

|
|
|
|
|
|
#1
 03-03-2011, 11:21 PM
|
||||
|
||||
|
DIY 300SD ashtray cupholder
I'm in the process of making a cupholder in the ashtray area of my 300SD. I'm writing up a how-to (also on my blog). Right now it is curing so I am breaking this into two parts. Here is what I have so far:
Taking the old ashtray apart revealed a couple things...1 - that it was incredibly simply designed with a plastic tray and pop-up lighter on a spring. 2. The front wood was just glued on. 3. It was asking for a mod. You can see that it simply slid on rails, here is the outer housing:  Therefore, you could make a thin board-like structure to slide in and out--this was the idea behind my design. I wanted to keep it pretty simple, no metalwork, no hard cutting, nothing too crazy. Here's what I've done so far: 1. Cut out a template from cardboard   Next step was to cover everything in either fabric or fiberglass. I had an old flannel sheet lying around and flannel happens to be PERFECT for this type of application. A lot of custom audio guys use flannel soaked in resin as a base for custom speaker boxes. It isn't perfectly flat, but will be decent once the resin soaks the fabric: 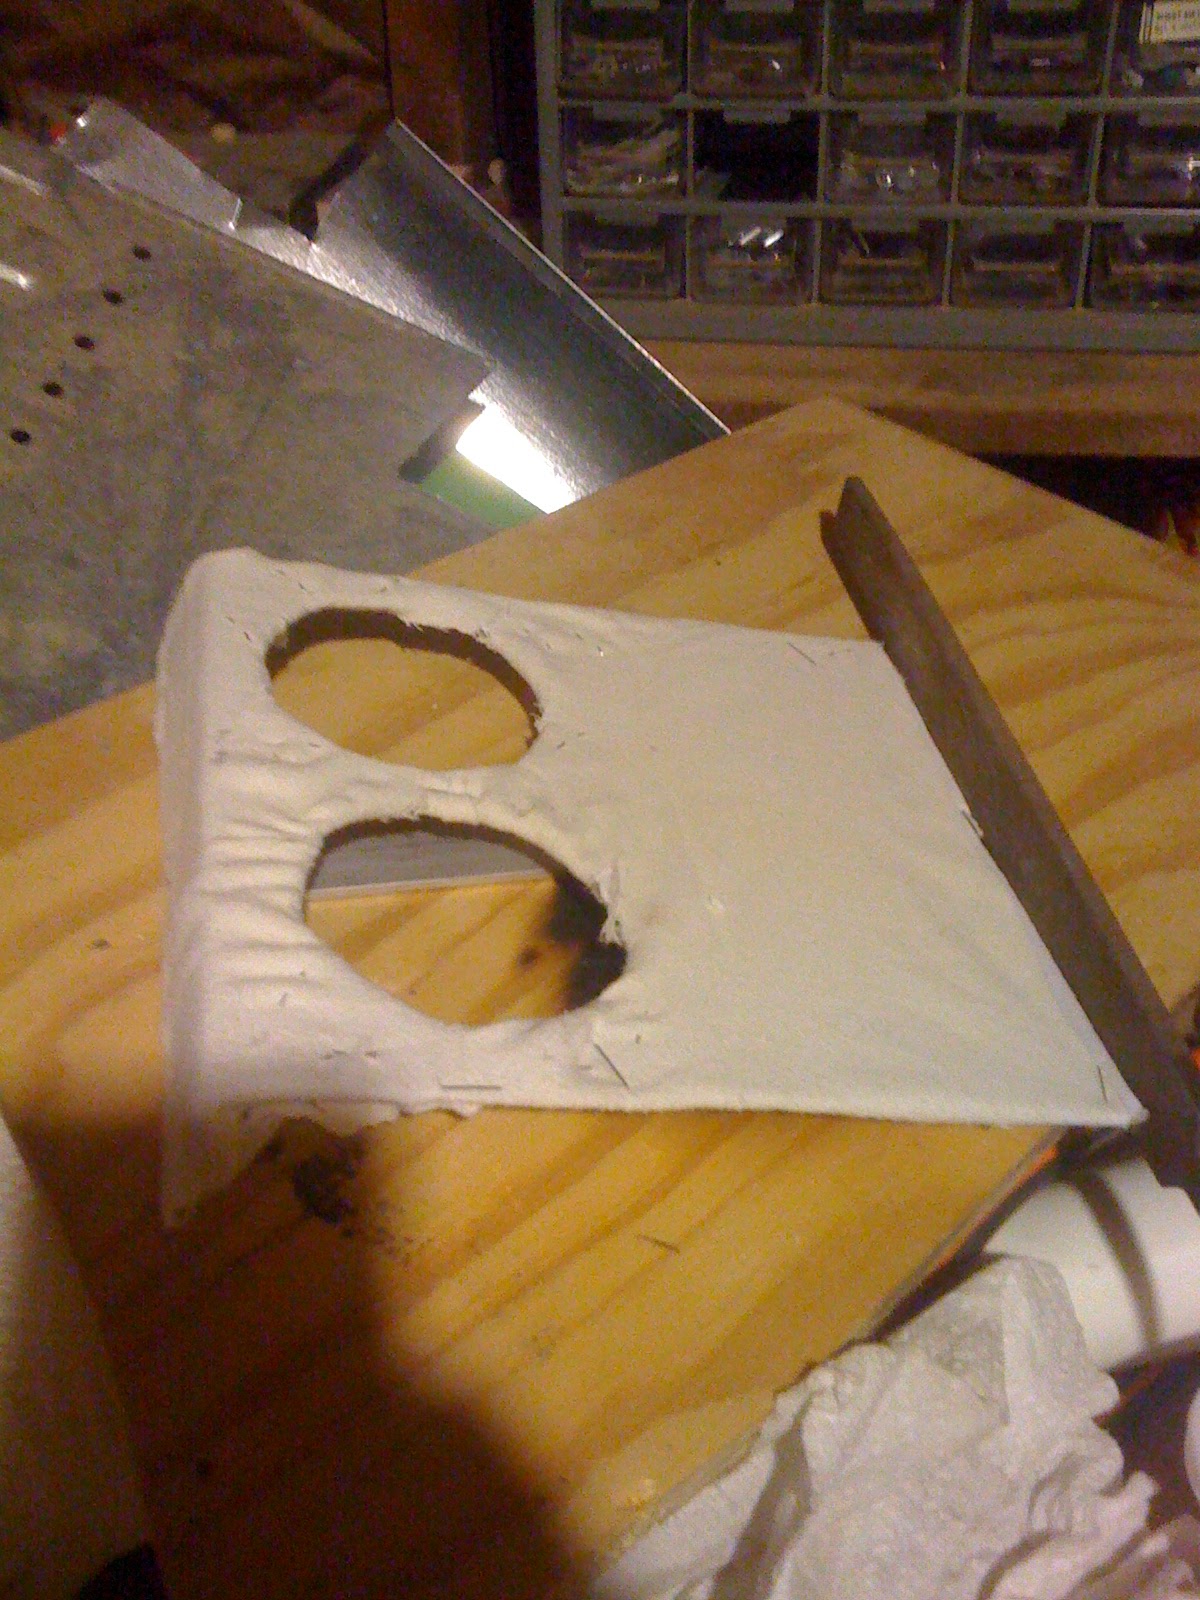  Right now it is curing. Part 2 will be following a good night's sleep and 8 hours of work.
__________________
TC Current stable: - 2004 Mazda RALLYWANKEL - 2007 Saturn sky redline - 2004 Explorer...under surgery. Past: 135i, GTI, 300E, 300SD, 300SD, Stealth 
|
| Bookmarks |
| Thread Tools | |
| Display Modes | |
|
|


 Threaded Mode


