

|
|
|
|
|
|
|
|
#1
 06-01-2015, 02:00 PM
|
|||
|
|||
|
Awesome project. Do you do have any of this documented, at least from a hardware perspective, other than on this thread?
Does your app implement any data logging or audible alarms? I am familiar with the electronics side of this, but have no idea where to start with Android development. Any recommendations? 
|
|
#2
06-01-2015, 02:20 PM
|
||||
|
||||
|
Quote:
No data logging or audible alarms, though this would likely be trivial to do on the Android side, and a bit more complex on the Arduino side. Android development is quite easy using a programming environment called Processing, that uses a C-like syntax. It's optimized for graphical apps so it's perfect for this kind of project. The most difficult part of the entire project was getting the Bluetooth working to be able to pass data packets to the tablet. After that it was just straightforward.
__________________
Current Stable
|
|
#3
06-24-2015, 04:12 PM
|
|||
|
|||
|
Something you might find interesting
Ran across this while researching a like project for my 107:
Microcontroller Boards A couple of ruggedized or thermo resistant Arduino boards. I'm in Phoenix, and the heat is a factor, so I'm interested. If you've got your board in the engine bay, you might be interested also. Hope this helps someone. Scott
__________________
Remember, it's not just a car. It's an Adventure.
|
|
#4
06-24-2015, 04:46 PM
|
||||
|
||||
|
Quote:
Thanks for the information.
__________________
Current Stable
|
|
#5
06-24-2015, 08:36 PM
|
||||
|
||||
|
Today was 86F ambient temp and after a nice drive I took a screen shot of one of the Gauges screens.
 Arduino was comfortably at around 100, 13 degrees above ambient. The following screen was after a nice freeway run, about a mile of slow and go traffic after exit and then a minute or so after parking. Note the intake temp shows the results of heat soak as does the Arduino temp, but nothing to worry about. 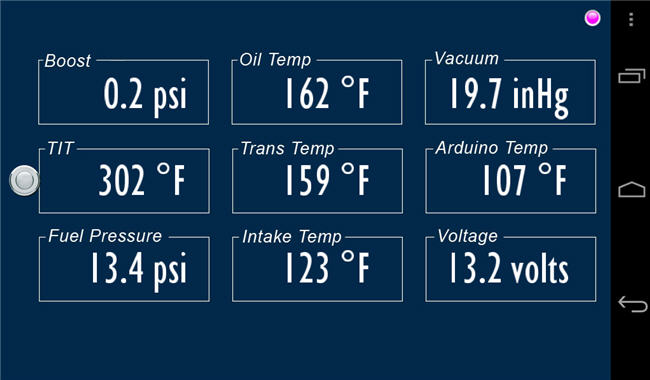
__________________
Current Stable
|
|
#6
06-26-2015, 10:27 AM
|
|||
|
|||
|
That's nicely laid out. I'm just learning the Arduino for a like project on my 107, and need all the ideas and tips I can get.
Since this is Phoenix, and the ambient temps can get a bit 'extreme', I'm sort of looking at one of the 'extreme temperature' units. But then again my personal motto has always been "If it's worth building, it's worth overbuilding." I've been known to construct a microwave oven cart that could survive a near Nuclear strike. ")
__________________
Remember, it's not just a car. It's an Adventure.
|
|
#7
07-05-2015, 09:42 PM
|
||||
|
||||
|
Rethinking the Oil Temperature Sensor
In the thread about Running with oil cooler bypassed it became pretty clear that my original design choice to take the oil temperature through a contact sensor mounted on the oil cooler line to the cooler was flawed. For whatever reason, I never got above 180 degrees or so, and then only on a long pull up a good hill on a warmish day. The discussion was pretty firm in the contention that normal oil temperature should be 200 degrees or slightly more in order to effectively boil off any condensate that might make it into the engine either through atmospheric or combustion vectors. One suggestion put forth was to put a sensor in the oil drain plug and take the temperature directly of sump oil. It was pointed out that the drain plug is oriented parallel to the ground so that would negate any potential interference with road debris or other hazards.
I definitely liked the idea so I set out to build a sensor based on that idea. Since the sensor was going to be mounted in the drain plug, I needed to find a convenient way to avoid twisting up the connecting cable every time I had the oil changed. The most obvious solution was to use a connector which could be disconnected, but that's a potential source of failure so I sought something a bit more simple and elegant. I decided to use magnets glued to a collar that would slide into the modified drain plug. So I went out and purchased some small round magnets with the intention of drilling a hole in the center to slip over the sensor - WRONG!!! Magnets are exceedingly hard and are not touched with a standard drill. Turns out magnets are made by grinding, usually with diamond tools....who knew. So plan B with the magnet strategy was to get some small 1/4" round Neodymium magnets and mount them radially around the sensor. The first thing was to modify a drain plug to accept a DS18B20 sensor. The sensor I'm using is packaged in a metal jacket with an integral electrical cable. Here's and image of the packaged sensor.  The first thing was to modify a drain plug to accept a DS18B20 sensor. I drilled out the center of the drain plug and then filed it flat to provide maximum gripping power of the Neodymium magnets I was planning on using, being very careful to not drill all the way through. 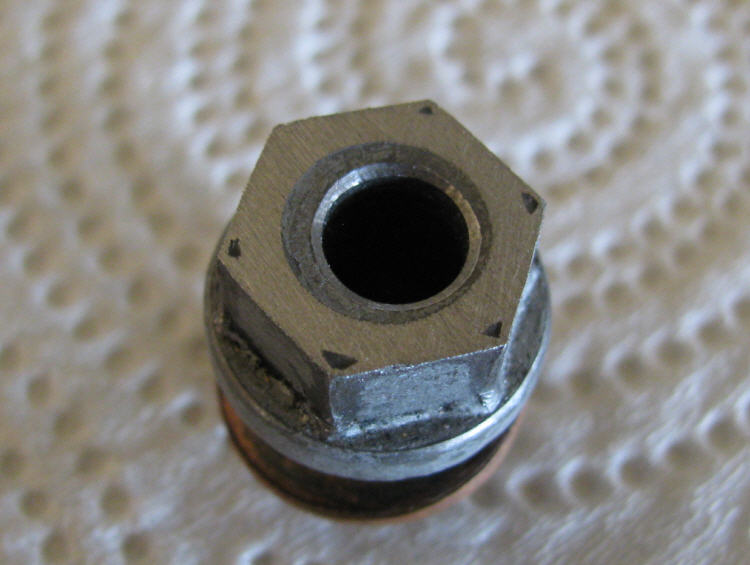 The next step was to install the magnets on a convenient washer around the body of the sensor.  I then inserted the sensor into the drain plug which was protected with a bit of Saran Wrap to catch any overflow and prevent gluing the sensor permanently to the plug.  I then mixed up a batch of JB Weld and glued the magnets together and encapsulated the unit in resin. 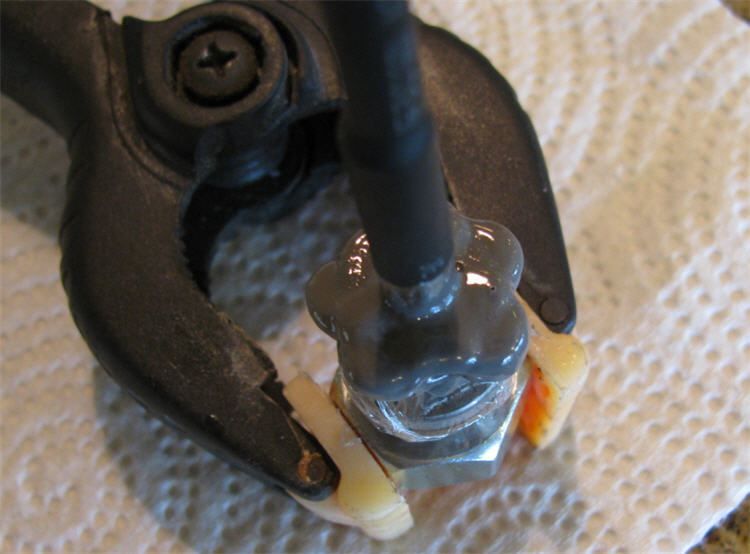 After a little cleaning of the magnet faces, the sensor is ready to go.  Next time I change the oil (tomorrow or the next day as part of the final preparations for the Benzipalooza trip to the Canadian Rockies) I'll install this drain plug. All that will be needed after that is to wire it in to the system and modify the software a bit to include that temp reading in the Gauges Project display.
__________________
Current Stable
|
 |
| Bookmarks |
|
|


 Hybrid Mode


