Parts Catalog Accessories Catalog How To Articles Tech Forums
Call Pelican Parts at 888-280-7799
Shopping Cart Cart | Project List | Order Status | Help


Go Back   PeachParts Mercedes-Benz Forum > Mercedes-Benz Tech Information and Support > ML, GL, G-Wagen, R-Class, Unimog, Sprinter

Reply
 
LinkBack Thread Tools Display Modes
  #1  
Old 04-28-2004, 08:09 PM
Ron in SC's Avatar
Registered User
 
Join Date: Aug 2003
Location: Charleston, SC
Posts: 1,095
Special Tool Required?

I think I need a special tool to remove the nut and bolt that hold the exhaust manifold to the catlytic converter. The nut is square on the base and then round on the to top. The square part is not welded to the base as far as I can determine.

When I try to turn it from the bottom, ie the 13mm bolt I have no success. Since the threads go into the square nut I think I would have better success applying force from that end, but I need to get a complete and very good grip or I'm going to make a mess.

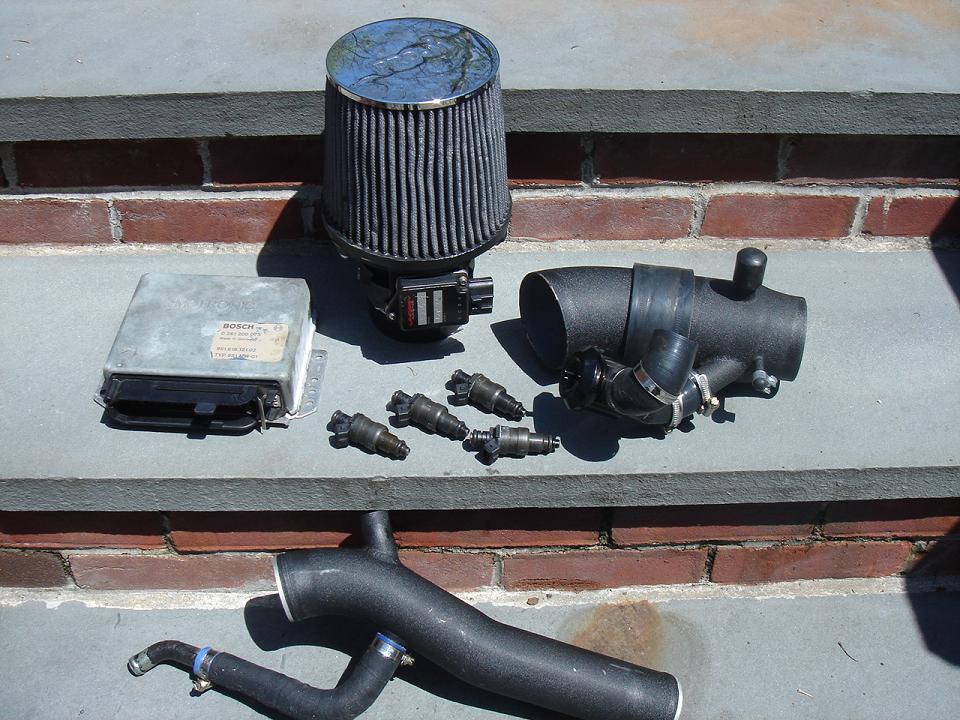
Would it be better just to cut the bolt and replace? I can cut the one in the photo with a dremel but don't really have access to the one on the other side.


Reply With Quote
  #2  
Old 04-28-2004, 09:18 PM
Gilly's Avatar
Registered User
 
Join Date: Mar 2001
Location: Evansville WI
Posts: 9,616
Hi Ron
The square nut is installed with a swaging (sp?) tool, it's sorta like the reverse of a crimp, it gets slightly expanded into the manifold. The dealers should have the tool for installing the nut, if yours is wrecked, or you CAN use a regular nut on top I suppose.
To remove it, are you saying the nut is spinning when you say "no luck"? Usually you can get the square part to stop spinning in any number of ways: wrench, vise-grips, or jamming a screwdriver or chisel to one of the flats and the other side of the chisel/screwdriver to any handy "jammable" surface like the manifold itself, maybe, but these are thinwall castings I believe, so be careful of that.

Gilly
Reply With Quote
  #3  
Old 04-28-2004, 09:55 PM
Ron in SC's Avatar
Registered User
 
Join Date: Aug 2003
Location: Charleston, SC
Posts: 1,095
Gilly,

Here's my situation.

My driver's side catalytic converter has a hairline crack right in the middle of a weld bead on its top. My plan is to remove it from the manifold and take to a friend of mine so he can TIG weld it. I see no reason why it can'nt be repaired. I hope I'm right as this part is very expensive.

I'm not going to have the dealer here do any work on the vehicle so I'm on my own. I let them do the warrenty work on it when it was under warranty but that's it. Sadly I can'nt even buy parts from them as they charge way way more than any other source I've used. They always charge over MSRP. They will not cover this problem since vehicle has 93K miles and the warranty on this item is 8 years or 80K miles whichever comes first.

If I need to buy that special tool I could probably get it from Baum Tools; but I'm thinking I wouldn't be able to have enough room to get it in postion to use it, especially on the bolt on the opposite side of the one in the photo.

My square nut is not messed up or spinning. I have waited to see what I could find out before applying to much torque to the head of the bolt. I think if I try to turn the bolt head I will probably break it.

What would be wrong with just using a bolt and a regular nut with a washer under it instead of the set-up with the swaged square nut. I bet that swaged nut is install to the manifold before the manifold and exhaust system is installed on the engine.
Reply With Quote
  #4  
Old 04-28-2004, 10:15 PM
Gilly's Avatar
Registered User
 
Join Date: Mar 2001
Location: Evansville WI
Posts: 9,616
Ron
Try turning it harder. If it's still possible, you could operate the engine for awhile, that may be the best way to heat up the fasteners, which may make it come apart easier. But don't worry too much about cutting anything yet, not without "knowing" if the nut will spin or not.
I agree, probably put those nuts on before the manifold is attached to the head.
If you run into big problems, as I already mentioned you could use a regular nut on top of there, but until the nut is spinning, don't sweat it yet.
Your biggest problem will be physically removing the front pipe, MORE than likely you'll need to remove the torsion bar.
Forwarned is forarmed, as they say.

Gilly
Reply With Quote
  #5  
Old 04-29-2004, 10:20 AM
Ron in SC's Avatar
Registered User
 
Join Date: Aug 2003
Location: Charleston, SC
Posts: 1,095
Gilly,

Have not started yet. Still studying situation.

Question:

How does the torsion bar come out. I know where the hole is to measure the depth which is next to the bolt that turns on the rear. I've taken a measurement 36 mm. Do a loosen this up to unload it? What else do I need to due? Clueless at this point.

ron
Reply With Quote
  #6  
Old 04-29-2004, 10:27 AM
Gilly's Avatar
Registered User
 
Join Date: Mar 2001
Location: Evansville WI
Posts: 9,616
Yeah, that whole adjuster is loosened up and the mechanism removed, then you have to hammer that coupler off up front by the control arm. It's a tough job, especially the first time.

Gilly
Reply With Quote
  #7  
Old 04-29-2004, 10:52 AM
Ron in SC's Avatar
Registered User
 
Join Date: Aug 2003
Location: Charleston, SC
Posts: 1,095
Quote:
whole adjuster is loosened up and the mechanism removed
So when the adjuster is completely loosened up then the mechanism can be removed? Because the mechanism which I assume is up in there is not currently visable, nor are there any other bolts that I can see to get at the mechanism.

ron
Reply With Quote
  #8  
Old 04-29-2004, 11:18 AM
Gilly's Avatar
Registered User
 
Join Date: Mar 2001
Location: Evansville WI
Posts: 9,616
Once the tension is released it'll make sense, there is a bottom plate that kind of slips into that part of the crossmember. It's not hard to figure out.

Gilly
Reply With Quote
  #9  
Old 04-29-2004, 01:56 PM
Ron in SC's Avatar
Registered User
 
Join Date: Aug 2003
Location: Charleston, SC
Posts: 1,095
Quote:
Once the tension is released it'll make sense
Gilly,

Yes I see what's going on in there now.

Does the part on the bar circled in red come out with the torsion bar? In other words I don't mess with it.


Do the nuts and bolts circled in red need to be loosened to take the torsion bar out?


Where does one pound on the torsion bar to get it to come out?

ron
Reply With Quote
  #10  
Old 04-29-2004, 03:09 PM
Gilly's Avatar
Registered User
 
Join Date: Mar 2001
Location: Evansville WI
Posts: 9,616
On the top picture, that is part of the bar itself, so it stays attached to the torsion bar.

On the second picture I belive that stays put, can you post a picture at a different angle? I don't remember taking that off.
Maybe I did though, is that like a strap that surrounds the torsion bar? If so, just remove it.

To disconnect the torsion bar, you need to hammer that large hex-shaped tube to the rear of the truck. I'd use an air hammer with a chisel tip on it, they'd slide back pretty easy when the bar was unloaded. The tube is just a coupler between the bar and the control arm, you only need it to slide back enough to disengage from the control arm.

Gilly
Reply With Quote
  #11  
Old 04-29-2004, 03:49 PM
Ron in SC's Avatar
Registered User
 
Join Date: Aug 2003
Location: Charleston, SC
Posts: 1,095
Quote:
is that like a strap that surrounds the torsion bar?
Gilly,

Yes it is a strap. I've removed it. The photo below is taken looking up at where the strap was. Do I pound on that gold looking tube that surrounds the hex part of the torsion bar in order to pound it out? If so do I pound the gold colored tube towards the front of the vehicle or the rear?


Edited: Much to my suprise and amazement I got both flange bolts off, very easily, with the sqare nuts not moving at all. I did put penatrating oil on yesterday but I think I just got lucky.

Last edited by Ron in SC; 04-29-2004 at 04:02 PM.
Reply With Quote
  #12  
Old 04-29-2004, 05:55 PM
Gilly's Avatar
Registered User
 
Join Date: Mar 2001
Location: Evansville WI
Posts: 9,616
Dang Ron, I don't remember it being either goldish plated or round. I was sure it was black and had a rounded/hexagon shape to it, but not perfectly rounded. Oh well, old age creepin' in I suppose. It should be pretty obvious, it connects the very front of the torsion bar to the lower control arm, and by looking it all over, you can tell it has to go towards the rear, it won't go forward very far at all without contacting the lower control arm. Again, you are only moving it until this coupler piece is off of the control arm (it'll be pretty obvious to you that you've moved it enough).
As an aside, in the manual (WIS) they say to remove these 2 pinch bolts that secure this coupler to the torsion bar and control arm, but I've never actually seen a coupler that had these set-bolts. Since I don't recall seeing a goldish plated coupler, maybe there are different styles that MB used, so look at that coupler and make sure there aren't some sort of bolts holding it in place.
Usually the bolts holding the front pipes to the manifold will come off without the square nuts spinning. I saw on your photo last night that you used a little penetrant on the threads, which never hurts.

Gilly

PS you could also spray a little of the penetrant into the gap inside this coupler piece too, it may help it move back easier....
Reply With Quote
  #13  
Old 04-29-2004, 06:25 PM
Ron in SC's Avatar
Registered User
 
Join Date: Aug 2003
Location: Charleston, SC
Posts: 1,095
Gilly,

Here's different and maybe better angle.


I do have the black rounded/hexagon thing you described. There is no bolt thru it as their may have been on some older models. My vehicle was manufactered in June of 1999 right before the switched over to 2000 year models; it does have some things I think as far as chassis changes that were on the 2000 year vehicles.

Anyway in the photo I circle the hex thing in red. I put an arrow in orange where I guess I'm supposed to pound with a chisel towards the rear of the car. That seems like it might damage the torsion bar. I could get an air hammer if I knew where to put the tip when I use it but I'm not certain I'm understanding where I should strike the part circle in red from since there really is'nt anything projecting from it to strike.

Like you said WIS said I removed the two pinch bolts, if they are the ones holding the strap around the coupler. There are no bolts holding the coupler in place. It seems like there is a bushing inside. I probed it with a screwdriver and did not feel any metal, only rubber.

With that black thing being hexagonal I'm thinking why? Would there be a special tool?

I just don't know for sure where to attack with a hammer.


Edited again.
I wonder if that thing is hexagonal so you can put a wrench on it and turn it, thereby loosing the seal so it will side out. I think I'll try that tomorrow.

ron

Last edited by Ron in SC; 04-29-2004 at 07:45 PM.
Reply With Quote
  #14  
Old 04-29-2004, 08:06 PM
Gilly's Avatar
Registered User
 
Join Date: Mar 2001
Location: Evansville WI
Posts: 9,616
Ron
On some of your comments you seem right in tune with the job, but then you seem to waffle a bit.

The black hex thing is the ONLY thing to worry about right now. You just use the chisel at a rearward angle to drive the coupler rearward. It's not rocket science. You'll see when you get it off.
It's ONLY hex shaped because the front of the torsion bar is, and the rear part of the control arm is (where the torsion bar engages). They could have made it about any shape they wanted except round, settled on hexagon shaped, maybe it was the cheapest way (probably it) or they paid an engineer somewhere a boat load of money to decide what shape to use, I dunno. It's NOT to attach a wrench to.
As I said, WIS says there are bolts that are supposed to go into the coupler, I suppose with the intend on preventing the coupler from shifting back on the torsion bar on it's own. Someone probably decided that coupler is going NO WHERE when the bar is actually installed on the truck (torsional force).
You won't damage the copler, it's quite thick. I've never had or seen a "real" problem getting the coupler to slide back. Once you do it it'll make perfect sense.
Maybe post a few more pictures for the benefit of others who may need to do this to show how it comes apart.

Gilly
Reply With Quote
  #15  
Old 04-30-2004, 06:06 PM
Ron in SC's Avatar
Registered User
 
Join Date: Aug 2003
Location: Charleston, SC
Posts: 1,095
Quote:
you seem to waffle a bit.
Gilly,

Well can't argue with that.

Thank goodness for air hammers. I never would have gotten it off without it. Even with the air hammer it was kind of stubborn. Below is a phot of the inside of the hex coupler that attaches to the hex on the A-arm.

Getting the convertor and all out was easy. I loosened the exhaust clamp for the other side of the vehicle that goes to the muffler and with that done I was able to easily push the muffler back so there was plenty of room to pull the other side off and back.


The next photo is of the the part on the A-arm that the coupler above goes onto.


The next photo is of the convertor which shows a hairline crack in the center of the weld bead. I've cleaned it with a stainless steel wheel so I will get a good weld.


They used some sort of assembly paste not really grease in the coupler and on the rear part of the bar that is adjustable, the part that sits on what seem to be a teflon pad or base of some sort. What assembly lube do you think I should use?

While I'l not be ready to put everything back together until next week I'm wondering what the torque spec is for the exhaust flange bolts? I'm thinking not much, like mayble 20 or 25 NM.

Thanks for all the help.

Edited:

Here's the other reason the driver's side to the exhaust system was so easy to remove. I took out the crossmember that supports the transfer case. It was held in by 6 easily accessable bolts. The transfer case is supported by the jackstand.


Last edited by Ron in SC; 04-30-2004 at 08:13 PM.
Reply With Quote
Reply

Bookmarks


Posting Rules
You may not post new threads
You may not post replies
You may not post attachments
You may not edit your posts

BB code is On
Smilies are On
[IMG] code is On
HTML code is On
Trackbacks are On
Pingbacks are On
Refbacks are On


All times are GMT -4. The time now is 05:08 PM.


Powered by vBulletin® Version 3.8.7
Copyright ©2000 - 2024, vBulletin Solutions, Inc.
Search Engine Optimization by vBSEO 3.6.0
Copyright 2024 Pelican Parts, LLC - Posts may be archived for display on the Peach Parts or Pelican Parts Website -    DMCA Registered Agent Contact Page