

|
|
|
|
|
|
|
|
#1
 12-24-2009, 11:06 AM
|
||||
|
||||
|
How-to: Replacing Ball Joints w124 300e
Warning: I am not a mechanic, and my technique for doing this is not the proper procedure. Proper tools should be used while performing this job especially a mercedes specific spring compressor. Working without the proper tools could cause severe injury. Work at your own risk
This thread documents my ball-joint replacement process -I hope this will be helpful for some people over here!!!! As I mentioned here a couple of weeks ago, my 1993 300e developed a knocking and creaking noise from the front suspension and on the driver's side. I examined the front end and found a torn ball joint boot (completely destroyed). So I sprayed the area with some lithium grease, and the sound went away confirming a bad ball joint. it still knocked though, and these were original ball joints at 180,000 miles, so i was not just going to change boots, I needed to change the whole thing..... So the ideal solution when dealing with such a problem is to change to the whole control arm since most likely the arm's bushings are worn-out or close to be. I would highly recommend this solution since the amount of work involved in changing ball joints is significant, and very similar to that of changing the whole arm. the problem is obviously cost as new ball joints will cost around $50 for both sides, whereas new control arms will cost around $180 a side.. So due to financial considerations, i had to change the ball joints only. it is a short term solution, if i decided to keep the car, maybe next year i will get new arms due to bushing wear in my existing ones... Important initial steps: 1- Research: you have to understand what is involved in this job. search the forums as there is plenty of information. this writeup was very helpful to me http://www.peachparts.com/Wikka/W124BallJoint . A very important point to realize is that this procedure applies only to w124s up to 1993. if you have a 1994,1995 you have to change the whole control arm as the ball joint is welded in place and is part of the control arm... 2-Buying parts: I would stay away from ebay parts for this one, it is such a critical part. I would also only get a mercedes or a LEMFOERDER part. I cheaped-out a bit, and got a Meyle part, but i regretted that instantly as i will discuss later.. So here is are the main job steps: 1-Raise the car using a jack, and place jack stands under the correct jacking points. you only need to raise the car high enough to be able to remove the front tires. 2-Remove the front tires. try and clean the area with degreaser and some brake cleaner as it will be very messy.... 3-Remove brake caliper, and put it aside. This requires the removal of 2 19mm annoying bolts in the rear of the caliper. the thing that really bugged me throughout this job was the brake caliper. it should not be hanging by the brake line, and keeping it out of the was was a challenge. It is heavy. i had to rest it on a box inside the wheel well. very annoying.... This is how it looks with the caliper removed 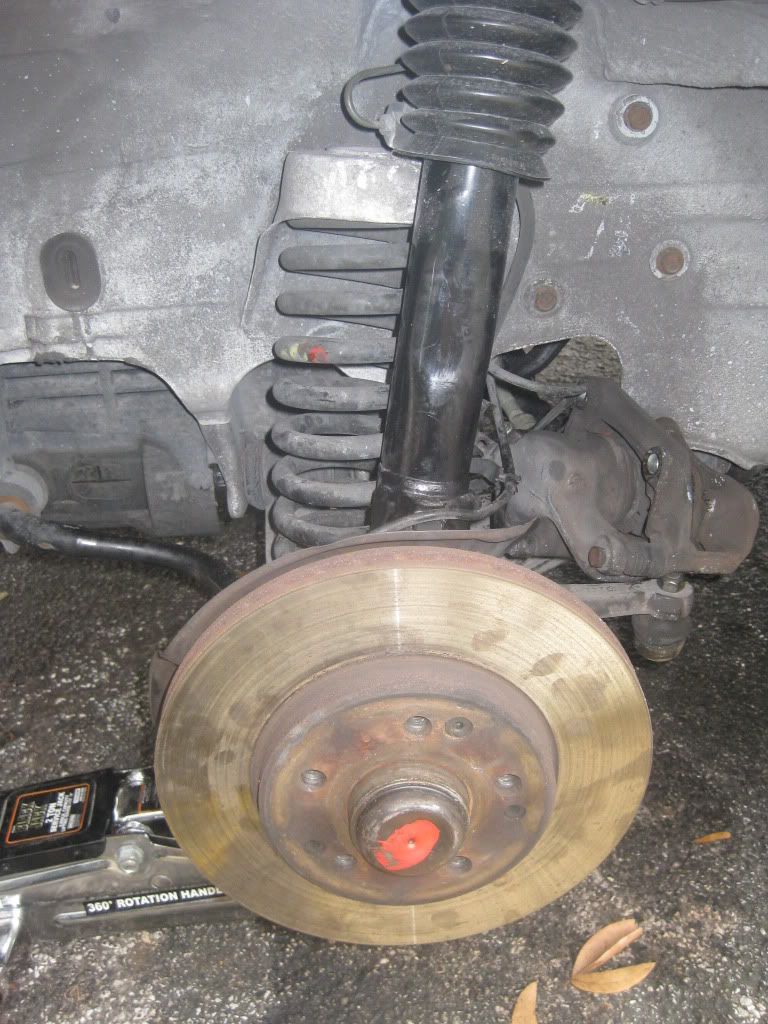 4-Remove the steering stop. it is a very short bolt that is covered with a piece of rubber right below the brake caliper towards the rear of the wheel well. I forgot to take a picture of it. It needs a 17mm wrench. You need to remove it to be able to access the main ball-joint bolt. 5-Remove brake disc. you will need an allen wrench or socket ( i think 5 mm).. 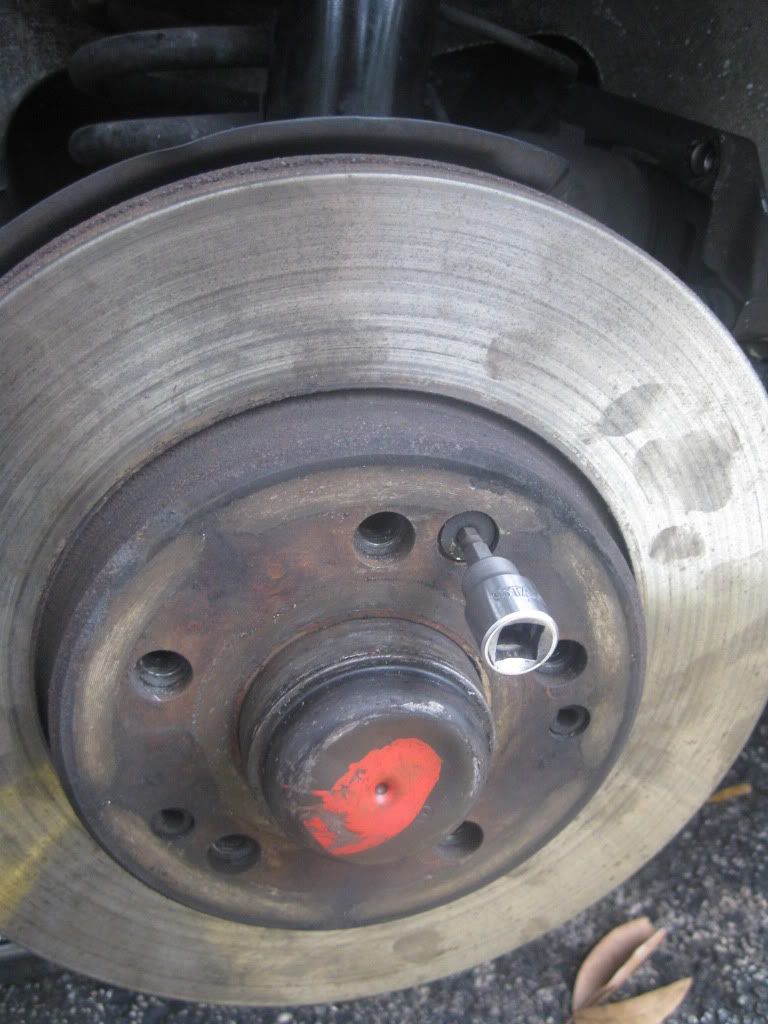 6- Remove wheel speed sensor. it also requires the removal of two allen bolts. mine was stuck in place so i had to convince it with a rubber mallet. the picture shows the locations and the bolts have already been removed. 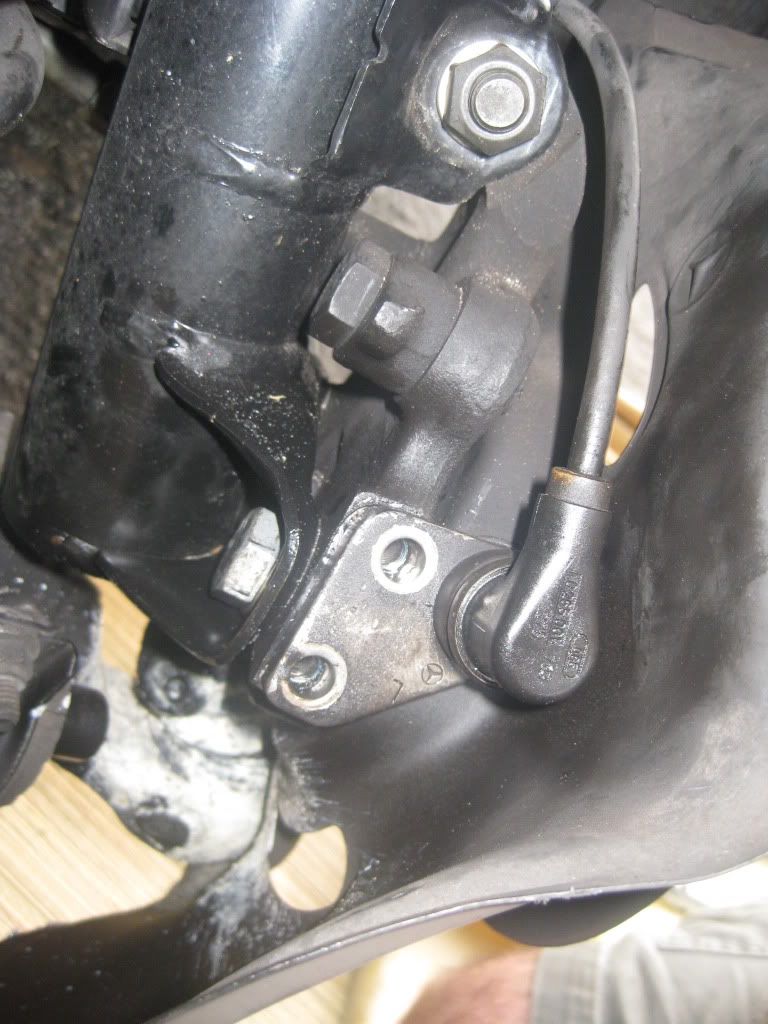 here is the sensor itself. it is a magnet so it is covered with metal shavings and debris. don't forget to put it aside and secure it... 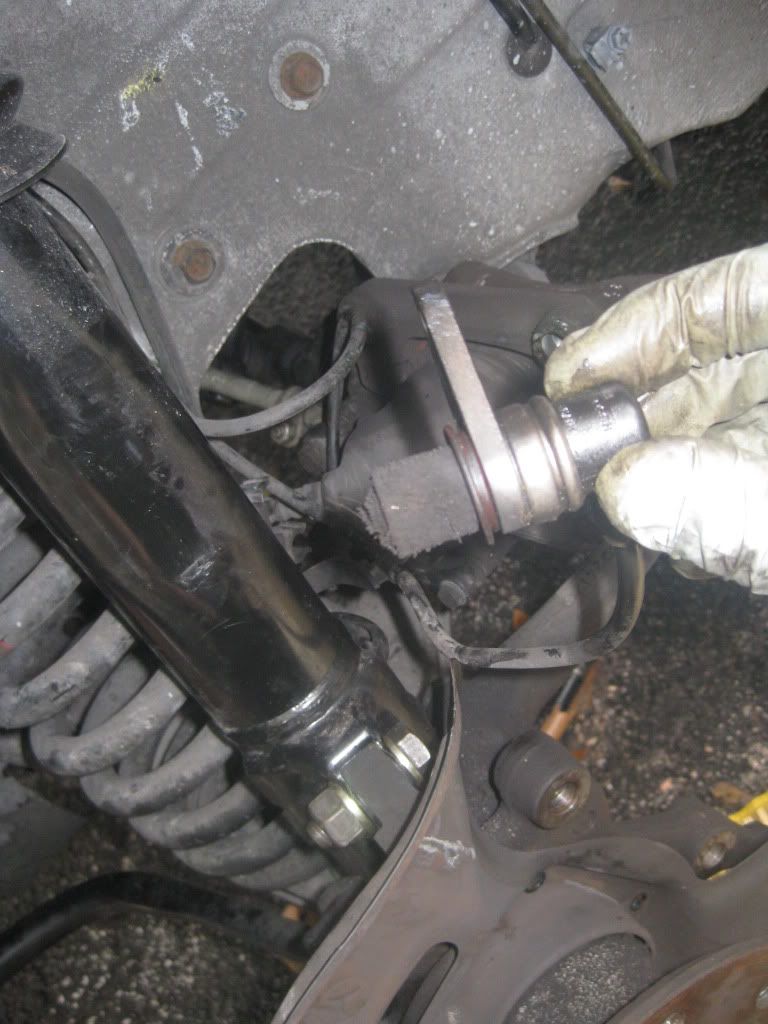 7- Loosen the bolts that hold the brake heat shield in place (the metal plate behind the brake). also some small allen wrench needed. you cant remove this shield completely without taking the hub off (we are not going to do that of course), but loosening it a bit makes moving it out of the way easier- it really bugged me. here is the picture of the shield...  8- Now comes the fun part. at this point, you will need to use a mercedes specific spring compressor to hold the spring in place. if that thing launches once you remove the ball joint bolt you will die !!! I did not have a spring compressor that will fit so i supported the control arm with a jack and a piece of wood. not a safe technique as the whole setup could slip out of place easily, but i was careful and meticulous. again, get a compressor if you can, it is much easier and safer....now once you supported the control arm. loosen the bolt holding the ball-joint to the hub. remove the nut and puch the bolt out. at this stage the pressure from the spring will want to push down all the way to the ground, but the floor jack holds everything in place (although barely). 2 19mm sockets are needed for this ...it was really hard to take a picture of the bolt so i did not, sorry ") lower the floor jack slightly until the ball joint clears the hub which is still suspended by the strut. it is nerve racking so prepare to be scared lower the floor jack slightly until the ball joint clears the hub which is still suspended by the strut. it is nerve racking so prepare to be scared  9-Now that everything is loose, turn your steering until the strut and hub are out of the way. i had to loosen the strut bolts (on top of the strut tower) to give me more clearance. in the write-up i provided earlier, the person who did the job removed the strut completely. i did not want to do that, and i did not want to mess-up my tie rods also. I thing i forgot to add was that you need to loosen and remove the sway bar bracket at the control arm side, if not, it will interfere with the job significantly and will prevent you from raising and lowering the control arm sufficiently to complete the job ,,,easy, 2 13mm nuts..... 10-Prepare your new ball joint. Take it out of the box an remove the protective cover (the blue one in the picture- discard). Here is why i regretted buying this. the ball joint itself is nice and solidly built, the problem is that it does not come with a new bolt to hold the control arm to the hub (the one we just removed). it seems that the LEMFOERDER brand comes with a new bolt for only a few dollars extra, I should have got that brand since when i removed the bolt, i noticed some scarring and wear. I had to order a mercedes one along with the nuts. it cost me $23 for these two bolts and two nuts. Next time get a LEMFOERDER !!! 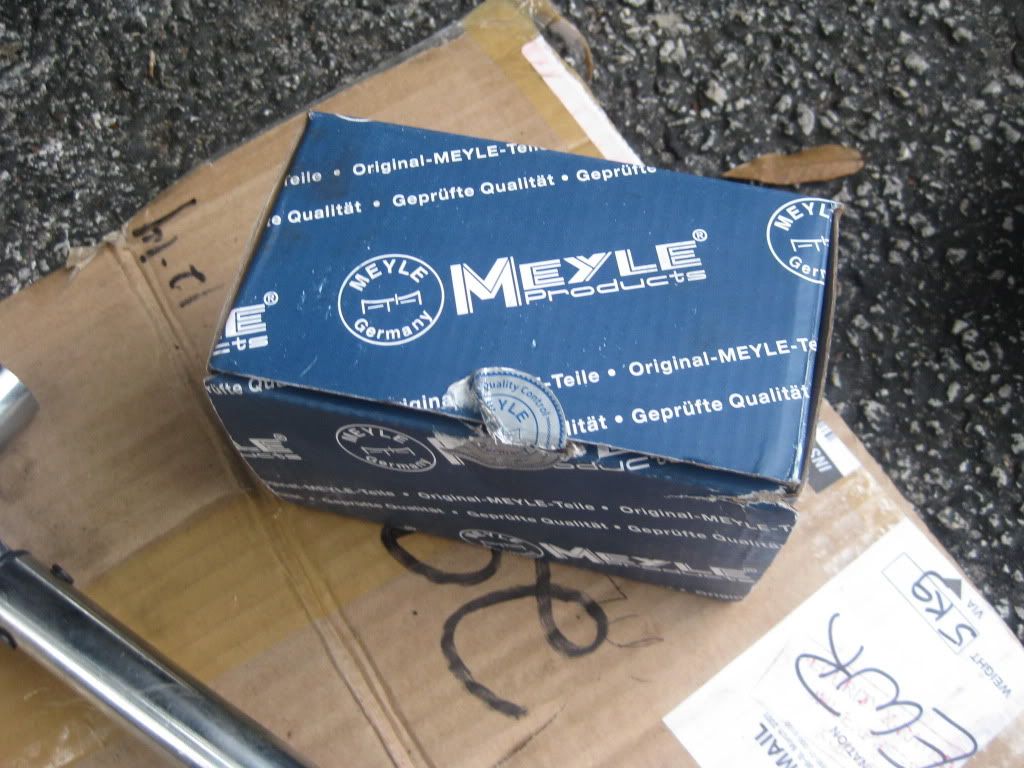  nice and clean !!  11-Another major hurdle now! how to press the old ball joints out?? as everything mercedes, the control arm has a unique design requiring a special socket to press the ball joint out, I tried the autozone/advance ball joint press -it was a no go!! it will not sit correctly and it started scaring the control arm. So i called a shop locally trying to rent their mercedes specific tool. they told me bring in the car and we will change them for you for $350 labor  yeah that is wonderful !!! Of course i started looking for a mercedes specific tool online, and ended-up renting the tool from a member over here (around $60 with shipping), it worked perfectly, the easiest ball joint removal i ever did !!! it hugged the control arm perfectly and i was able to remove the ball joint with only hand tools..... yeah that is wonderful !!! Of course i started looking for a mercedes specific tool online, and ended-up renting the tool from a member over here (around $60 with shipping), it worked perfectly, the easiest ball joint removal i ever did !!! it hugged the control arm perfectly and i was able to remove the ball joint with only hand tools.....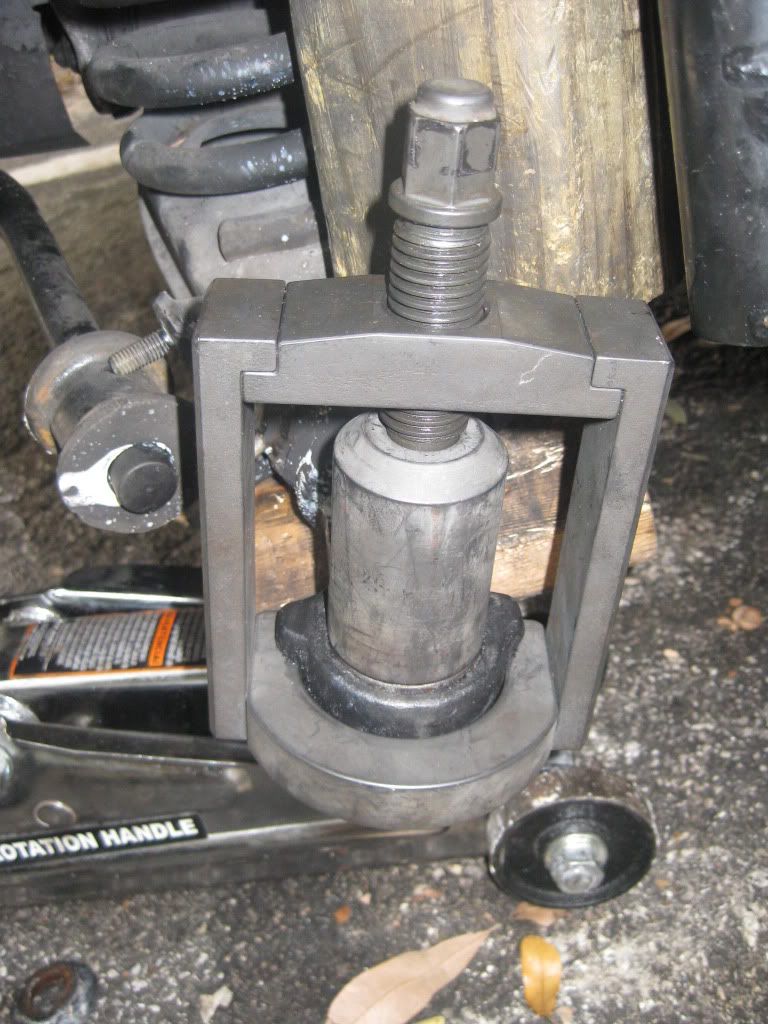 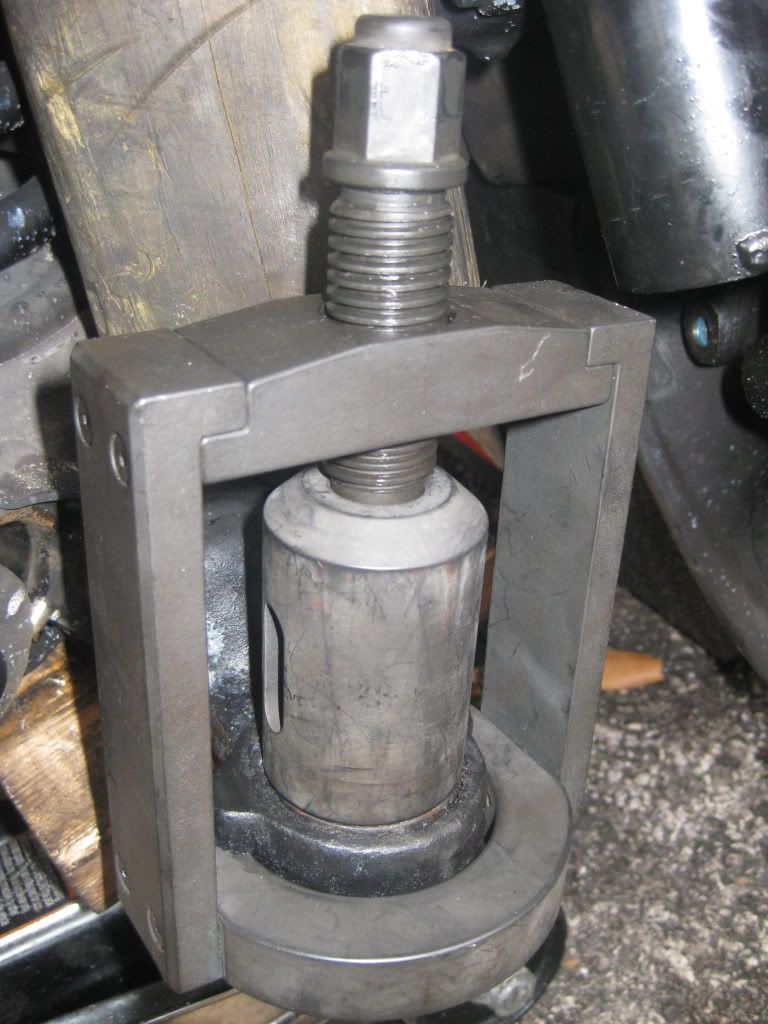 Ball joint removed .... 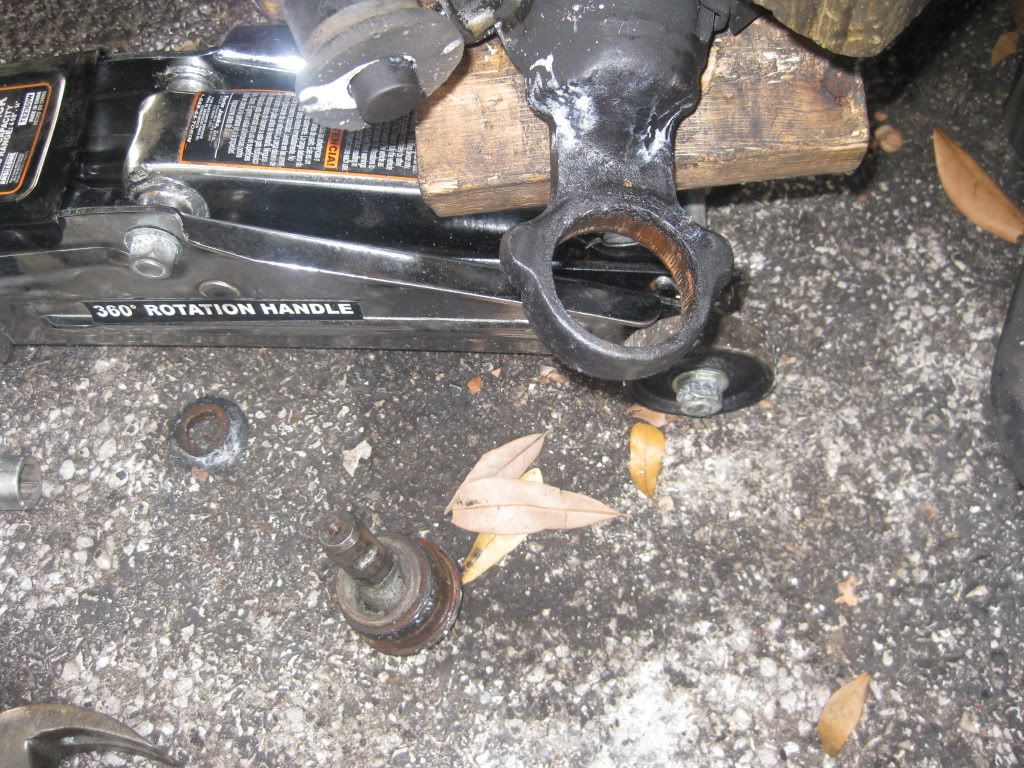 12-With ball joint removed, clean the control arms carefully to make sure no dirt prevents the new ball joint from seating correctly..by the way, if you are still running the original ball joints with high mileage (180,000+), i suggest you change them for your safety....there was so much slop in both ball-joints....i was shocked!!!!!! you can actually pull up and down inside the socket.....scary stuff...... 13-Now to install the new ball joint: there is a groove on the bottom side of the ball joint that acts like an arrow. it should be facing the inner side of the control arm as seen in the picture below ...  14-Put the ball joint in place by hand inserting from the bottom of the control arm. make sure the orientation is correct as mentioned above. install the press as found in its instructions. Press in slowly making sure the ball joint goes in straight so not to damage the control arm. with this specific mercedes press, this is near impossible to botch...best money spent ever 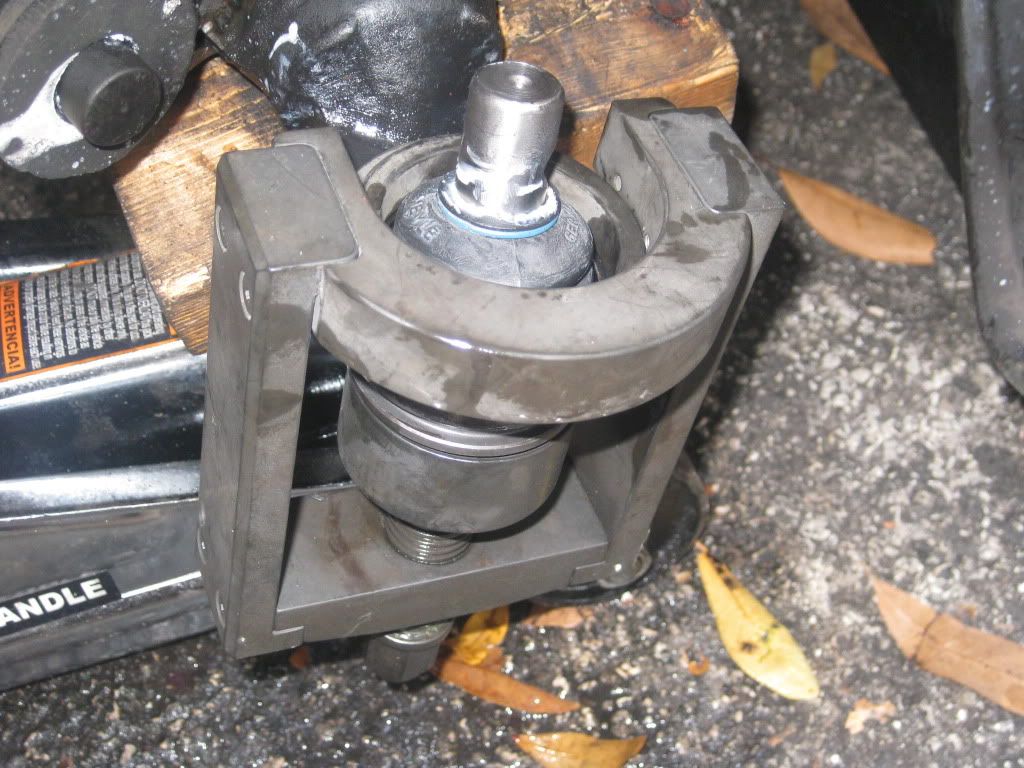 15-Aligning the new ball-joint back into the hub is not so much fun. there is a big groove in the shaft of the ball joint (where the 'ball-joint to hub' bolt passes through) it should be facing inwards also. you can move that around prior to install...then using the floor jack to push control arm up, align the ball joint with the hub opening, push it in, and insert the bolt....make sure everything is sitting and aligned correctly, tighten the nut and bolt according to factory spec (120nm) i think....... 16-install everything back, and enjoy the car !!!! GOOD LUCK, i will update and refine this more later .....
__________________
1993 300E, 2.8 M104 ..... Last edited by latief; 12-24-2009 at 12:07 PM. 
|
|
#3
12-24-2009, 06:34 PM
|
||||
|
||||
|
I"m so glad I have a 140 right now.... But that's a good write up...
__________________
All it takes for evil to prevail is for good men to stand by and do nothing. Too many people tip toe through life, never attempting or doing anything great, hoping to make it safely to death... Bob Proctor '95 S320 LWB '87 300SDL '04 E500 wagon 4matic
|
|
#4
12-24-2009, 08:10 PM
|
||||
|
||||
|
Quote:
thanks,
__________________
1993 300E, 2.8 M104 .....
|
|
#5
12-24-2009, 09:09 PM
|
||||
|
||||
|
heck ya. Took me 35 minutes to do each side on my 95 S320.... Everything is on tapers.
Look at one of the 140 ball joints in an online parts catalog. YOu take the wheel off, undo the brake disk shield bottom support screw, undo both nuts on the ball joint, and then use a tie rod puller to get both taper parts out. As soon as the ball joint there goes pop, it's out. No having to continue to push it... Install is reverse.... no pulling springs, no yanking out the shocks, no pulling off the brake disks or calipers, no messing with sensors, no having to press the ball joint back in, etc... You can decide if that sounds easier... Thanks for the write up though, I have been considering buying a 124 or a 210...
__________________
All it takes for evil to prevail is for good men to stand by and do nothing. Too many people tip toe through life, never attempting or doing anything great, hoping to make it safely to death... Bob Proctor '95 S320 LWB '87 300SDL '04 E500 wagon 4matic
|
|
#6
12-24-2009, 09:57 PM
|
|||
|
|||
|
You can easily use the autozone tool for free!
Measure the Autozone tool, measure the ball joint. Make a sleeve out of a scrape of steel on the lathe. I bet a scrape of 4140 and some beer volia you have a tool=0). Nice write up Michael
|
|
#7
12-25-2009, 10:57 AM
|
||||
|
||||
|
Quote:
But for a DIY'er with no garage, scrap metal laying around, and no power tools, this makes a world of difference. The regular clamp style ball joint press is huge compared to this, and it tends to rotate once it is very tight using hand tools. Since i had the control arm in the car, it was very hard to work with it as it wanted to rotate all the time pressing against the floor jack supporting the control arm ...it was nasty!!this specific tool is wonderful...super easy .... thanks
__________________
1993 300E, 2.8 M104 .....
|
|
#8
12-27-2009, 03:27 PM
|
|||
|
|||
|
glad it was easy with the tool-
Looks massive compared to the AZ tool I used. It doesn't take huge effort with tightening the bolt either- it's not a super tight press fit (could be rusty). I just used an adjustable wrench and held it in one hand with tool. Then it is pretty tight-just give it a nudge with a 1-2 lb hammer. It will drop out quickly. FYI when I did it.. the dealership was the cheapest on the parts too. M
|
|
#9
12-29-2009, 03:52 PM
|
||||
|
||||
|
Just wanted to confirm that after driving on this for a couple of days, all those mysterious small clunks upfront disappeared...it used to make such noises every now and then, and I did inspect it a couple of times while not finding anything wrong ......
so bottom line is, there was slop inside the ball joints causing these small clunk noises,,,,i would advise you check your ball joints if they have not been changed before, and you have noises that are hard to trace......
__________________
1993 300E, 2.8 M104 .....
|
|
#10
12-30-2009, 03:47 PM
|
||||
|
||||
|
Very nice pics.
I just replaced ball joints on my 190 and used this as reference. I did the hole thing without a press. Mine had come apart so it was much simpler. I supported the lower arm with a block of wood and used a socket to drive out the old ball joint. Then after having the new balljoint in the frezzer all night. I warmed up the lower arm with a propane thourch and it slid right in. Just a small tap with a socket and hammer and it was home.
__________________
2009 CLS550 55,000 2004 ML350 144,000 2004 X5 95,000 2002 X5 165,000 1996 320S 155,000 (sold) 1991 190E 192,000 (sold) 1989 300SE 160,00 (sold) 1984 300D 210,000 owned since 85, (sold) 1984 300SD 160,000 (sold)
|
|
#11
01-01-2010, 05:46 PM
|
||||
|
||||
|
I did this job without a spring compressor a few years ago too, but in a slightly different way to that described above. I would never trust a hydraulic trolley jack to be supporting the arm all the time, so I jacked it up high enough initially, then rested the arm on wide solid wooden/concrete blocks. The other wheels were also chocked.
I then cut a piece of 1/2" ply to form a shield between me and the spring. I also tied the spring to a few lengths of wood so if the arm dropped, or car moved and the spring ever became free, its path to freedom would be severely hindered. (this was very unlikely anyway, as the spring would have to lift the car itself). Then loosen the strut nut, and jack up the car from the front crossmember up to remove it. Lower the car then onto an axle stand at the front jacking point. Now the wishbone can be levered, pressed, tightened etc with the car and arms on solid surfaces, not a jack. Might be a bit long winded.....but I had heard of a local man who was removing springs and killed himself. I didn't want that to happen, so I dont mind putting in a few extra belt and braces. The risk of the trolley jack failing, or slipping off that sprung control arm is very real.
|
|
#12
01-06-2010, 03:15 PM
|
||||
|
||||
|
Hey latief, awesome write-up, thanks for doing that! I definitely saved that one since I have the same car as you and that job is in my immediate future, I am sure...
Did you ever get your wind noise issue fixed???
|
|
#13
01-06-2010, 04:00 PM
|
||||
|
||||
|
Quote:
Wind noise issue still pending. I changed the front door seals, made it a bit better but still is a problem.. it is definitely door/window alignment though...I will update the original thread once/if i resolve it....I have so much to work on with this car, my check list of things to do is huge! I love it though 
__________________
1993 300E, 2.8 M104 .....
|
 |
| Bookmarks |
|
|


 Hybrid Mode


