

|
|
|
|
|
|
#1
 10-09-2011, 03:22 PM
|
|||
|
|||
|
"10" Steps to R&R W124 Odometer
Greetings all, with some recent time off from school I finally had a chance to take out my non-functional odometer and tinker with it. Theres some great info out there, but dribbled like bread crumbs in many different MB sites. And, if youre visual like me pictures are a great incentive to jump in. Thought itd be nice to give and not take for once. All of this pertains to my 8/88 build 300te. If you find anything different across the 124 line please, let us know.
Youll need a fair sized phillips Table White backdrop Small standard slot screw drivers. One from a glasses repair kit may do. Possibly JB Weld Removal and easy repairs should only take a couple hours. Over night if you have to let an adhesive dry. **Warning: Neither Peach Parts or myself take any responsibility for erroneous use of this info. Its intended for the enthusiast only. If you tamper an odo. to knowingly defraud someone, youre an ass** So its ubiquitous among 80s-90s German Japanese cars, the broken odometer. The two most common outward symptoms are the numbers that sag as they near the right side, and the normal looking but also dead odometer. On rare occasions one can have a working odometer but a dead trip odometer. Theyre all three related to a couple lynch pins. 1. The removal itself is simple. I didnt get pictures but if someone needs more of an explanation I can grab some. I did forget to replug the clock haha. Basically the entire cluster is held by tension up top and two tabs at the bottom. Ive heard of using paint lid prys or screw drivers to pull the sides out near the vents, but Id likely scratch something. I pulled outwards on the bottom of the cluster until I had enough slack to grab the right side of it and pull HARD. Itll come out with some encouragement. I find the easiest way is to move my seat a little closer, lean forward and to the right, steering wheel all the way out, and then move the cluster to the left. 2. Once its free of its physical restraint reach behind it and disconnect the speedo cable. Its right behind the center of the speedo needle, feels like a large tire stem cover. Roll it towards your right and itll come off. Its a tight fit, but I wear a 16 ring and was able to do it. Once you get a mental picture of its location its pretty fool proof. After that theres enough room to swing the cluster out and up to see the back. Everything is in a couple neat harnesses, and coded by shape. Remove all warning lights except oil pressure, and pull the fuel economy straight out. After that youre ready to take the cluster inside 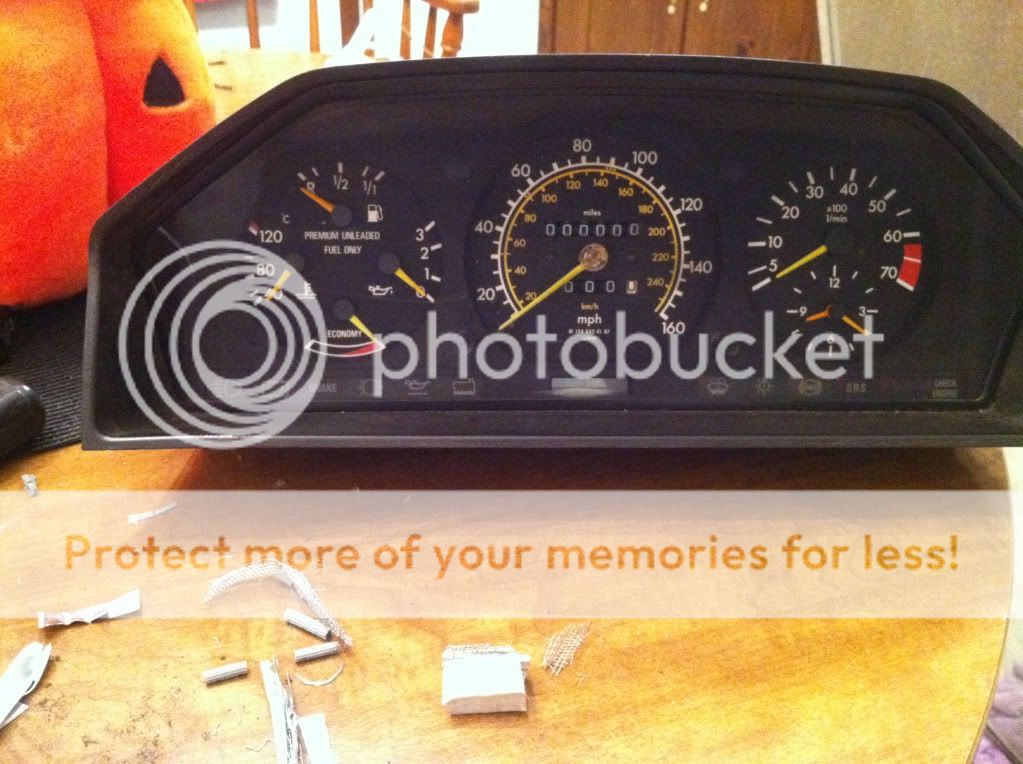 3. Lay it face down and youll see a series of angular- head brass screws that hold the circuit boards onto the back. Take all of these on the panel to the right of the speed, and behind the speed. Should be 7-8. Theres also two behind the outside temp display and one in a white cube at the bottom right of the speed. You should now be able to grab the white plastic behind the speedo and pull the entire thing out. Holding the speedo onto the white plastic are four round head brass screws. Slot head. Take these out and you should have the face of the speedometer and its hind quarters free. Move the cluster off to the side and its show time. 4. First step is to take the needle. It comes off with simple upward pressure, but can be stuck the first time after 20ish years. Be careful not to damage the black plastic cap that covers the needle. Also, move the needle up and over its stop pin, to see where it sets hanging free. Theres two small black screws between the trip odometer and the big one, remove those and the plate will come off. Behind that is a black plastic rack holding the numbers and a metal bracket. Again, remove four round brass screws and pull upward. The coil return for the needle is here. As long as you dont physically mangle it a little shoving wont hurt it. Had units apart about a dozen times now and yet to have a failure. Just note which direction the slot in the center circle is pointing. Should be straight up. 5. Now that the internals are isolated we can see how the odometer actually functions. White peg transfers turns from the cable to the green wheel. Green wheel is at the end of the bar supporting the odometer. This turns the silver metal wheel at the opposite end. This is what physically moves the upper and lower numbers.  The numbers themselves are black plastic wheels. The right side has many small teeth, while the left has one large tooth. The grey and white wheels that drive each individual meter are the same design, just no numbering. When each digit moves around a value of 10, the large slot on its left turns the white roller above it. This turns the wheel to the left forward 1 digit. So the silver wheel moves constantly with the car, and turns the 1 place constantly, and so on up 1:10. 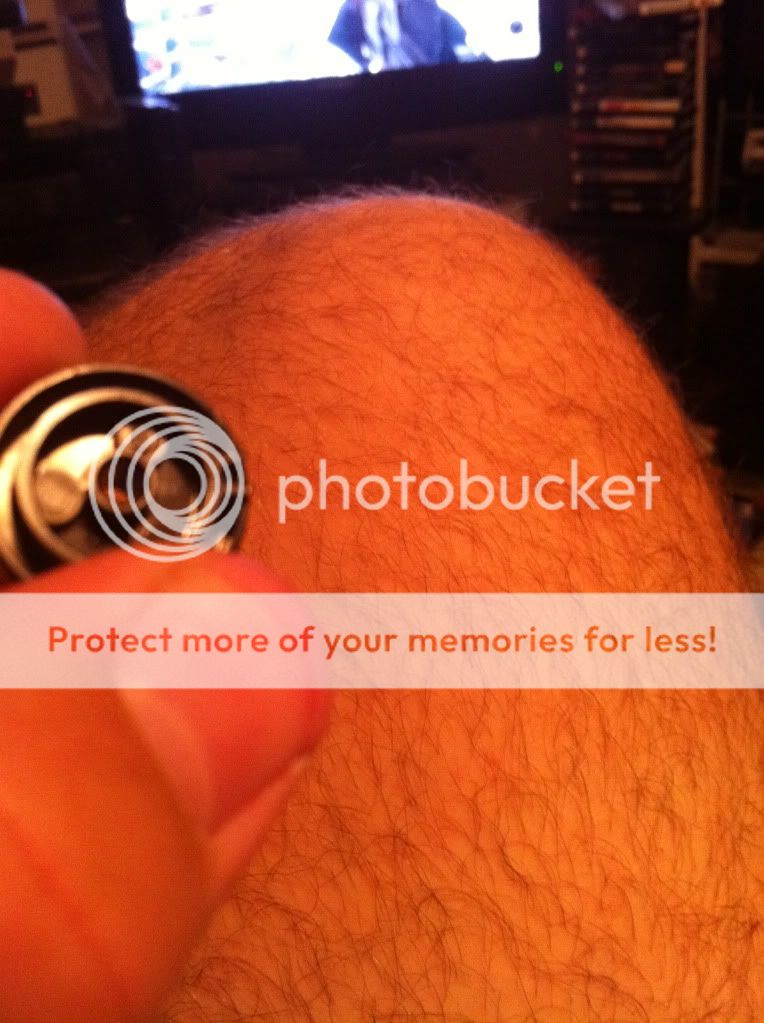 This plastic gear goes between the upper and lower odometer. It turns the trip in unison with the upper odo. This is why you can never reset the trip with the car moving. Little gear pops, or shreds, and the trip odometer stops working. Sometimes, both stop working. If thats happened to you youll hopefully find it in the bracket. If not, Im not sure what to say  6. The green gear contacts the gear going back to the cable. This is where the most common problem starts. As the car ages this green gear can slip to the left, causing the end of its rod to fall out. Then you no longer have turning numbers. And, in some cases, pop out the little gear mentioned above. Its simple enough to push it back to the right. I did this, buttoned everything up, and 470.2 miles later I was back at square one. Id seen a post on this forum about putting a piece of something in the way to keep it in place. For the life of me I cant find it now, I believe it was 2007. If you have it let me know, so we can give the author credit.  I took a piece of ~10 gage aluminum and cut it to the right length to fit in the metal bracket. Now I originally planned to JB weld it in place, but I figure itll just make it harder the next time this thing breaks. So I made it tall enough to contact the back of the speedometer face. Then a thin bead of super glue between the black plastic holding the odometers and the metal. Dremel a slit in it and thin a couple places in the back so it doesnt contact any of the plastic. Held in place by tension, and pushes on the top rod, keeping it from sliding to the left.  7. So I go through all of this, drink some Coors and feel like a man. 73 miles later I again have a dead odometer. After drying my tears it was time to open it all back up. This time everything was still in place, but the green gear was no longer turning the silver one at the other end. If I used the trip odo gear to turn everything by hand it worked. There was too much tension, time and my dismantling had made the grey gear loose on the rod. 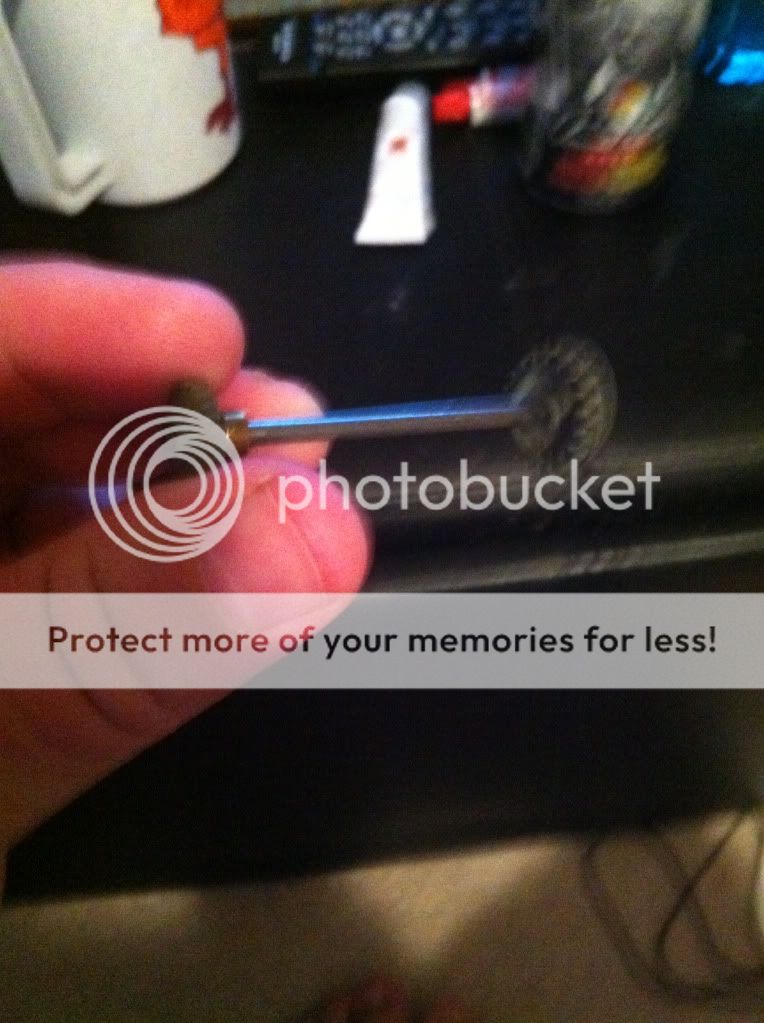 I mixed a pile of JB Weld about the size of a pencil eraser on a piece of board. Take out the small gear connecting the two odometers to make things easier, then slip the green gear and the upper rod out just enough to free the silver gear. Roll a toothpick in the JB weld, then insert it in the grey gear, effectively coating the inside of the wheel with JB. I saw no way to get it in the exact place on the shaft, so I was forced to put it on the gear then slide the rod back through. So I put a dab of white lithium grease on another toothpick and lubed the hole in the black plastic where the rod goes. Let it sit overnight warm/dry. ~14 hours I checked it out, everything seemed tight. Put the unit back together, tried to turn the trip odometer by itself. Wouldnt budge because of the green/white gears. Im hesitant to call it a success, but been 3 days and ~500 miles and everything is still working as it should. 8. The last problem I ran into was the trip odometer stopped working. It was from resetting it too many times while I had everything dismantled, but I assume it could happen from wear in the car. Looking at the back of the black plate you can see the reset bar and above it the plastic and rod that support the trip. This bar can slip out on the right side just like the top rod, simply pop it back into place and everything should go dandy. The lower numbers are much simpler and a sealed unit, so other than the small gear coming out Ive yet to see any major issues with it. 9. Now, when my odometer stopped it read 243,732. Trouble is itd been dead for ~10 years. I chose to take all of the numbers out and reset it by hand. In retrospect I wish I hadnt. It was hellacious and tedious. Certainly the longest part of all this, other than waiting for the JB to dry. If youre changing your mileage to 0, or making a donor odo match your car, I highly recommend doing so by hand. Take everything but the meters apart, and take the gear between the two of them out. Then turn the mileage up or down by the green gear. Its also time consuming, but turn on the TV and save yourself the headache. My title has the odo declared as not actual, inoperable, so I set it at 0s to make my maintenance life easier. Check with your state laws before doing anything like that if youre planning to resell the car. Basically, pull on the green gear and everything will fall out. You want to fix it so that they all line up with each other, and the white rollers above. I found it easier to hold it backwards in my right hand, moving the rod with my palm and holding the gears with my left (dominant) hand. In this case seeing a line of 5s at the back means the front face is on 0. Put the 100k gear in, line it up with the roller above it, and move everything tight to the right. Put in the next digit, and so on. When youre down to the grey gear things can get tight, but itll fit. You should have a row of 0s. To test myself I made sure that rolling it backwards went to 999,999. Then forward to 100, just to check everything. Seems like its good to go, barring any other mechanical failure.  10. Installation is, as they say, reverse of removal. A few notes come in handy though. To put the copper coil for the speedometer back on do the black plate 1st. Screw it in loosely and the coil should be lined up over its peg. Just push down on the center circle until its touching the plate. When replacing the speedo needle, line it up in the black area below 0mph. Then lift it up and over so at rest it is pushing on the peg. Otherwise, you have a needle that wont go below 40. Pretty hilarious. Nothing in this should alter the gearing of the needle, so just check that your mph is accurate, and you should be good to. After a couple of tinkers Im now ~1mph off of GPS indicated. Close enough to not deal with taking it back apart. When plugging the cluster back up, do all of the loose wires first. The warning lights were originally labeled. All but my #3 had fallen off. If you didnt label them when starting, lay the harness out flat. After 20yrs they should fall somewhat in order. So check engine is the furthest to the right, etc. Then push it just so that you can get your arm behind it. From here I use my index and middle finger to pull the speedo cable forward. Imagine youre holding a cigarette or upside down wine goblet. Pull it forward and onto the speedo. Youll know when it makes contact, roll it towards the drivers door to tighten. The threads are large, so shouldnt be much resistance until its fully tightened. Appreciate all the help through the last year. Look forward to many more with yall/the 124. Hopefully somebody uses this. Questions, Comments, Concerns? `  

|
|
#3
10-09-2011, 09:27 PM
|
||||
|
||||
|
I can make those needles pretty and orange again.
love the "a christmas story" Lamp too It's also illegal to set your odometer back to Zero. Tampering laws etc....
__________________
hum..... 1987 300TD 311,000M Stolen. Presumed destroyed
|
|
#4
10-09-2011, 10:05 PM
|
|||
|
|||
|
Haha, glad somebody recognized the lamp. Space is at a premium in college housing, there's a full size one my family puts out this time of year at home.
And for sure odo's are a tricky legal subject. Since mine was declared inop there's a provision in VA law that lets me replace or reset it. As long as I got this statement of change form filled out. I can sell it as is as long as a notary and the buyer sign another form. But I figure for a $800 car that's 13 mos. older than me, it'll either leave the house piece by piece or become cans.
|
|
#5
10-09-2011, 10:12 PM
|
||||
|
||||
|
lol, I'd know that lamp anywhere! I'm glad you looked into local laws, some dont which is why I brought it up
__________________
hum..... 1987 300TD 311,000M Stolen. Presumed destroyed
|
|
#6
10-09-2011, 10:14 PM
|
|||
|
|||
|
Va is pretty good about these things, as long as you're willing to pay through the nose. Personal plates start at only $10, no emissions, couple years I won't have to have the 124 inspected at all haha.
Just looked through your gauge thread, looks like good work. This summer I plan to drive the f250 for a couple weeks while I replace all my rubber, have the head machined, etc etc. I'll probably be sending my needles down your way.
|
|
#7
10-09-2011, 11:37 PM
|
||||
|
||||
|
Quote:
__________________
hum..... 1987 300TD 311,000M Stolen. Presumed destroyed
|
|
#8
10-10-2011, 12:03 AM
|
|||
|
|||
|
Ah, good to know SJH. So you used super glue in the same place I used JB Weld. I was worried super glue wouldn't be strong enough. Not worth the gamble to go through the headache again haha.
How many miles since you repaired yours? Thanks to a road trip this weekend I should be crossing 1k this week.
|
 |
| Bookmarks |
|
|


 Linear Mode


