

|
|
|
|
|
|
#76
 09-14-2009, 02:01 PM
|
|||
|
|||
|
Quote:
I really hate to drag this up again.. But how do you suggest cleaning and packing the inner bearing without replacing the seal? How bad could it be to mix two greases which are assumed to be in good condition? 
|
|
#77
09-14-2009, 02:05 PM
|
|||
|
|||
|
Quote:
2) Could be quite bad if the grease(s) is not compatible chemically. I never take the risk.........all the old is removed.........and all the new is installed. Do it once. Do it right.
|
|
#78
09-14-2009, 02:29 PM
|
||||
|
||||
|
The thing about mixing new grease with old is that "High Temp" grease can only be mixed with "High Temp," High friction" with "High friction," etc. The brand is irrelevant.
__________________
 Don't Chrome them; polish them
|
|
#79
09-14-2009, 02:45 PM
|
|||
|
|||
|
Quote:
|
|
#80
09-14-2009, 02:48 PM
|
|||
|
|||
|
Quote:
devastating. I just got it out, though I'm quite sure everyone will demand I use a seal press to re-install the new one... that won't be happening. I also tried the Vstech method of pulling the inner Bearing against the nut.... was not kosher... at least for me. good info, thanks again.
|
|
#81
09-14-2009, 03:31 PM
|
||||
|
||||
|
I had to "perforate" the metal carrier on the seal to get them to release.
I used Valvoline "synthetic" wheel bearing grease, in the grease gun and a Lisle bearing packer. Works like a champ every time. When I replace the bearings, I replace the race as well. I tap in the seal using a dead blow hammer or a rubber mallet.
__________________
RRGrassi 70's Southern Pacific #5608 Fairmont A-4 MOW car 13 VW JSW 2.0 TDI 193K, Tuned with DPF and EGR Delete. 99 W210 E300 Turbo Diesel, chipped, DPF/Converter Delete. Still needs EGR Delete, 232K 90 Dodge D250 5.9 Cummins/5 speed. 400K Gone and still missed...1982 w123 300D, 1991 w124 300D
|
|
#82
05-05-2010, 10:07 AM
|
||||
|
||||
|
Wheeler Dealer Merc 280SL-Front Brakes
http://www.youtube.com/watch?v=dX1P4DwlEiY
Ed China replaces the front brakes and rotors on this 70's 280SL. THe procedure and parts look exactly the same as this DIY, but China does not use a dial indicator, or does he even explain how to reset the locknut on the hub. Nevertheless, its a decent visual of the basic steps required in pulling the used disc off the hub and spindle. Enjoy!
__________________
1985 300TD Turbo Diesel Wagon 273,000 miles
|
|
#83
09-01-2010, 07:02 PM
|
|||
|
|||
|
Useful pictures, useful discussion
Not being a mechanic, I found the first post's pictures useful in preparing me for what to look for, and the later comments useful for what to do. A few points:
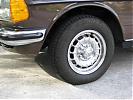
My hardware store didn't have the L-shaped 10mm Allen wrench I wanted, only the little multi-size fold-up type, but they did have a hex driver (its 8" length gave me clearance to work), which turned out to be the best choice, since I needed not only my socket wrench but also a length of pipe to get those Allen nuts loose (while my wife stood on the wheel!) I cleaned out every bit of old grease (the old gray-black would have clashed with the red jelly look of the new stuff) with rags everywhere I saw it through to the inner bearing, then, since I didn't have any gasoline, I used the brake cleaner spray on everything and I think I got the last bits out with pressure from the spray can. Don't go with the "back off a third/quarter/etc turn" option: the opinions back and forth prompted me to get a dial indicator and magnetic mount ($25, cheap peace of mind), and I found 1/3 turn was way beyond spec - snugged up by hand then backed off, on my car it took barely an eighth of a turn to stay under 0.12mm end-play. Keep an old brake shoe to compress the caliper - I had to dig one out of the garbage when nothing else I did made a difference, but with this and a channel lock wrench squeezing it down, it was pretty easy. I didn't see any evidence of anything like a paste on the backing of the pads, so I didn't use it, but I could go back and add it if there is some technical reason for it. I did use a little bearing grease on the side of the pads, though. Last edited by hempev; 09-01-2010 at 07:22 PM.
|
|
#84
09-01-2010, 08:18 PM
|
||||
|
||||
|
:Moderator EDIT: This is wrong and dangerous, causes excess wear + possible catastrophic bearing failure. :EDIT:...
I just tighten the nut over the bearing as tight as i can possibly get it with a channel lock and then tighten the bolt. It works CRAZY GOOD, for me. Last edited by whunter; 09-29-2010 at 11:24 AM. Reason: Wrong and dangerous
|
|
#85
09-02-2010, 12:31 AM
|
|||
|
|||
|
Quote:
I'm more curious about the reason for the paste some people slather on the back of the discs (and some people don't, like the one's who last changed my car's brakes many thousands of miles ago).
|
|
#86
09-28-2010, 11:34 PM
|
|||
|
|||
|
Holy cow
I think we should remove each roller from the inner and outer bearings and have them magnafluxed and x-rayed for possible stress cracks or manufactuing voids. Just kidding.
No matter how good or bad the information in this DIY thread is presented it is still likely to beat what really goes in in your typical tire store-slash-brake shop-slash-muffler shop-slash-oil and lube center. These are the jobs the new guy in the shop gets, and depending on the shop he may have never seen a Mercedes before in his life. I went to Jiffy Lube to get my emmissions test on my 83 240D. The kid performing the test noticed the car was a diesel. He commented that that was cool because "Dang you can tow stuff". Granted I live in Utah, but still... I think this proceedure as described in this thread will beat what you would get at most shops. Even the guy behind the parts counter at the Mercedes dealer didn't know what a delivery valve oring was and had to call his boss over to help him. We are all doomed, websites like this and threads like this are the only thing we have left to cling to... snif... snif...
|
|
#87
11-05-2010, 04:34 PM
|
||||
|
||||
|
Dial Indicator Help
I'm almost ready to perform this job. I have ordered a dial indicator and magnetic base to complete the tolerances on the wheel bearing, hoever I'm confused when reading the tolerances and looking a the dial. I don't know how to read it. I know that my dial is in the form of inches.
So, according to DMorrison the endplay on the rear wheel bearings are as follows: The limits are 0.04-0.06 mm SAE .0015-.0023Inch Or 1 mark on my dial gauge is .001 Inch the FSM states: 0.01-0.02 Which one do I use? Also, how do I use the numbers on the dial indicator to achieve this? I understand what the Dial indicator is made to do, I just don't know how to understand the numbers. Thanks
__________________
1985 300TD Turbo Diesel Wagon 273,000 miles
|
|
#88
11-05-2010, 06:01 PM
|
|||
|
|||
|
Quote:
Which end are you working on? Guessing that you need the front specs, 0.01-0.02mm = .0004-.0008 in. One half of one increment on you indicator is .0005 in. So be happy with a needle displacement around 2/3 of one increment.
|
|
#89
11-05-2010, 08:58 PM
|
||||
|
||||
|
Quote:
http://www.mini-lathe.com/measurement/dial_indicators/dial_indicators.htm#Dial%20Indicators
__________________
1985 300TD Turbo Diesel Wagon 273,000 miles Last edited by markho; 11-05-2010 at 09:30 PM.
|
|
#90
01-25-2011, 09:22 PM
|
||||
|
||||
|
Bearing Grease
In my preparation to perform this DIY, I was researching wheel bearing greases. I found this MB site that apparently lists several brands of grease that meet their specifications. MB even included their house brand in the line up. Hopefully others will also find it useful.
http://bevo.mercedes-benz.com/bevolisten/265.1_en.html
__________________
-1985 300TD - 324k mi on chassis. MB "Tauschaggregat" 617 motor + 4-speed conversion Alaska Roadtrip 2009 -2002 E320 Wagon - 197k mi -1998 E320 Wagon - 310k mi - retired
|
 |
| Bookmarks |
|
|


 Linear Mode


