

|
|
|
|
|
|
#16
 03-18-2008, 12:14 PM
|
||||
|
||||
|
Hey Chad, Nicely done. I'm looking at taking on a similar project on my 300TD. I have about 5 or 6 small trouble spots that I'm going to attack with POR15 and filler (might try POR's body filler/putty, anybody use that before?).
I'm amazed at how closely you got the paint to match. Nice work. Where does one find the color codes on these cars?
__________________
1984 300TD Wagon 
|
|
#17
03-18-2008, 12:27 PM
|
||||
|
||||
|
Quote:
http://old.mbclub.ru/mb/vin/?lng=eng I've used the por15 filler on a buddy's jeep.....seemed to work pretty good. It's better quality than bondo - but it's still a putty. As in, if you don't treat/remove the surrounding areas sufficiently - you'll be dealing with it again in 5 years.
__________________
1981 240d - 135k - Arlene
|
|
#18
03-18-2008, 01:19 PM
|
||||
|
||||
|
The site Jordan linked is where I got my code too.
You can check out this link to see pics of cars with the different color codes available: http://www.astralsilber.de/farbcodes/farbcodes.htm I used some of the POR-15 putty on my floor repair. It's good stuff and will still cure when under water. 
__________________
Chad 2013 Jeep Unlimited Rubicon OBK#44 "Pleasure in the job puts perfection in the work." - Aristotle (384-322 B.C.) SOLD 1985 300TD - Red Dragon 1986 300SDL - Coda 1991 - 300TE 1995 - E320 1985 300CD - Gladys 2006 Nissan Pathfinder LE 1998 Acura 3.0 CL
|
|
#20
03-18-2008, 06:31 PM
|
|||
|
|||
|
I practiced trim removal
Chad,
Thanks for the response. It's good to get insights from someone that's been there and done that. I spent some time this weekend practicing at a near-by pick n pull and I'm feeling pretty confident about getting almost everything off and back on - even the drip rails. The trim at the door bottom has a few bolts and then seems to just pop off leaving the clips on the car and sliding out to the rear from the front. I'm not sure about the short pieces in front and behind the door - do they just pop off and on? The rear door handles are easy but I don't see how to disconnect the lock mechanisms on the front. Did you take yours off and have any tips? If the trim will polish, I'm looking into powder coating it clear. If it doesn't polish, I'm thinking of powder coating it black. Either way, it all needs to come off. The car is original white 737 single stage. I've not decided about going back single stage, updating to base - clear coat, or maybe going to one of the diamond or pearl whites. I think I'll go back to original wheel color by sand blast and powder coat unless I go to larger rims and lower profile tires. Charles
|
|
#22
03-19-2008, 08:29 AM
|
||||
|
||||
|
Charles,
I haven't removed my door handles. Here's a link about door lock repair, the beginning briefly describes how to remove the door handle: http://www.peachparts.com/Wikka/W123DoorLock I would imagine that bgkast (Bryan) would be able to help with your question. The short trim pieces are held by plastic clips. You can pry them off and snap them back into place. I personally like 2 stage paint. I think it's easier to get a smooth finish. I'd love to see some pics of your process. Good luck. Aaron, The seal on the hatch window gets removed in the reverse of the way it gets installed. Use a wide flat tool to lift the seal up and over the ridge and work it all the way around and push the window out. You will have to remove the inside hatch trim and rear wiper, and be careful of the connections for the defrost. I would have a helper available to make it easier to hold the window. To replace with the new seal, put the aluminum trim in the seal after the window and pull it into the hatch with a rope and windex. Good luck and thanks for the earlier compliments. 
__________________
Chad 2013 Jeep Unlimited Rubicon OBK#44 "Pleasure in the job puts perfection in the work." - Aristotle (384-322 B.C.) SOLD 1985 300TD - Red Dragon 1986 300SDL - Coda 1991 - 300TE 1995 - E320 1985 300CD - Gladys 2006 Nissan Pathfinder LE 1998 Acura 3.0 CL
|
|
#23
03-19-2008, 12:37 PM
|
|||
|
|||
|
Thanks for the link Chad,
This is what if found and it's what I needed to know: "Remove the pin that holds the tumbler assembly to the handle. I used a small nail with the tip ground off held in vice grips. Be careful, there is a small spring in the assembly. Don?t let the spring shoot off into a bush (ask me how I know)." I'm leaning toward two stage and considering the three stage diamond or pearl that would be close enough to the original white to leave door jams alone. Charles
|
|
#24
04-03-2008, 08:31 PM
|
|||
|
|||
|
i too am impressed with the results you achieved using bondo, pop rivets, and jb weld. a guy i work with has a canoe thats hull has been held together with jb weld for years. your post made me feel better about the rust repair on my 300D between the rear window and the trim piece. good job!
__________________
1983 300D classic white 196,xxx 2007 toyota yaris lb 2007 nissan versa (wife's) 2001 nissan frontier 2006 bmw r1150gs 2001 ducati monster 900 2003 zr7s 2007 klr650
|
|
#25
08-12-2008, 05:22 PM
|
||||
|
||||
|
I thought I'd add some pics and info to help answer some questions I've gotten. I didn't take pics of all the steps like bending the metal and pop riveting or mixing and spreading filler, but this should help a little.
 In these repairs I needed to cut and shape 4 pieces of sheet metal. In all cases except the rail, I glued the metal from the inside and used Bondo filler and spot/glaze putty to fill the remaining void and make it smooth and level with the body lines. 2 were in this area. 1 slightly curved using my leg and hands and fit between the inner support and the existing body metal (at the left of the pic). The other was for the hole near the bumper support. That piece was compound and required a hammer and an anvil to shape. The duck tape was used to keep POR-15 from dripping through and allow it to help shape the repair area.  1 flat piece was along the rail where you see pink peaking through: 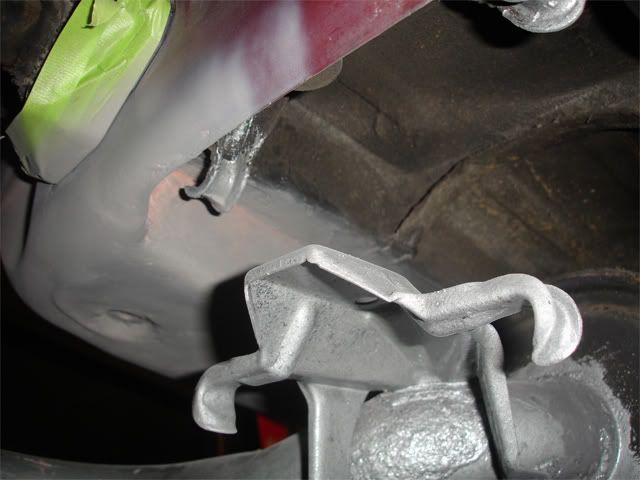 The 4th flat piece was here at the window hole above the antenna. Oh yeah, as you can see I actually used JB Weld as body filler before finishing it off with the Bondo products. JB Weld is much more durable than body filler and spot/glaze putty: 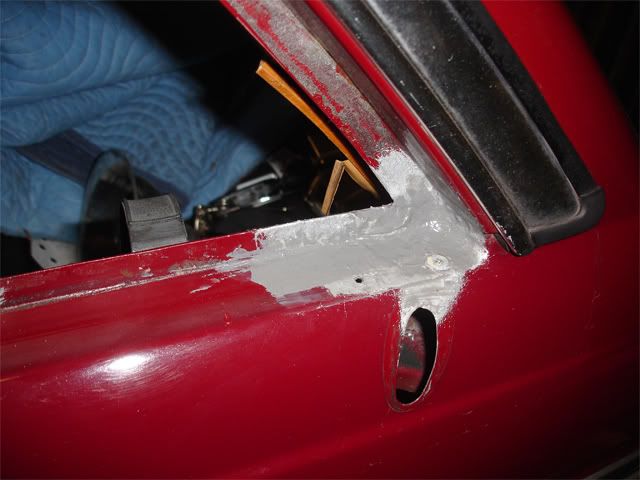 I also used POR-15 fiber sheets inside the well to help add strength. You can see the sheet metal between the body metal and the support: 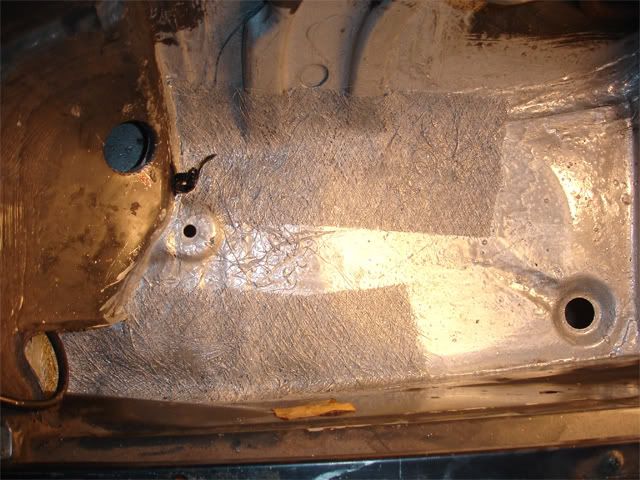 Topcoated: 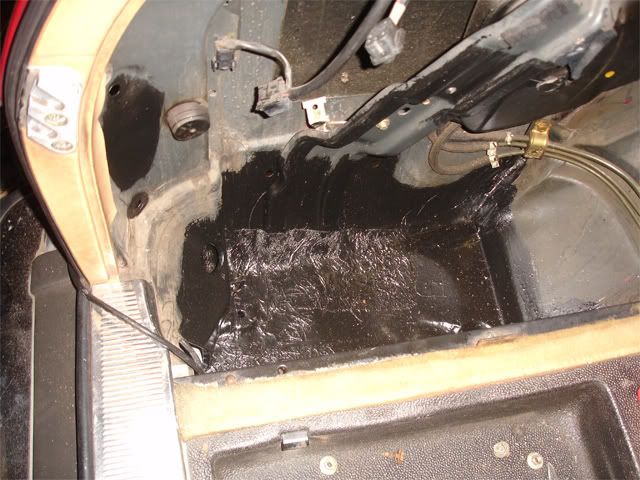 After Primer: 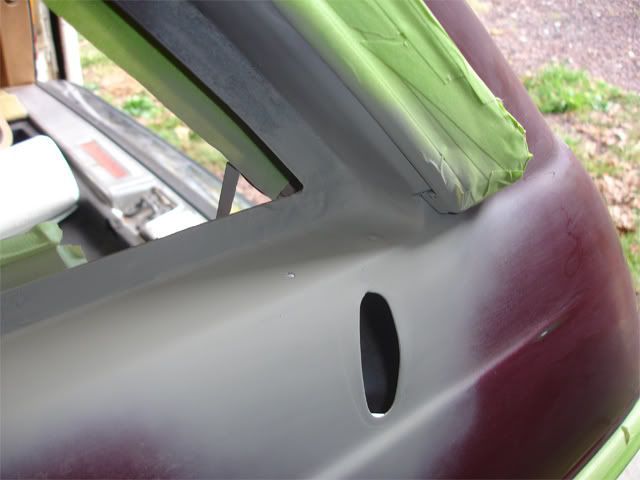 Closeups after paint: 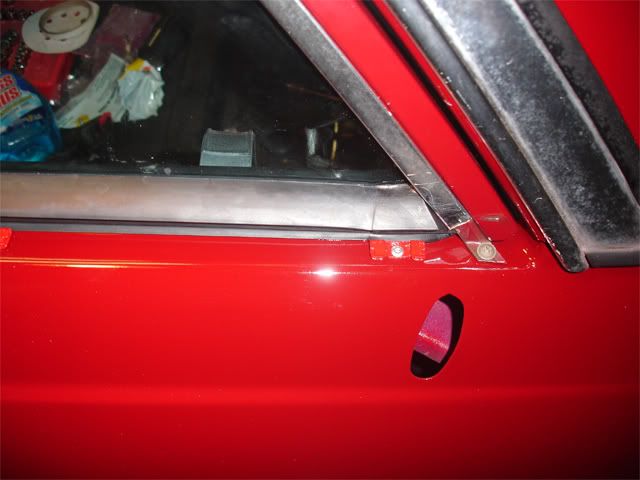 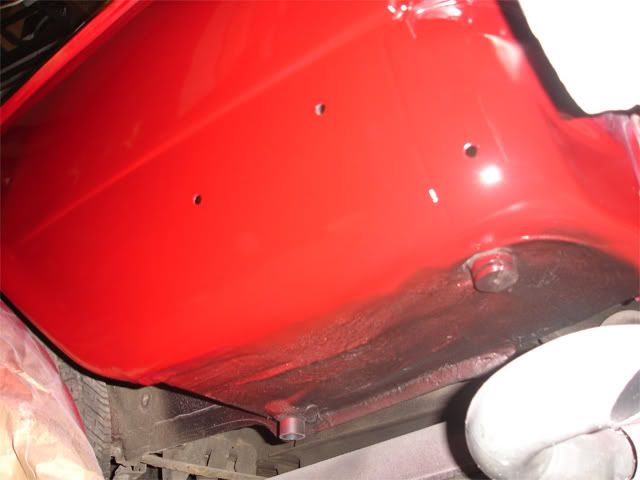
__________________
Chad 2013 Jeep Unlimited Rubicon OBK#44 "Pleasure in the job puts perfection in the work." - Aristotle (384-322 B.C.) SOLD 1985 300TD - Red Dragon 1986 300SDL - Coda 1991 - 300TE 1995 - E320 1985 300CD - Gladys 2006 Nissan Pathfinder LE 1998 Acura 3.0 CL Last edited by Chad300tdt; 08-12-2008 at 05:34 PM.
|
|
#26
08-12-2008, 11:57 PM
|
||||
|
||||
|
And when you're about to re-install the quarter windows, make sure you attach the trim to the rubber seal before you install the window. The lower trim goes in last after the window has been installed.
__________________
1984 300TD
|
|
#27
08-13-2008, 09:12 AM
|
||||
|
||||
|
Quote:
Here is the link to the thread I did on removing and reinstalling the quarter window: http://www.peachparts.com/shopforum/diesel-discussion/201820-300td-quarter-window-removal-w-pics-post1937709.html?posted=1#post1937709
__________________
Chad 2013 Jeep Unlimited Rubicon OBK#44 "Pleasure in the job puts perfection in the work." - Aristotle (384-322 B.C.) SOLD 1985 300TD - Red Dragon 1986 300SDL - Coda 1991 - 300TE 1995 - E320 1985 300CD - Gladys 2006 Nissan Pathfinder LE 1998 Acura 3.0 CL
|
|
#28
11-08-2008, 09:34 PM
|
||||
|
||||
|
Did you paint the whole quarter panel or just the areas you repaired? That repair looks very nice.
__________________
1979 240D- 316K miles - VGT Turbo, Intercooler, Stick Shift, Many Other Mods - Daily Driver 1982 300SD - 232K miles - Wife's Daily Driver 1986 560SL - Wife's red speed machine
|
|
#29
11-08-2008, 10:22 PM
|
||||
|
||||
|
Thanks.
It's still looks like the day I finished it too.I painted most of the quarter panel. I started feathering/blending over the center of the wheel opening and toward the middle of the hatch pillar with the base coat. Then I clear coated it and extended the blend edge further than the base coat edge. I also feathered the clear at the top of the hatch pillar to repair some clear coat failure there.
__________________
Chad 2013 Jeep Unlimited Rubicon OBK#44 "Pleasure in the job puts perfection in the work." - Aristotle (384-322 B.C.) SOLD 1985 300TD - Red Dragon 1986 300SDL - Coda 1991 - 300TE 1995 - E320 1985 300CD - Gladys 2006 Nissan Pathfinder LE 1998 Acura 3.0 CL
|
|
#30
11-10-2008, 08:13 AM
|
||||
|
||||
|
Well, it certainly turned out quite well, having now seen your car up close, Chad.
__________________
" We have nothing to fear but the main stream media itself . . . ."- Adapted from Franklin D Roosevelt for the 21st century  OBK #55 1998 Lincoln Continental - Sold Max 1984 300TD 285,000 miles - Sold The Dee8gonator 1987 560SEC 196,000 miles - Sold Orgasmatron - 2006 CLS500 90,000 miles 2002 C320 Wagon 122,000 miles 2016 AMG GTS 12,000 miles
|
 |
| Bookmarks |
|
|


 Linear Mode


