

|
|
|
|
|
|
|
|
#1
 10-06-2010, 10:40 AM
|
||||
|
||||
|
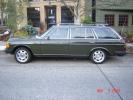
I've taken your advice and started to paint!
G'day Folks,
I thought I'd start a work in progress thread. I'm re-spraying the front wings and bonnet / hood of my car. This is the first time that I'll have ever done this so I'll be posting the good, the bad, and hopefully not too much ugly. The front wings of the car (a 1981 W123 300D) were getting a bit crumbly - so I took 'em off for a repaint. The bonnet on the top side is sort of OK but underneath where moisture has been trapped between the insulation and the metal it is also a bit flaky. I've taken my usual approach with rust:- Angle grinder + wire brush attachment, then Metal Ready (or KBS equivalent) and then POR15. This is fine for the underside but I want to make the top side beautiful. See the attached pictures for an overview of the state of the right hand front wing (on the underside)
__________________
1992 W201 190E 1.8 171,000 km - Daily driver 1981 W123 300D ~ 100,000 miles / 160,000 km - project car stripped to the bone 1965 Land Rover Series 2a Station Wagon CIS recovery therapy! 1961 Volvo PV544 Bare metal rat rod-ish thing I'm here to chat about cars and to help others - I'm not here "to always be right" like an internet warrior  Don't leave that there - I'll take it to bits! Last edited by Stretch; 10-06-2010 at 10:41 AM. Reason: Added more info 
|
|
#2
10-06-2010, 10:43 AM
|
||||
|
||||
|
And for the top side of the front R/H wing
Here are some pictures of the upper side / outside of the wing.
I'll be pleased to hear any comments you may have. I'm following the advice from this thread:- Calling all paint experts - is this a good idea? "paint and cure", good answers. (One I started earlier)
__________________
1992 W201 190E 1.8 171,000 km - Daily driver 1981 W123 300D ~ 100,000 miles / 160,000 km - project car stripped to the bone 1965 Land Rover Series 2a Station Wagon CIS recovery therapy! 1961 Volvo PV544 Bare metal rat rod-ish thing I'm here to chat about cars and to help others - I'm not here "to always be right" like an internet warrior Don't leave that there - I'll take it to bits!
|
|
#3
10-06-2010, 10:53 AM
|
||||
|
||||
|
POR15ed it
Here are some shots of the front wing after a bit of POR15. I'm using the Tie coat primer on top of the POR 15.
I think I'm getting along quite well with the wet and dry sand paper. I've elected to do this by hand as I can be a bit over enthusiastic with power sanders... ...does anyone know of a neat way of washing all the sludge off of the paint work? I've just been rubbing it off with water...
__________________
1992 W201 190E 1.8 171,000 km - Daily driver 1981 W123 300D ~ 100,000 miles / 160,000 km - project car stripped to the bone 1965 Land Rover Series 2a Station Wagon CIS recovery therapy! 1961 Volvo PV544 Bare metal rat rod-ish thing I'm here to chat about cars and to help others - I'm not here "to always be right" like an internet warrior Don't leave that there - I'll take it to bits!
|
|
#4
10-06-2010, 03:18 PM
|
|||
|
|||
|
I use paint thinner or mineral spirits (not reducer) followed by a 50-50 denatured alcohol/water mix in a spray bottle.
The paint thinner makes the sludge "flow" better than water. The mix cleans up any residue from the thinner. I use a paint brush for the mineral spirits part and wipe the spray with old terry cloth towels. Hang the towels out to dry. Don't just toss them in a container.
|
|
#5
10-06-2010, 05:34 PM
|
|||
|
|||
|
I know that you are following the instruction on the POR15 can but from my experience the repair lasts longer if you completely eliminate all traces of rust. You will end up with a
"pickled" surface which will allow the POR15 to adhere. You can achieve this by either sandblasting or multiple passes with naval jelly to completely remove rust from the pitted areas.
|
|
#6
10-07-2010, 04:24 AM
|
||||
|
||||
|
Quote:
I have also noticed that sometimes if the surface is not cleaned as well as it could be or as much rust as possible has been not removed, you can see new rust poking through thin coats of KBS Rust Seal. So far however, I've not noticed that with POR15, even though I guess these products are essentially the same...
__________________
1992 W201 190E 1.8 171,000 km - Daily driver 1981 W123 300D ~ 100,000 miles / 160,000 km - project car stripped to the bone 1965 Land Rover Series 2a Station Wagon CIS recovery therapy! 1961 Volvo PV544 Bare metal rat rod-ish thing I'm here to chat about cars and to help others - I'm not here "to always be right" like an internet warrior Don't leave that there - I'll take it to bits! Last edited by Stretch; 10-07-2010 at 04:25 AM. Reason: Punctuation!
|
|
#7
10-20-2010, 09:45 AM
|
||||
|
||||
|
Spray filler done?
Update:-
I've been sanding and spray fillering and here are some pictures of the results so far. I've been washing the panel down and I can see on some parts that the surface looks nice and smooth. The whole surface feels really nice and smooth - to the touch - but I'm a bit worried that over greater distances I'll have ripples or noticeable undulations. Does anyone know how I can check for this at this stage on the curved surfaces? (On flat surfaces I can use a straight edge - but curves...)
__________________
1992 W201 190E 1.8 171,000 km - Daily driver 1981 W123 300D ~ 100,000 miles / 160,000 km - project car stripped to the bone 1965 Land Rover Series 2a Station Wagon CIS recovery therapy! 1961 Volvo PV544 Bare metal rat rod-ish thing I'm here to chat about cars and to help others - I'm not here "to always be right" like an internet warrior Don't leave that there - I'll take it to bits!
|
|
#8
10-20-2010, 12:48 PM
|
||||
|
||||
|
Ripple...
Hey Army,
It's looking Good! I'm no expert but I believe the procedure for finding any low spots, etc... is to spray a darker color primer over what you have now and then sand it off using a flexible sanding block. The high spots will be the lighter color and the low spots will be darker. The sanding blocks I've seen are made of a semi hard foam rubber that will bend around the curves but still keep your sand paper flat on the paint surface. When you spray the darker color, I don't think you need to have complete coverage either. I've seen people just spray enough to make speckles (is that a word?). I guess that's to save time sanding but it seems to me that you'd want "some" coverage everywhere to expose any low spots. Also, when wet sanding, I have the sand paper in one hand and the hose running in the other and keep a constant flow of water over the sanding area. It keeps the sludge to minimum and your paper will last longer. Keep going Army, it's going to look SWEET!!!
__________________
 1981 300TD "The Green Lantern" 1980 300TD 1983 300D Euro "China Cat"
|
|
#9
10-20-2010, 01:41 PM
|
||||
|
||||
|
Quote:
__________________
1992 W201 190E 1.8 171,000 km - Daily driver 1981 W123 300D ~ 100,000 miles / 160,000 km - project car stripped to the bone 1965 Land Rover Series 2a Station Wagon CIS recovery therapy! 1961 Volvo PV544 Bare metal rat rod-ish thing I'm here to chat about cars and to help others - I'm not here "to always be right" like an internet warrior Don't leave that there - I'll take it to bits!
|
|
#10
11-05-2010, 05:26 AM
|
||||
|
||||
|
Spray gun info
Thanks for the response jmk - I'll look it all up when I get home from work
EDIT:- Right I'm home. I have got a Sunex SX70a The closest thing that is still made by Sunex is the SX70c (I think):- http://www.sunextools.com/search.php?page=6&limit=6 I found the box it came in and in the bottom I found the instructions - doh - the maximum pressure seems to be 70PSI but most of the tables only show data for as much as 50PSI - so I'm putting way too much pressure through the gun... ...time for a rewind... Last edited by Stretch; 11-05-2010 at 11:49 AM. Reason: I'm home from work!
|
|
#11
11-05-2010, 12:13 PM
|
|||
|
|||
|
Get yourself an old sheet of metal. Practice on it. Start with 35 p.s.i. Play with the mix/pattern (round) until you get a consistent covering. Experiment with adjusting the mix and pattern. Go to 40 p.s.i. and then 45 p.s.i. Learn the gun. You will find the pressure the gun and you work best on.
Work on starting the spray BEFORE you reach the panel and releasing it AFTER you have made your pass. Learn to keep the gun the same distance all the way through the pass. Most novices have a tendency to "arc" the gun, i.e., you start the pass and swing your arm which leads to being closer in the middle of the swing. Concentrate on moving the gun parallel to the surface being painted. Move your arm, don't swing it. Learn to spray at the same speed. Don't try to get complete coverage in one pass, it isn't going to happen. Work on overlaps. You are not shooting a "sheet" of paint. You are shooting very fine droplets (think bubbles) which as they hit the solid surface splatter and flatten together. Get comfortable with your ability. Now, bend the sheet around something. Start all over again. Work on changing the paint/reducer mix. Re-learn the gun. Then do like I do. Sand, prep and deliver the car to a professional painter with a spray booth. 
|
|
#12
11-15-2010, 02:33 PM
|
||||
|
||||
|
Sorry Mike the point of the exercise is to practice on my car - eeek!
Anyway today it was warm enough, dry enough, and not very windy so I got out and got the stone chip bit done on the lower part of the wing. All went well - considering I was using an aerosol - until I slipped just after taking the photo and rubbed up against the panel. I've got to do it again...
__________________
1992 W201 190E 1.8 171,000 km - Daily driver 1981 W123 300D ~ 100,000 miles / 160,000 km - project car stripped to the bone 1965 Land Rover Series 2a Station Wagon CIS recovery therapy! 1961 Volvo PV544 Bare metal rat rod-ish thing I'm here to chat about cars and to help others - I'm not here "to always be right" like an internet warrior Don't leave that there - I'll take it to bits!
|
|
#13
11-15-2010, 09:16 PM
|
|||
|
|||
|
The link did not help. I couldn't figure out what your gun was. They sell both conventional and HVLP, though from your description it sounds like you have a conventional gun.
Mike D's advice was much more practical than mine. I would do what he says. And you are right: too much pressure. Read the instructions and see if you can adjust the pressure, fluid flow, and flow rate separately with your gun. And you can always delive it to a professional, but that just isn't as much fun!
__________________
___________________________________________ 2010 Toyota matrix '93 500 SEL Well, I sold it. Just got to be too much to keep up with. First time I haven't owned a MB since 1983. '12 Volvo S80 T6 Needed something that wasn't as hard to deal with as my bad addiction '18 Mazda Miata No more boring cars for everyday transport!
|
|
#14
11-16-2010, 04:16 AM
|
||||
|
||||
|
Quote:
__________________
1992 W201 190E 1.8 171,000 km - Daily driver 1981 W123 300D ~ 100,000 miles / 160,000 km - project car stripped to the bone 1965 Land Rover Series 2a Station Wagon CIS recovery therapy! 1961 Volvo PV544 Bare metal rat rod-ish thing I'm here to chat about cars and to help others - I'm not here "to always be right" like an internet warrior Don't leave that there - I'll take it to bits!
|
|
#15
12-02-2010, 03:37 PM
|
||||
|
||||
|
Just in case anyone stumbles across this thread and needs more information about painting here's a good thread on the vintage forum:-
thinking of Maaco
__________________
1992 W201 190E 1.8 171,000 km - Daily driver 1981 W123 300D ~ 100,000 miles / 160,000 km - project car stripped to the bone 1965 Land Rover Series 2a Station Wagon CIS recovery therapy! 1961 Volvo PV544 Bare metal rat rod-ish thing I'm here to chat about cars and to help others - I'm not here "to always be right" like an internet warrior Don't leave that there - I'll take it to bits!
|
 |
| Bookmarks |
|
|


 Hybrid Mode


