

|
|
|
|
|
|
|
|
#1
 09-19-2011, 09:43 PM
|
||||
|
||||
|
I just got back from the dealer where I had all 4 wheels aligned. I brought the steering box centering screw with me so that they could center the box while adjusting the front wheels to point straight ahead.
 All 4 wheels are now within specs and the steering feels great. It's one less thing to worry about. The cost was $165.58 after my 10% MBCA discount. I was charged $8 for shop supplies and another $8 for hazardous waste removal, which I think is a bit of a scam, but oh well. After topping off the fuel tank I am now broke, which is not a good thing. I still can't get over how much better my car looks after adding the wheels/tires and polishing it.  It looks much better than it did at the time I purchased it.  Oh, and I made wall art out of my last car: 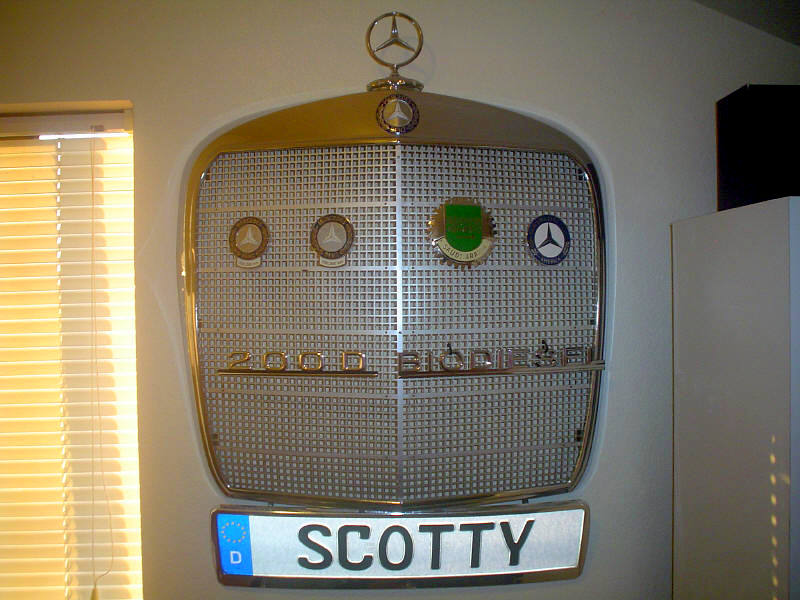
__________________
Stop paying for animal enslavement, cruelty, and slaughter. Save your health and the planet. Go vegan! I did 18 years ago. https://challenge22.com/ DON'T MESS WITH MY MERCEDES!  1967 W110 Universal Wagon, Euro, Turbo Diesel, Tail Fins, 4 Speed Manual Column Shift, A/C 1980 W116 300SD Turbo Diesel, DB479 Walnut Brown, Sunroof, Highly Optioned, 350,000+ Miles 
|
|
#2
09-19-2011, 10:22 PM
|
|||
|
|||
|
W116
Stunning Car
__________________
Anders 1995 E300 2015 VW TDI Sportwagen 15K 1977 240D (197K) 2002 Subaru Legacy L Wagon (115k) (Wife's) Gone but not forgotten: 2005 Buick LeSabre 1998 C230 1984 300D 1983 240D 1981 300SD 1974 240D 1974 Fiat 124 Spider 1968 Triumph TR250
|
|
#3
11-25-2011, 09:53 PM
|
||||
|
||||
|
I started working on those TRON wheels so I could use the studded snow tires this winter. I took them to the best locksmith in town and it took them a week to make a key. The key would only unlock one of the center caps because the other three were too corroded inside the lock cylinders. I soaked the cylinders in penetrating oil, then tried baking soda and vinegar. Both of the keys I had broke off inside the locks, so I gave up.
I sold those things to someone who is going to drill out the locks. I couldn't deal with them anymore. They cost a good amount of money to purchase and have the keys made, then they were just taking up valuable space in my storage shed. I also think that the tires were made in 1983 and probably no longer safe for freeway use. I started hearing a thumping noise under the hood. What I discovered was a broken air cleaner mount that was causing the air cleaner to rattle against the inner fender. This is not uncommon because owners neglect the rubber air cleaner mounts, and engines that have an idle that is too low or rough puts a lot of vibration into the bracket. A previous owner had drilled a hole in the bracket where the crack occurred. The crankcase breather pipe next to the bracket had a paper towel inserted in it when I purchased it, since there was a melted cone filter attached to the turbo in place of the factory air cleaner.  The bracket had already been welded once before in another location.  I didn't buy a new bracket since I'm unemployed, but I had three spares. Unfortunately, all three had broken in the same place, but two of them had been repaired.  When people have these welded, they forget that the area underneath needs to be flush or else it will cause the bracket to tilt. I filed the area smooth.  That fixed the problem. Hopefully it lasts. Some day I want to buy Meyle's heavy duty bracket. I also noticed that the turbo wastegate hose was getting worn through, and the air intake rings were aged and not sealing well. If the wastegate hose leaks, it can overboost the engine, and bad air intake rings can cause the engine to suck in grit. So, I ordered those parts right away.  I also noticed that my power steering pump is leaking at the front seal, so I ordered a new seal kit. I'm trying to spend as little money on my car as possible, but I have to keep it reliable and can't risk damaging it, either.
__________________
Stop paying for animal enslavement, cruelty, and slaughter. Save your health and the planet. Go vegan! I did 18 years ago. https://challenge22.com/ DON'T MESS WITH MY MERCEDES! 1967 W110 Universal Wagon, Euro, Turbo Diesel, Tail Fins, 4 Speed Manual Column Shift, A/C 1980 W116 300SD Turbo Diesel, DB479 Walnut Brown, Sunroof, Highly Optioned, 350,000+ Miles
|
|
#4
11-25-2011, 09:54 PM
|
||||
|
||||
|
Papalangi gave me this nice car cover when I visited. With all of the rain we've been having, my interior has been soaked. So, I'm going to try the cover to see if it helps keep the interior dry until I can replace the weatherstripping. It didn't rain today, so I opened the doors and trunk, sopped up the water, and let it air out before covering it. For being for a Ford Mustang notch, it fits my car very nicely, and I'm happy with it. I'm on the lookout for a nice blue left front door panel and maybe some other interior parts for his 450SEL to repay him for his generosity.
   
__________________
Stop paying for animal enslavement, cruelty, and slaughter. Save your health and the planet. Go vegan! I did 18 years ago. https://challenge22.com/ DON'T MESS WITH MY MERCEDES! 1967 W110 Universal Wagon, Euro, Turbo Diesel, Tail Fins, 4 Speed Manual Column Shift, A/C 1980 W116 300SD Turbo Diesel, DB479 Walnut Brown, Sunroof, Highly Optioned, 350,000+ Miles
|
|
#5
01-02-2012, 03:06 AM
|
||||
|
||||
|
Wow that's one gucci roof rack.
__________________
1992 W201 190E 1.8 171,000 km - Daily driver 1981 W123 300D ~ 100,000 miles / 160,000 km - project car stripped to the bone 1965 Land Rover Series 2a Station Wagon CIS recovery therapy! 1961 Volvo PV544 Bare metal rat rod-ish thing I'm here to chat about cars and to help others - I'm not here "to always be right" like an internet warrior  Don't leave that there - I'll take it to bits!
|
|
#6
01-02-2012, 01:00 PM
|
|||
|
|||
|
It's beautiful.
What do you plan on using it for?
__________________
Paul S. 2001 E430, Bourdeaux Red, Oyster interior. 79,200 miles. 1973 280SE 4.5, 170,000 miles. 568 Signal Red, Black MB Tex. "The Red Baron".
|
|
#7
01-02-2012, 07:12 PM
|
||||
|
||||
|
Thanks for the comments. I might use the roof rack for shipping things, maybe for large parts from PickNPull, and possibly for when I move to Arizona. I will use padding whenever I put something on there. I just feel like sedans have such little cargo room. Even going from driving a W110 to a W116 I've lost a lot of trunk space.
__________________
Stop paying for animal enslavement, cruelty, and slaughter. Save your health and the planet. Go vegan! I did 18 years ago. https://challenge22.com/ DON'T MESS WITH MY MERCEDES! 1967 W110 Universal Wagon, Euro, Turbo Diesel, Tail Fins, 4 Speed Manual Column Shift, A/C 1980 W116 300SD Turbo Diesel, DB479 Walnut Brown, Sunroof, Highly Optioned, 350,000+ Miles
|
|
#8
01-02-2012, 09:20 PM
|
|||
|
|||
|
Quote:
I recall you posting recently that you were laid off. Did you find employment in Arizona?
__________________
Paul S. 2001 E430, Bourdeaux Red, Oyster interior. 79,200 miles. 1973 280SE 4.5, 170,000 miles. 568 Signal Red, Black MB Tex. "The Red Baron".
|
|
#9
01-03-2012, 01:56 AM
|
||||
|
||||
|
Squiggle Dog - What car did you get the manual window regulators from?
|
|
#10
01-03-2012, 04:53 AM
|
||||
|
||||
|
My roommate and I are moving to Arizona because we are sick of the rain in Washington. I much prefer the dry desert heat and sunshine. We both lost our jobs, so we might as well move. I'll just look for work once we find a place to rent. It's a renter's market these days and housing is half the cost of here, so even if we make half of our old wages we won't be too far behind. For me, having no career or any real education makes it easy to pack up and move because I'm used to living on less than $15,000 a year.
I got my manual window regulators from a W116 that had manual windows (only W116 regulators will fit).
__________________
Stop paying for animal enslavement, cruelty, and slaughter. Save your health and the planet. Go vegan! I did 18 years ago. https://challenge22.com/ DON'T MESS WITH MY MERCEDES! 1967 W110 Universal Wagon, Euro, Turbo Diesel, Tail Fins, 4 Speed Manual Column Shift, A/C 1980 W116 300SD Turbo Diesel, DB479 Walnut Brown, Sunroof, Highly Optioned, 350,000+ Miles
|
|
#11
01-20-2012, 05:37 PM
|
||||
|
||||
|
The Seattle area is having a historic snow storm. We rarely get any snow here; in fact, just one inch causes everything to shut down! We got seven inches of snow which melted, then froze into ice. There are downed trees, power cables, power outages, and dozens of crashes.
    The power cables have fallen down on the cars and the driveway is blocked. The City doesn't know if they can get anyone out today. The garbage trucks never came by on Wednesday and the mail truck got stuck in front of the house. We lost power last night, too. 
__________________
Stop paying for animal enslavement, cruelty, and slaughter. Save your health and the planet. Go vegan! I did 18 years ago. https://challenge22.com/ DON'T MESS WITH MY MERCEDES! 1967 W110 Universal Wagon, Euro, Turbo Diesel, Tail Fins, 4 Speed Manual Column Shift, A/C 1980 W116 300SD Turbo Diesel, DB479 Walnut Brown, Sunroof, Highly Optioned, 350,000+ Miles
|
|
#12
01-20-2012, 06:18 PM
|
|||
|
|||
|
Gentlemen, Start your engines... We need to fight global warming as a united group.
|
|
#13
02-20-2012, 07:47 PM
|
||||
|
||||
|
I just scored a sunroof deflector at the wrecking yard. It's the clip type and I got the hardware, but this is just a test fit. I think it helps tie in the roof rack and the main reason I wanted it was because I'm moving to Arizona, and sunroofs are practically useless to vent the car when it's hot because the sun beats down on you. This one is tinted so it will filter the amount of sunlight coming through.

__________________
Stop paying for animal enslavement, cruelty, and slaughter. Save your health and the planet. Go vegan! I did 18 years ago. https://challenge22.com/ DON'T MESS WITH MY MERCEDES! 1967 W110 Universal Wagon, Euro, Turbo Diesel, Tail Fins, 4 Speed Manual Column Shift, A/C 1980 W116 300SD Turbo Diesel, DB479 Walnut Brown, Sunroof, Highly Optioned, 350,000+ Miles
|
|
#15
05-01-2012, 02:06 AM
|
||||
|
||||
|
Quote:
__________________
Stop paying for animal enslavement, cruelty, and slaughter. Save your health and the planet. Go vegan! I did 18 years ago. https://challenge22.com/ DON'T MESS WITH MY MERCEDES! 1967 W110 Universal Wagon, Euro, Turbo Diesel, Tail Fins, 4 Speed Manual Column Shift, A/C 1980 W116 300SD Turbo Diesel, DB479 Walnut Brown, Sunroof, Highly Optioned, 350,000+ Miles
|
 |
| Bookmarks |
|
|


 Hybrid Mode


