

|
|
|
|
|
|
#16
 11-15-2013, 11:11 AM
|
||||
|
||||
|
Quote:
__________________
Eric, CPO, Submarines, retired. Here's a sig line... Mine: '68 Corvette LS1/4L65E, 83 240D, 2000 GMC 4x4, 08 FLSTC Anniv Hers: '72 Corvette 454/4spd, '99 MB SLK, '93 Metro vert, 78 240D, '92 Silverado, '65 Fjord Rustang, '59 Fjord Fairlane, '17 Slingshot. 
|
|
#17
11-15-2013, 02:27 PM
|
||||
|
||||
|
Quote:

__________________
Graham 85 300D  ,72 350SL, 98 E320, Outback 2.5 ,72 350SL, 98 E320, Outback 2.5
|
|
#18
06-20-2015, 01:12 PM
|
|||
|
|||
|
Bumping an old post. I've read quite a bit about people having trouble with the Meyle subframe mounts. I came up with a tool of my own and was able to fully press one into a W123 subframe earlier this afternon.
I'll post photos and video of the tool here sometime probably later this weekend. No can do today - leaving for a wedding soon. I have all the Home Depot part #s handy for those who want to duplicate the tool.
|
|
#19
06-22-2015, 02:34 PM
|
|||
|
|||
|
I'm back with info. I'm happy to report that with my tool, I was able to press in Meyle subframe mounts fully without much fuss.
Here's a picture of the tool: 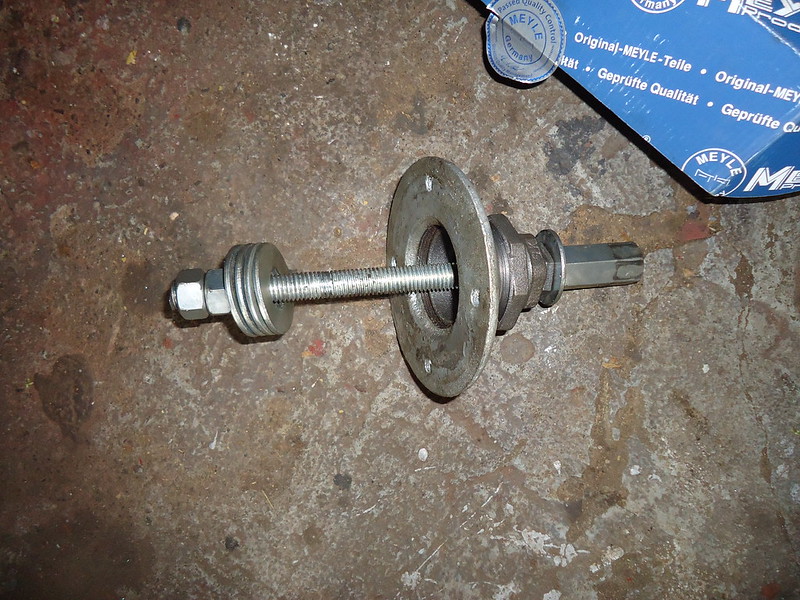 I used pipe fittings from Home Depot. The real key piece is the two inch floor flange, which sits PERFECTLY over the subframe mount, allowing you to press it into the subframe via the metal lip, as opposed to pressing on the center rubber portion of the subframe mount. Here's a list of the parts I used:
The following part numbers are plumbing fittings from Home Depot made by LDR:
Arrange the parts on the threaded rod in the following order, according to the picture:
The pipe fittings just screw together. I assembled them hand-tight only. Here's s picture of the tool in place on the subframe: 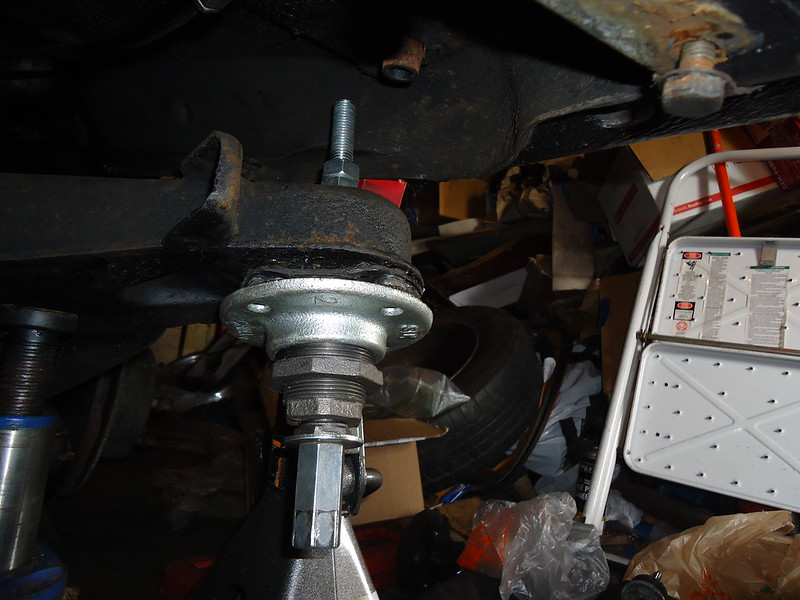 And here's a picture of a Meyle mount fully pressed into place: 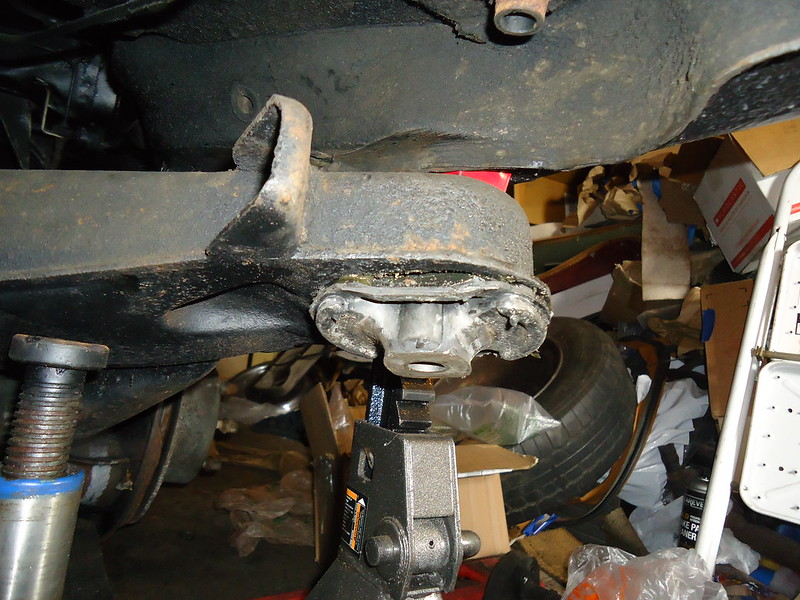 I was able to seat one of these by hand with a ratchet. The other one required the use of my electric impact wrench. Neither one took my more than ten minutes to change. I can post a link to a video of this later.
|
|
#20
06-22-2015, 09:21 PM
|
|||
|
|||
|
Thanks again!
I am following in the wake of your rebuild. Got all the parts for the trailing arm bushing and will do that this week. Have the entire rear end out and just finished Por-15 the subframe. Got the SF bushings out after making a makeshift tool patterned after the MB tool. It broke after the second bushing came out but got me through the job. I have a w126 and the bushings are different than you show. I will press in the bushings this week after building my version of your tool. Thanks for sharing. Jeff
__________________
1984 300SD 300,000 miles--two tank WVO setup 2.88 diff & 500SEL anti-squat rear end Last edited by Rooster300SD; 06-22-2015 at 09:32 PM.
|
|
#21
06-22-2015, 10:02 PM
|
|||
|
|||
|
Quote:
The passenger side mount was in better shape, but pretty worn. I got it started with a hammer and chisel and then pried it out with a small pry bar. Probably took me five minutes. Not counting unbolting the subframe from the body and remounting it, it took me maybe ten minutes to change the passenger side subframe mount. I'm not sure how the W126 differs, but I hope this info helps.
|
 |
| Bookmarks |
|
|


 Linear Mode


