

|
|
|
|
|
|
#1
 09-02-2010, 01:56 AM
|
|||
|
|||
|
Transmission leak around overload protection switch; 722.3
Hi folks. A thorough search turned up some threads discussing this, but the configurations were different from my '91 500SL. I have a leak in this area in the front driver's side area of the trans.
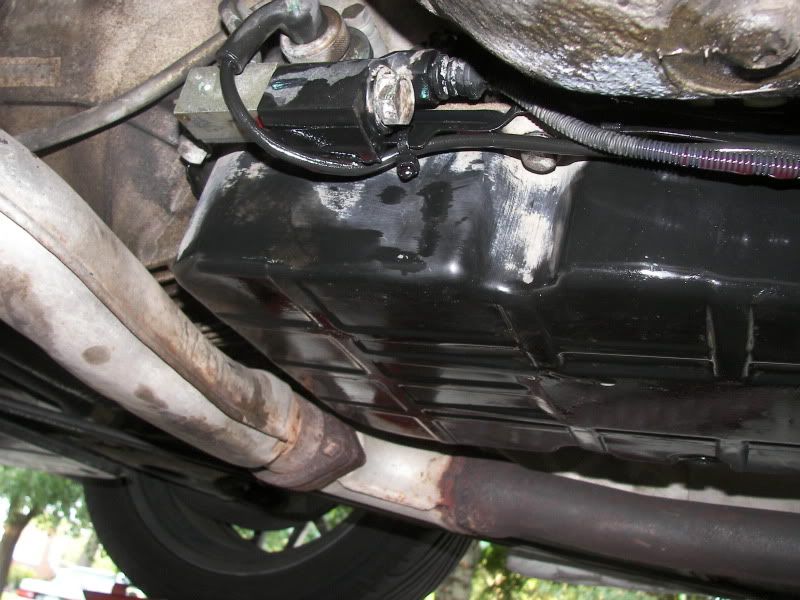 I replaced the O-rings in the kickdown solenoid, but I then discovered the leak is coming from above, around the overload protection switch. It seems to be running down the back side of the plate that the switch is mounted through. 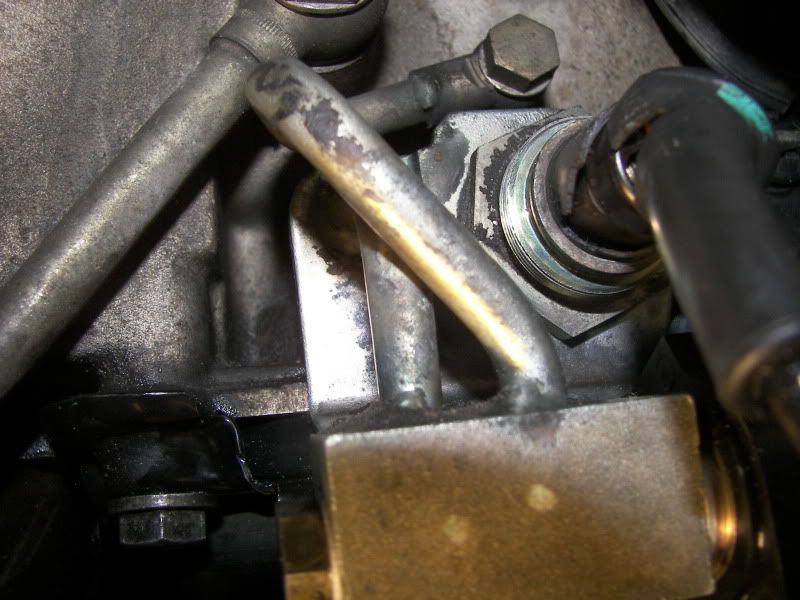 The switch itself is fine, it doesn't leak between the plastic and the case. 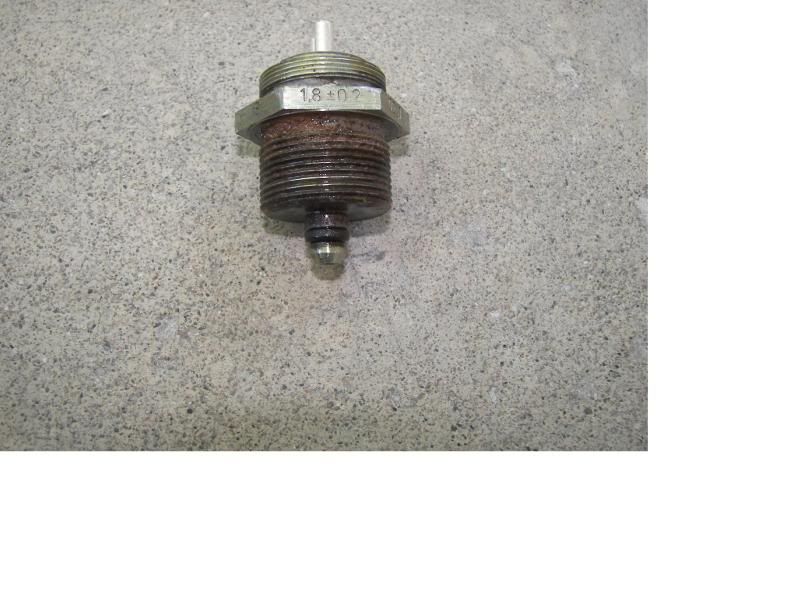 I replaced the little O-ring on the end of it, but I'm still getting fluid in this hole that the switch came out of. 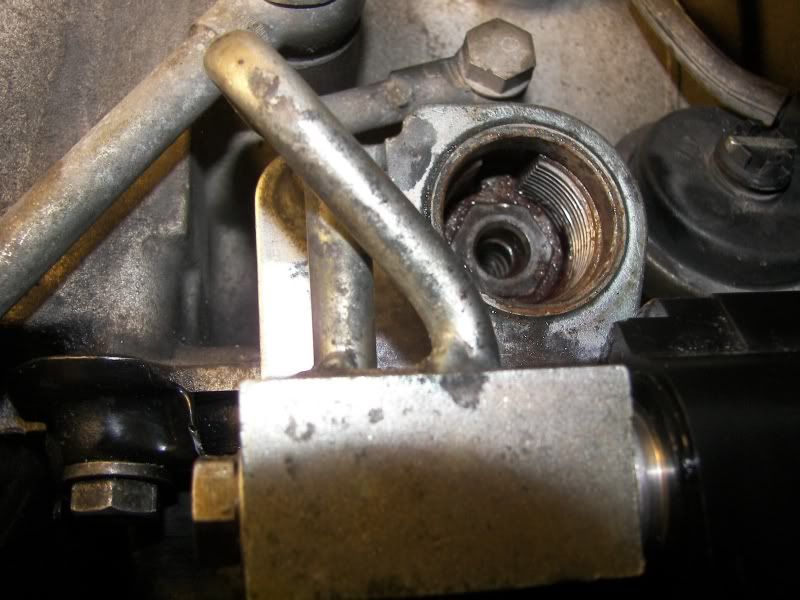 The fluid is then leaking past the seam where the threaded part meets the plate. The seam doesn't have any kind of seal, so I'm assuming it's not meant to hold back pressure, and there isn't supposed to be fluid in that hole. 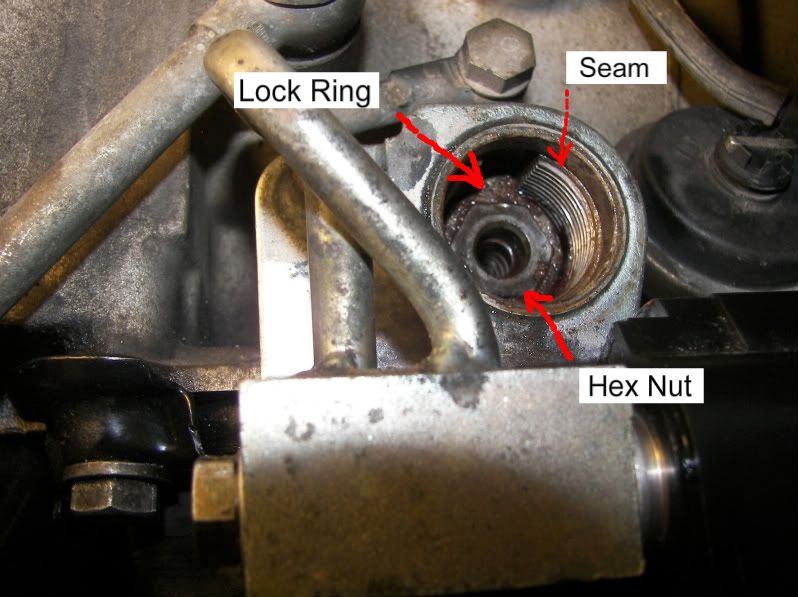 The diagrams I've been able to find online and the dealer parts counter has don't describe what's going on in here. If I pull out the lock ring, and unscrew the hex nut, is there a seal in there that could be causing fluid to get in there? I'm a bit out of my depth here, and don't want to mess up some adjustment or release a bunch of small parts that will turn my leaking trans into a broken trans. Does anyone know if this is a possible point of leakage, and what is required to fix it? Last edited by zeen; 09-02-2010 at 01:27 PM. 
|
|
#2
09-02-2010, 02:28 AM
|
||||
|
||||
|
It looks as though ATF is getting past the o-ring in your third picture. It would never make it to the seam or the threads if the o-ring was containing it, right? I'm thinking that the o-ring either isn't thick enough or you may not be getting it to seat for some reason.
|
|
#3
09-02-2010, 02:48 AM
|
|||
|
|||
|
Quote:
|
|
#4
09-02-2010, 03:14 AM
|
||||
|
||||
|
What series transmission is it? I may have a service manual that covers it. From what I see in my manual, the body of that block is held in place by the hex nut. Inside, there appears to be 1 or 2 more O-rings to seal the block to the transmission.
Last edited by Christine in FL; 09-02-2010 at 03:39 AM.
|
|
#5
09-02-2010, 09:41 AM
|
|||
|
|||
|
Quote:
It's a 722.3; The exact MD is 722353 03 538026. The parts counter guy said it looks like there was a mid-year change to the overload switch, which is probably why the one I purchased is wrong. But like I said, the switch doesn't look like it's the problem, and the O-ring wasn't it either. 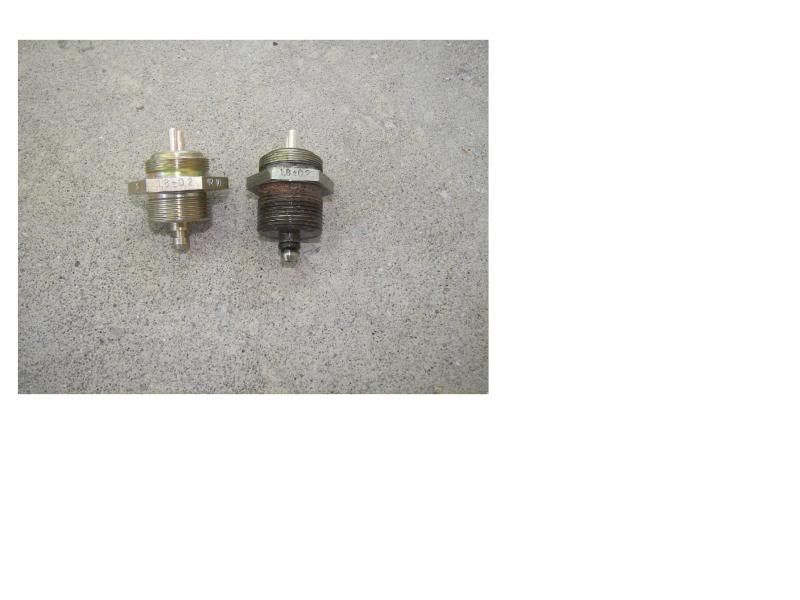
|
|
#6
09-02-2010, 02:17 PM
|
||||
|
||||
|
I have a detailed diagram that shows everything but the block (that only came on some models). However, I don't know how to convert a PDF file to Jpeg so I can post it here for you.
|
|
#7
09-02-2010, 02:54 PM
|
||||
|
||||
|
Wisdomsoft Screenhunter (FREE)
It allows you to take a "Snapshot" of your active screen.
Then you use the "Attachments" to Browse to the Desktop and upload the screen picture. http://wisdom-soft.com/products/screenhunter_free.htm
__________________
'84 300SD sold 124.128
|
|
#8
09-02-2010, 03:12 PM
|
||||
|
||||
|
Here is a link to the MB service manual: http://w124-zone.com/downloads/photos/300TE/remove_tranny/tranny_722_repair.pdf
Don, the section that you need is on page 91.
|
|
#9
09-02-2010, 04:36 PM
|
|||
|
|||
|
Is this the image you are talking about?
Looks like I have a weird one-off configuration. That's the same hole, right down to the notch through the threads, but it has a different kind of overload protector, underneath a plug, and the kickdown solenoid located in a completely different spot. I've got this, screwing in to this hole, topped off by an electrical connector. I guess at this point there's nothing for it but to dive in and see what's in there. Thanks again for all the help.
|
|
#10
09-02-2010, 04:46 PM
|
||||
|
||||
|
Yes, that is the one. After looking at hundreds of different pictures and reviewing 5 different manuals trying to solve my own problems, I've learned that there are many different external accessories to our transmissions, but for the most part they are the same internally. I suspect that you'll find one of those O-rings inside is the culprit of your leak. Let us know what you find. That's how we learn from each other here. This site is a great resource with many experienced folks who are willing to share their knowledge.

|
|
#11
09-02-2010, 10:25 PM
|
|||
|
|||
|
OK, now we're getting somewhere. What I thought was a hex nut surrounded by a lock ring:
was actually all locked together and was the front of this: 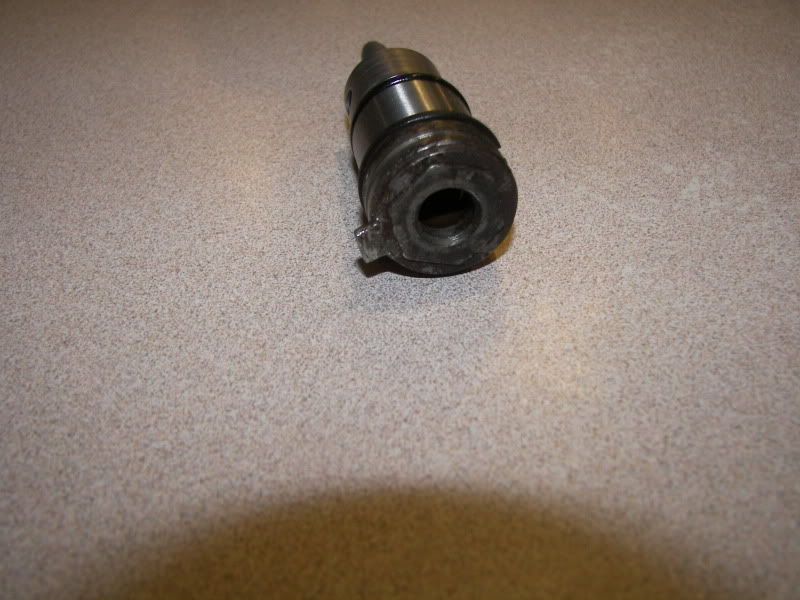 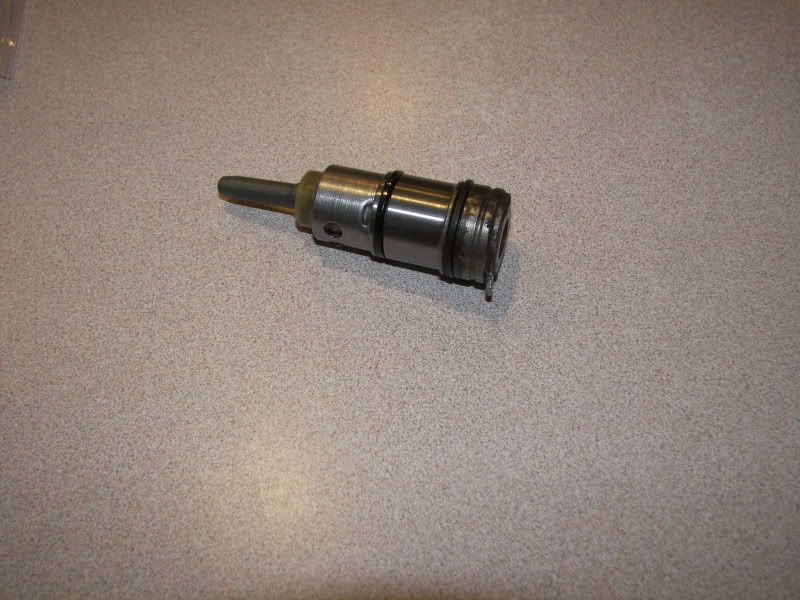 Which is basically #34 in Christine's diagram with a hole in it for the overload switch. The parts guy at the dealer was kind enough to print off the proper diagram, it's #65 here: The outermost O-ring was hard and shrunken, so I'm hopeful I have found my leak. Sadly, the dealer didn't have it in stock, and I missed the cutoff for tomorrows delivery by 10 minutes, so I'll have to wait till Tuesday. Thanks again for the help, I'll update when I get the new O-rings installed.
|
|
#12
09-09-2010, 10:07 PM
|
|||
|
|||
|
Victory, sweet victory!
Finally got the O-rings from the dealer, cleaned up the grooves and got it back together today. No leaks! It was definitely part #74 in the drawing from the dealer, #32 in the other drawing. It fought me all the way, but after a high-speed run with the top down, all is forgiven. Thanks for your help, Christine and Compress. 
|
 |
| Bookmarks |
|
|


 Linear Mode


