

|
|
|
|
|
|
|
|
#1
 12-18-2014, 01:38 PM
|
||||
|
||||
|
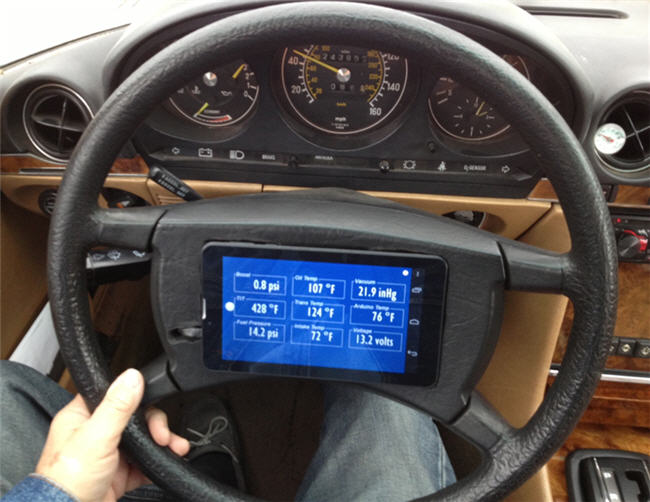
Got the fuel pressure and voltage components up and running on the system. Here's a picture of my latest option in the screen data presentation library which includes the fuel pressure and voltage readings.
 One of the pieces to the solution of mounting the tablet in the steering wheel was to create a "slip ring" for ground. The horn circuit brings power into the steering wheel through two slip rings - one for power in (switched power) and one for power out to the horn which is grounded to the chassis. So I was able to tap the power for the tablet but had no reliable ground. The solution was to create a "slip ring" using a thick piece of copper wire around the steering shaft and a small ground wire along the outside of the steering tube to a ground behind the dash. Not the best solder job, but serviceable for a ground. 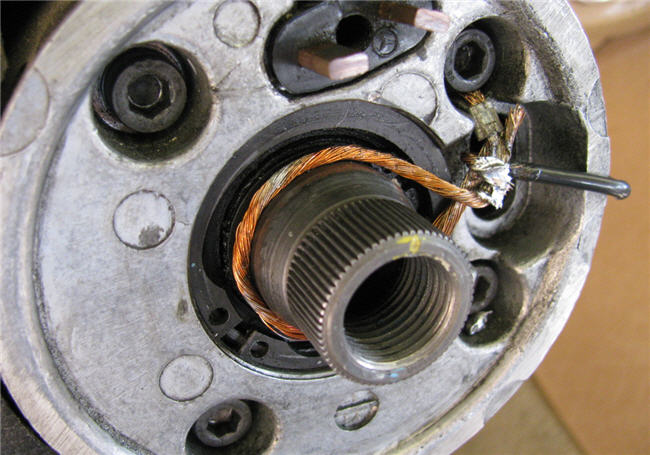 Since my gauges display is a tablet, I've also got apps running for a heads up display and navigation. 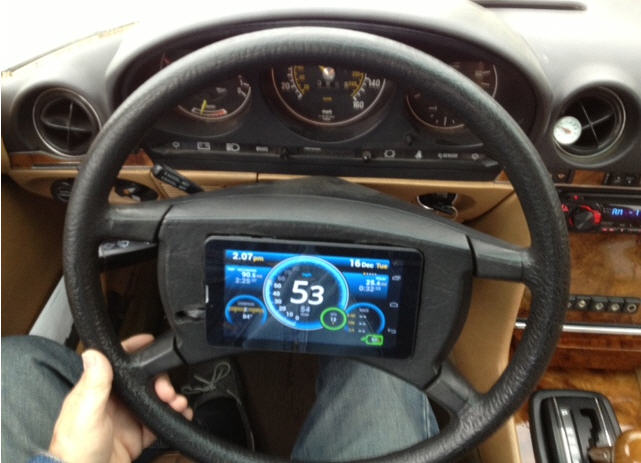 After my experience last summer with the alternator going out without warning and my propensity to extend filter changes, having volts and fuel pressure data readily available is a very comforting feeling. I'm convinced that a lot of my early problems were due to the HTC phone I was using for a data display. The new system is totally reliable and I was able to double the packet rate with no ill effects. I still need to mill a bracket for the fuel pressure transducer to make the physical installation complete.
__________________
Current Stable

|
|
#2
12-18-2014, 06:47 PM
|
||||
|
||||
|
My only problem would be browsing the web while driving. Motorcycle crash videos, all day long.
That's cool man. When's the kit available? With Bluetooth for our phones?
|
|
#3
04-19-2015, 11:08 PM
|
||||
|
||||
|
I was doing some work on the Arduino part of the project today. It seems that the intake, trans, oil and engine bay temperatures all fail after about 5 minutes of running. These are all DS18B2 sensors that run on a one-wire bus - so the problem is finding out whether there is a bad sensor, bad connection or a problem with the Arduino itself. Preliminary troubleshooting says it's the trans sensor that is flakey.
While I was out there I thought it would be fun to see if I could get a screen capture of the system in operation - even though the above referenced temps are not showing accurately. So I did a search and found an app that looked like it would work. Here is a quick YouTube video showing the Gauges program in operation. A couple of things to keep in mind - first the three temps that are showing are not connected to the right gauge, second the screen capture program is forcing the Gauges program to restart when switching between apps - this does not normally happen and finally the capture program is working at 8fps so it is a little jerky and its resolution is 1/4 of the screen resolution so it appears quite pixelated compared to the actual and since I'm testing the free version it has a watermark on it. But should provide a pretty good idea of how it works. http://youtu.be/99d51kPf7qU
__________________
Current Stable
|
|
#4
06-01-2015, 02:00 PM
|
|||
|
|||
|
Awesome project. Do you do have any of this documented, at least from a hardware perspective, other than on this thread?
Does your app implement any data logging or audible alarms? I am familiar with the electronics side of this, but have no idea where to start with Android development. Any recommendations?
|
|
#5
06-01-2015, 02:20 PM
|
||||
|
||||
|
Quote:
No data logging or audible alarms, though this would likely be trivial to do on the Android side, and a bit more complex on the Arduino side. Android development is quite easy using a programming environment called Processing, that uses a C-like syntax. It's optimized for graphical apps so it's perfect for this kind of project. The most difficult part of the entire project was getting the Bluetooth working to be able to pass data packets to the tablet. After that it was just straightforward.
__________________
Current Stable
|
|
#6
06-24-2015, 04:12 PM
|
|||
|
|||
|
Something you might find interesting
Ran across this while researching a like project for my 107:
Microcontroller Boards A couple of ruggedized or thermo resistant Arduino boards. I'm in Phoenix, and the heat is a factor, so I'm interested. If you've got your board in the engine bay, you might be interested also. Hope this helps someone. Scott
__________________
Remember, it's not just a car. It's an Adventure.
|
|
#7
07-05-2015, 10:07 PM
|
||||
|
||||
|
If the drain plug is ferrous or magnetic, shavings might cling to the threads and mess up the bung with each removal. Or do millions of drain plugs with magnets suggest this isn't a problem?
Sixto MB-less
|
|
#8
07-05-2015, 10:22 PM
|
||||
|
||||
|
No, the magnets won't interfere with the signal. Magnetic drain plugs are so common I can't imagine that's a problem. And on mine, the magnetism goes away as soon as he probe is removed so cleaning will be even easier.
__________________
Current Stable
|
|
#9
07-06-2015, 06:31 PM
|
||||
|
||||
|
Got the oil changed today, so in the process swapped in the modified oil plug and hooked up the new sensor.
I had a one-in-four chance of having the internal ID of the new sensor occupy the same space as the original sensor and bingo, it did - no software modifications needed. A quick test drive showed things working as desired.  It will be interesting to see if I get any oil temp readings that are substantially different from the previous configuration.
__________________
Current Stable
|
|
#10
07-13-2015, 07:48 PM
|
||||
|
||||
|
Bump
To be able to find and read when I can Comprehend
(AALD)[ At A Later Date] Thanks
__________________
'84 300SD sold 124.128
|
|
#11
07-05-2015, 09:55 PM
|
||||
|
||||
|
Will the magnets mess with the temperature signal?
How tight a fit is the probe in the hollow plug? Will a dab of heat transfer paste such as used between PC CPU and heat sink improve the signal? Sixto MB-less
|
|
#12
07-21-2015, 02:46 PM
|
||||
|
||||
|
Very cool instrumentation project!
I'm curious too about the air intake changes, and valve cover breather you've set up here. Did you do another thread on that project?
__________________
1983 W123 300TD US spec Turbo engine, with Euro bumpers and manual climate control, and manual transmission.
|
|
#13
07-21-2015, 03:44 PM
|
||||
|
||||
|
Quote:
__________________
Current Stable
|
|
#15
07-24-2015, 11:54 PM
|
||||
|
||||
|
Quote:
#2 No
__________________
Current Stable
Last edited by mach4; 07-25-2015 at 12:05 AM.
|
 |
| Bookmarks |
|
|


 Hybrid Mode


