Parts Catalog Accessories Catalog How To Articles Tech Forums
Call Pelican Parts at 888-280-7799
Shopping Cart Cart | Project List | Order Status | Help


Go Back   PeachParts Mercedes-Benz Forum > Do It Yourself Links & Resources > Restoration Projects & Long-Term Builds

Reply
 
LinkBack Thread Tools Display Modes
  #1  
Old 12-11-2015, 02:38 PM
Save the manuals!
 
Join Date: Jan 2006
Location: .
Posts: 3,485
#doingwagonthings

Reply With Quote
  #2  
Old 12-11-2015, 03:29 PM
Registered User
 
Join Date: Jun 2013
Location: Rochester NY
Posts: 282
Cool project, I thought 300Es came with a 717.430 though. Probably a stronger box than .411plus bigger clutch.
Reply With Quote
  #3  
Old 02-28-2016, 07:05 AM
Save the manuals!
 
Join Date: Jan 2006
Location: .
Posts: 3,485
These are some additional pictures of the 5 speed swap. This is the wiring for the NSS and the reverse lights. I never hooked up the clutch interlock so the car will still start in gear. I took these pictures from the donor car and wired it exactly the same in the 91.


Reply With Quote
  #4  
Old 02-28-2016, 01:01 PM
Stretch's Avatar
...like a shield of steel
 
Join Date: Sep 2009
Location: Somewhere in the Netherlands
Posts: 14,461
Do you want the part number for the plug for the reverse lights?
__________________
1992 W201 190E 1.8 171,000 km - Daily driver
1981 W123 300D ~ 100,000 miles / 160,000 km - project car stripped to the bone
1965 Land Rover Series 2a Station Wagon CIS recovery therapy!
1961 Volvo PV544 Bare metal rat rod-ish thing

I'm here to chat about cars and to help others - I'm not here "to always be right" like an internet warrior


Don't leave that there - I'll take it to bits!
Reply With Quote
  #5  
Old 02-29-2016, 05:01 AM
Save the manuals!
 
Join Date: Jan 2006
Location: .
Posts: 3,485
Quote:
Originally Posted by Stretch View Post
Do you want the part number for the plug for the reverse lights?
I do not. It looks like that might be some aftermarket plug that the PO on the 87 donor car adapted to work. I left the plug alone and spliced the wires into the 91 wiring.
Reply With Quote
  #6  
Old 03-12-2016, 09:56 AM
Save the manuals!
 
Join Date: Jan 2006
Location: .
Posts: 3,485
Quote:
Originally Posted by Stretch View Post
Do you want the part number for the plug for the reverse lights?
Ok I need to work on my reading comprehension... If you have the PN handy I would like it
Reply With Quote
  #7  
Old 03-13-2016, 02:10 PM
Stretch's Avatar
...like a shield of steel
 
Join Date: Sep 2009
Location: Somewhere in the Netherlands
Posts: 14,461
Quote:
Originally Posted by gatorblue92 View Post
Ok I need to work on my reading comprehension... If you have the PN handy I would like it
I'll go and read it off the plug in my car some time this week
__________________
1992 W201 190E 1.8 171,000 km - Daily driver
1981 W123 300D ~ 100,000 miles / 160,000 km - project car stripped to the bone
1965 Land Rover Series 2a Station Wagon CIS recovery therapy!
1961 Volvo PV544 Bare metal rat rod-ish thing

I'm here to chat about cars and to help others - I'm not here "to always be right" like an internet warrior


Don't leave that there - I'll take it to bits!
Reply With Quote
  #8  
Old 03-12-2016, 10:08 AM
Save the manuals!
 
Join Date: Jan 2006
Location: .
Posts: 3,485
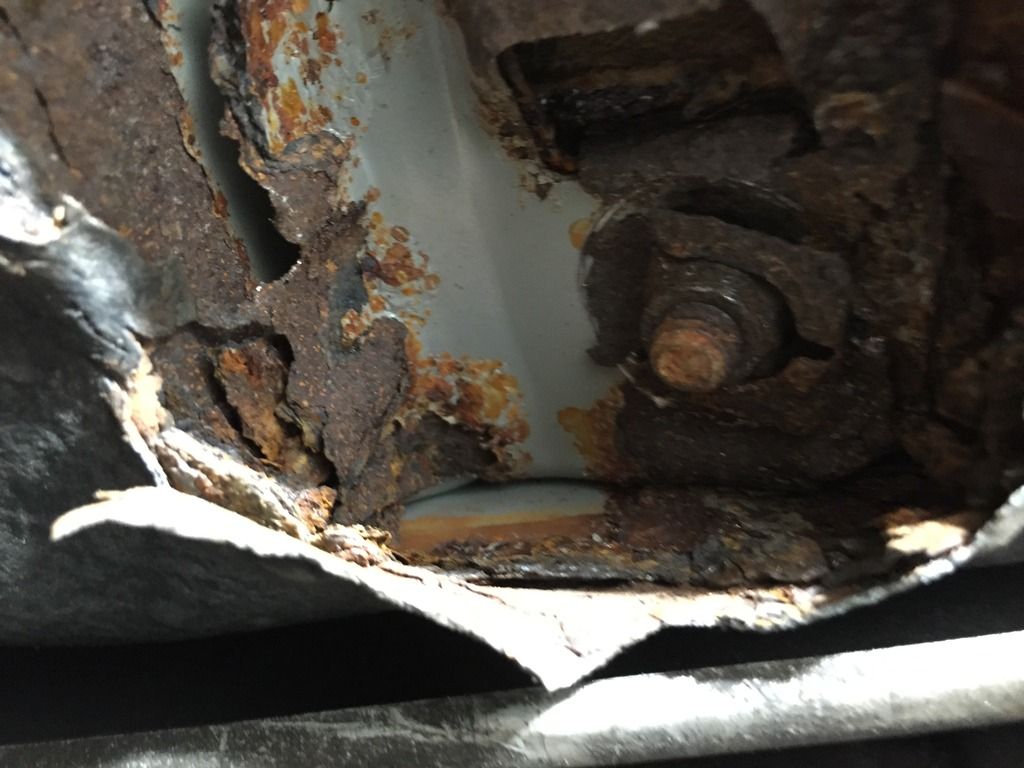
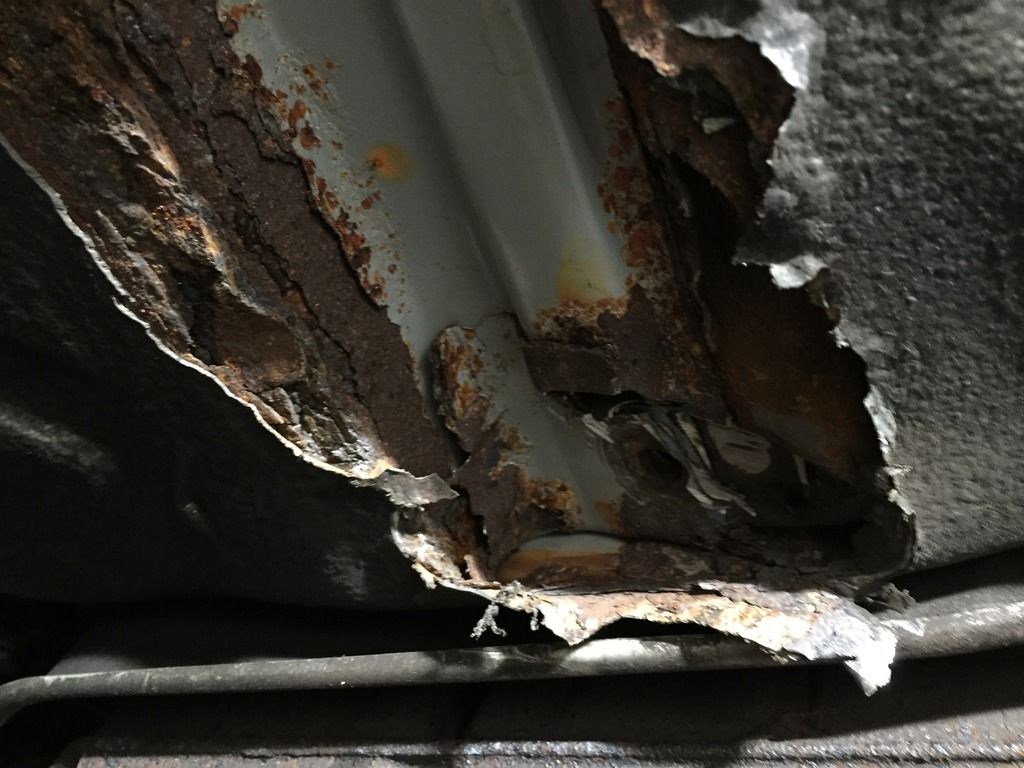
Getting ready for my next project...

Reply With Quote
  #9  
Old 03-14-2016, 05:20 PM
euroamg's Avatar
Registered User
 
Join Date: Aug 2003
Location: BC,WA
Posts: 578
Quote:
Originally Posted by gatorblue92 View Post
Getting ready for my next project...


Rusty floor plan on the TE? I never removed any of the floor pans on my parts car before... Maybe i should start saving some of them right now..

Seeing your car with the 5 speed made me miss driving the te's.. I'll get them warmed up just in time for springtime...
__________________
'76 300D
'82 230CE
'84 300DT
'91 300D 2.5
'86 300D 5 speed
'86 250D 5 speed
'90 300E 24v
'88 560SEC
300TE euro 5 speed
91 350SD
http://i75.photobucket.com/albums/i3...d6605222-1.jpg
Reply With Quote
  #10  
Old 03-16-2016, 04:48 PM
Save the manuals!
 
Join Date: Jan 2006
Location: .
Posts: 3,485
Quote:
Originally Posted by euroamg View Post
Rusty floor plan on the TE? I never removed any of the floor pans on my parts car before... Maybe i should start saving some of them right now..

Seeing your car with the 5 speed made me miss driving the te's.. I'll get them warmed up just in time for springtime...

Yes the rear mounts for the drivers seat are rotted out. I cut the part above out of a 95? sedan so it should weld right in. There was a bit of rust that was repaired before I bought the car on the passenger side and it will still need some rust repair around one of the rear windows where these all seem to have some rust. Its a never ending battle but at least the car isn't exposed to winter driving and the salt that comes with it anymore.
Reply With Quote
  #11  
Old 03-27-2016, 12:04 PM
Save the manuals!
 
Join Date: Jan 2006
Location: .
Posts: 3,485
Facebook was kind enough to remind me I have had this car for two years now. I think that aside from the 240D which is a keeper for life this is a record for length of time I have owned a car.

Reply With Quote
  #12  
Old 04-03-2016, 07:50 AM
Save the manuals!
 
Join Date: Jan 2006
Location: .
Posts: 3,485
And so it begins again...

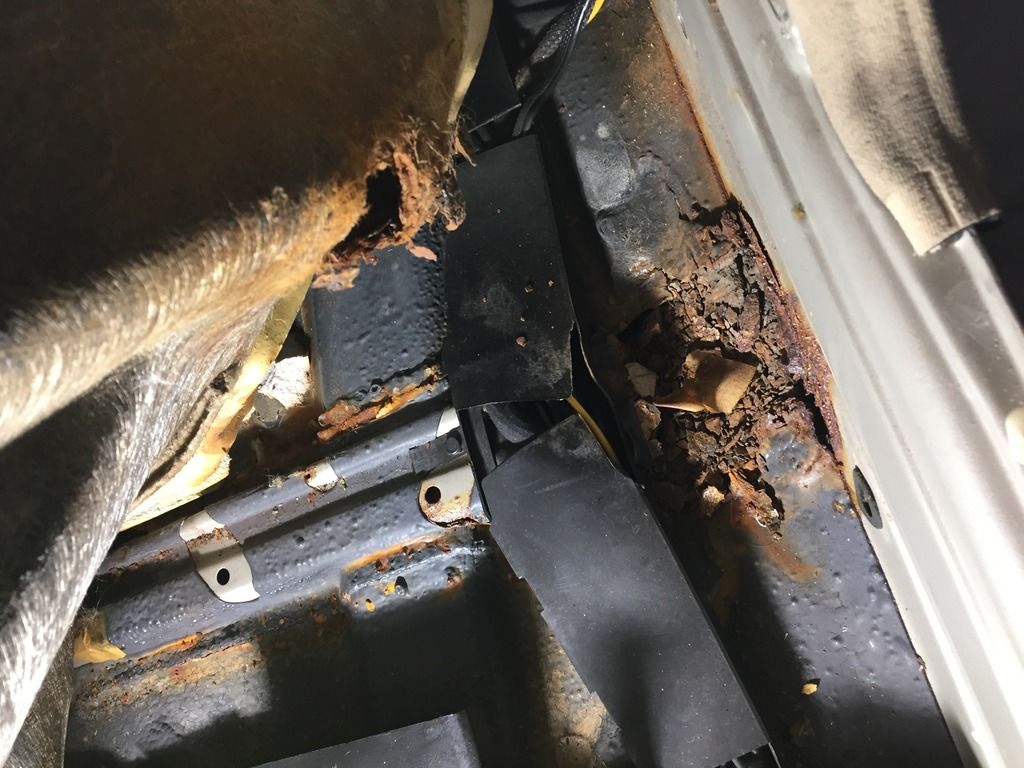
I have finally decided to tackle the rust issues on my 300TE which appear to be a bit extensive on the floorpan. I already have a good part I removed from another member's parts car (Thanks Hanno) to weld in.

This saga began last summer when I went over a bump and felt the driver seat shift a bit. It seems that the rear outboard seat mount rusted thru the floor and fell all the way through. Upon closer inspection the floor had begun to rot out under the seat mount brace so I knew it would need to be tackled at some point. So far I have removed the driver seat and begun to see what I'm dealing with. Its not pretty but it should be repairable. The car had some more extensive rust repairs done before I bought it which are holding up perfectly.

Nest steps are going to involve removing the passenger seat and center console so I can get the entire carpet out to have more room to work and see if I can salvage the carpet.


Reply With Quote
  #13  
Old 04-03-2016, 05:25 PM
euroamg's Avatar
Registered User
 
Join Date: Aug 2003
Location: BC,WA
Posts: 578
Nice to have replacement panels to patch the rust areas.. Looking forward to the cutting & welding :-) Your TE looks great!
__________________
'76 300D
'82 230CE
'84 300DT
'91 300D 2.5
'86 300D 5 speed
'86 250D 5 speed
'90 300E 24v
'88 560SEC
300TE euro 5 speed
91 350SD
http://i75.photobucket.com/albums/i3...d6605222-1.jpg
Reply With Quote
  #14  
Old 04-03-2016, 06:52 PM
Save the manuals!
 
Join Date: Jan 2006
Location: .
Posts: 3,485
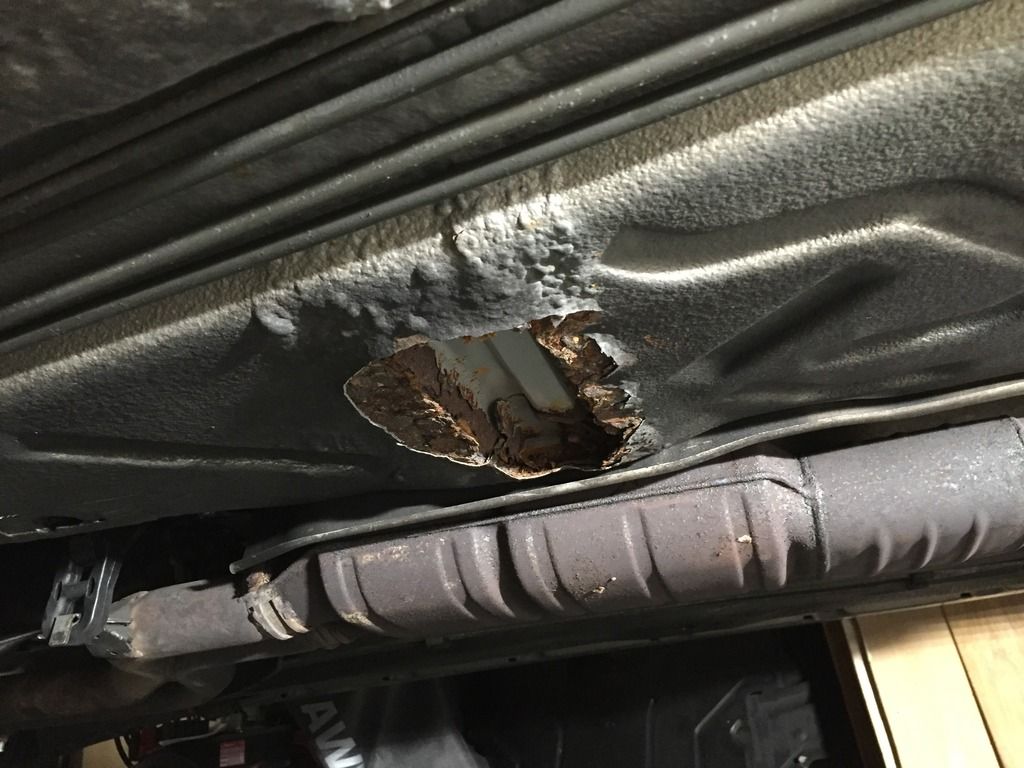
Made some good progress today but I also found another rust spot at the rear of the floorpan


Reply With Quote
  #15  
Old 04-17-2016, 07:27 AM
Save the manuals!
 
Join Date: Jan 2006
Location: .
Posts: 3,485
Made a ton of progress yesterday. Cut all of the rust out under the drivers seat and got the patch panel welded in. Didn't get any pictures of the finished product. Today's work will include the rear rust and paint on the front section.


Reply With Quote
Reply

Bookmarks


Posting Rules
You may not post new threads
You may not post replies
You may not post attachments
You may not edit your posts

BB code is On
Smilies are On
[IMG] code is On
HTML code is Off
Trackbacks are On
Pingbacks are On
Refbacks are On


All times are GMT -4. The time now is 03:41 AM.


Powered by vBulletin® Version 3.8.7
Copyright ©2000 - 2025, vBulletin Solutions, Inc.
Search Engine Optimization by vBSEO 3.6.0
Copyright 2024 Pelican Parts, LLC - Posts may be archived for display on the Peach Parts or Pelican Parts Website -    DMCA Registered Agent Contact Page