

|
|
|
|
|
|
|
|
#1
 05-28-2014, 10:50 PM
|
||||
|
||||
|
I'll lend my chain crimper tool and my pin puller in exchange for borrowing the tested and approved chain guide. I have two 300SD timing chains to do this summer.
__________________
1977 Red 240D ( Squished by a 18 Wheeler ) 1976 Black 240D ( Sold ) 1991 White 420SEL ( Sold ) 1987 Black 560SEL ( Sold ) 1983 White 300SD ( Sold ) 1984 Blue 300SD ( Sold ) 2014 Red Chevy Cruze Diesel ( New Hotness ) 
|
|
#2
05-28-2014, 11:03 PM
|
||||
|
||||
|
Quote:
__________________
Current Stable
|
|
#3
07-17-2014, 10:53 PM
|
||||
|
||||
|
Well I can report that the Mach4 Chain Tool ver 1 works like a charm. I tackled the job today with some level of trepidation, but like everything the job went way smoother than anticipated. Not knowing how much tension is on the chain during the process, I clearly over-engineered the tool, but better that than slipping a link!
I first mounted the tool on the engine.  I then isolated the grinding area as much as possible to prevent grinding dust from getting into the engine and to prevent anything from dropping down into the engine.  I used a Dremel with a cutoff wheel to remove the crimp from the chain. 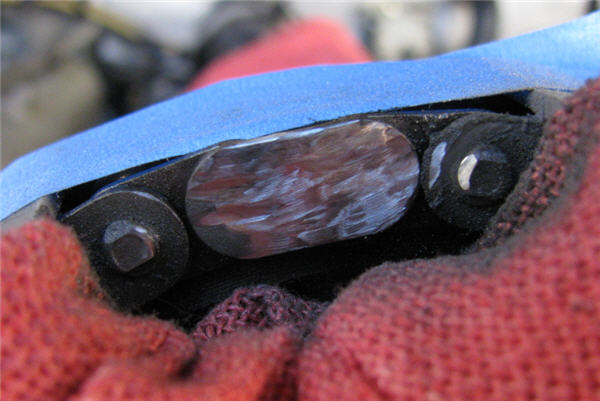 I used a clip on master link I salvaged from my original SL engine to join the two chains and began dragging the new chain in using the old chain.  When the new chain was in, I set up the new link for crimping. I'm "borrowing" Rollguy's crimper and it should be in tomorrow so I can finish the job.  While I had everything apart I pop tested my injectors, inspected and tested the glow plugs and of course replaced the tensioner spring. I'll also do a valve adjust and re-polish the valve cover before buttoning things up.
__________________
Current Stable
|
|
#4
07-18-2014, 12:10 AM
|
||||
|
||||
|
As usual, awesome job!

__________________
 All Diesel Fleet 1985 R107 300SLD TURBODIESEL 2005 E320 CDI (daily) LOTS of parts for sale! EGR block kit http://www.peachparts.com/shopforum/diesel-discussion/355250-sale-egr-delete-block-off-plate-kit.html 1985 CA emissions 617 owners- You Need This! Sanden style A/C Compressor Mounting Kit for your 616/ 617 For Sale + Install Inst. Sanden Instalation Guide (post 11): http://www.peachparts.com/shopforum/diesel-discussion/367883-sanden-retrofit-installation-guide.html
|
|
#5
07-19-2014, 02:53 PM
|
||||
|
||||
|
The crimp tool really does a quality job. The crimp made by the tool is virtually indistinguishable from those on the rest of the chain.
 I was initially thoroughly confused about how the crimper works in that there are two positions for the crimping die. The first is to press the link onto the chain. And the other is to actually make the crimp. It's completely obvious once you understand the design, but it took me a bit to figure it out. Hopefully this will help someone else avoid the confusion for their job.  My polished valve cover had gotten kind of drab and oxidized, so I took the opportunity to throw a little aluminum polish on it to bring it back to life.  Since the chain tool works so well, I'll make it available in the tool rental on this site. It truly makes a two person job easy and safe for one person.
__________________
Current Stable
|
|
#7
07-19-2014, 08:59 PM
|
||||
|
||||
|
Quote:
__________________
All Diesel Fleet 1985 R107 300SLD TURBODIESEL 2005 E320 CDI (daily) LOTS of parts for sale! EGR block kit http://www.peachparts.com/shopforum/diesel-discussion/355250-sale-egr-delete-block-off-plate-kit.html 1985 CA emissions 617 owners- You Need This! Sanden style A/C Compressor Mounting Kit for your 616/ 617 For Sale + Install Inst. Sanden Instalation Guide (post 11): http://www.peachparts.com/shopforum/diesel-discussion/367883-sanden-retrofit-installation-guide.html
|
|
#8
07-19-2014, 11:48 PM
|
||||
|
||||
|
Quote:
The other face has the bevels for applying the crimp. I've got the tool packed up for shipping back, but I might open it up to take a better picture.
__________________
Current Stable
|
 |
| Bookmarks |
|
|


 Hybrid Mode


