

|
|
|
|
|
|
|||||||
 |
|
|
LinkBack | Thread Tools | Display Modes |
|
|
|
#1
 08-31-2012, 03:06 PM
|
||||
|
||||
|
Quote:

__________________
Current Stable

|
|
#2
08-31-2012, 04:12 PM
|
||||
|
||||
|
I'm keeping the existing JD head and fit the hard line fittings to the existing w123 hose setup.
This is the discharge - high side line fitting that I will bend to attach to the lower hose going underneath the front pulley.  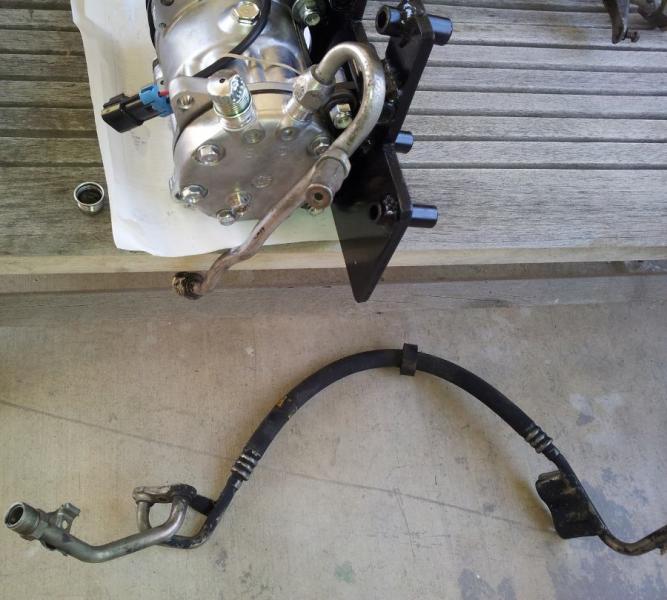 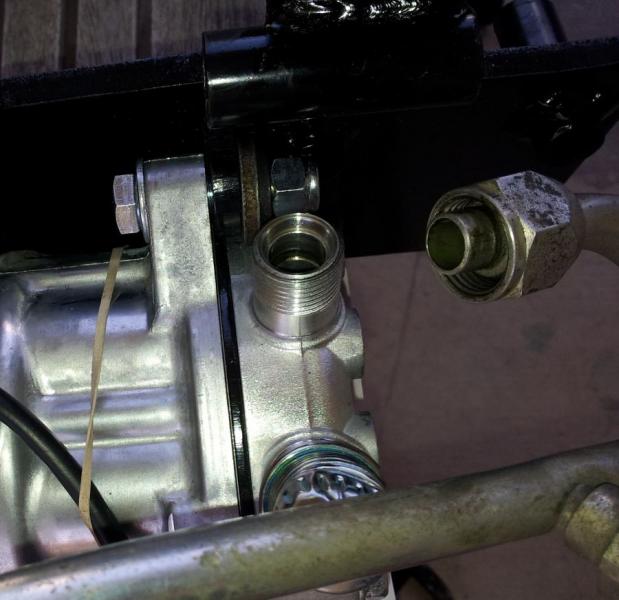 For suction - low side line, I'm going to cut the stock hard coupling to the upper low side line and braze the compressor fitting to it. .
__________________
1983 123.133 California - GreaseCar Veg System 
Last edited by DeliveryValve; 08-31-2012 at 04:49 PM.
|
|
#3
08-31-2012, 04:41 PM
|
|||
|
|||
|
Quote:

__________________
'98 E300 Turbo "Juliette" '85 Federal 300TD
|
|
#4
08-31-2012, 04:54 PM
|
||||
|
||||
|
Quote:
.
__________________
1983 123.133 California - GreaseCar Veg System
|
|
#5
04-30-2013, 03:48 AM
|
||||
|
||||
|
Quote:
The GH rear head has the similar manifold pad as the R4 setup. The advantage is that it can use the same hoses as in the stock with a little modifications. The GH rear head will put the Sanden compressor 90° towards the passenger side and will use sealing washers to seal the connection. In researching more, I think the QC head would use the same type of O-Rings as in the original Harrison R4. Here are pics of the GH rear head setup.  Shot of the GH rear head.   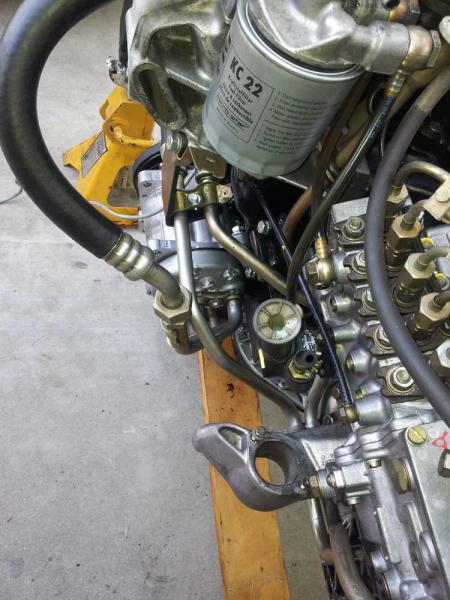  .
__________________
1983 123.133 California - GreaseCar Veg System
|
|
#6
04-30-2013, 03:54 AM
|
||||
|
||||
|
This pic shows how much I bent the modified manifold to make it work with the Sanden. EDIT: this pic shows the bottom of the compressor.
 The oil cooler lines had to be placed closer to the engine block in order for the Suction line to clear the side.  The discharge lower rubber hose will need to be lengthen to be properly seated underneath the fan shroud as in the stock setup. 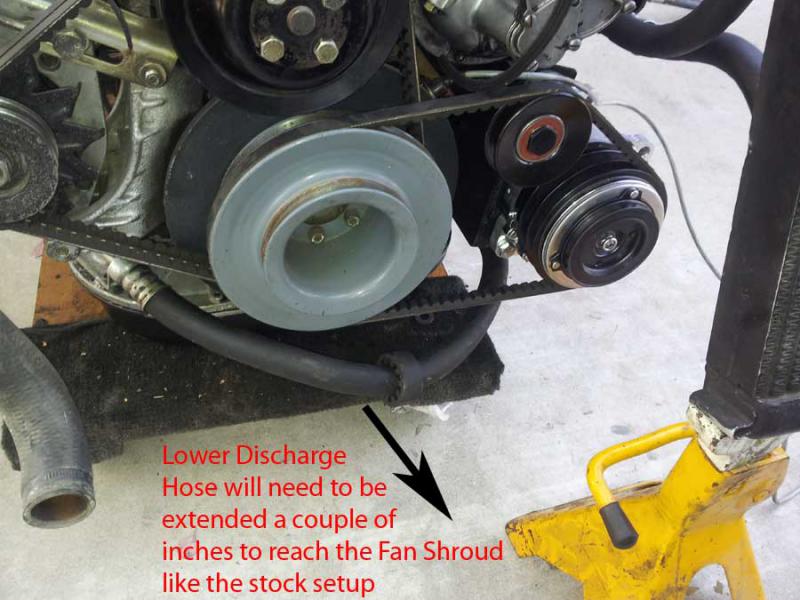 The GH head uses a smaller diameter center mounting bolt. To prevent potential movement, I made a bushing to close the gap on the manifold. 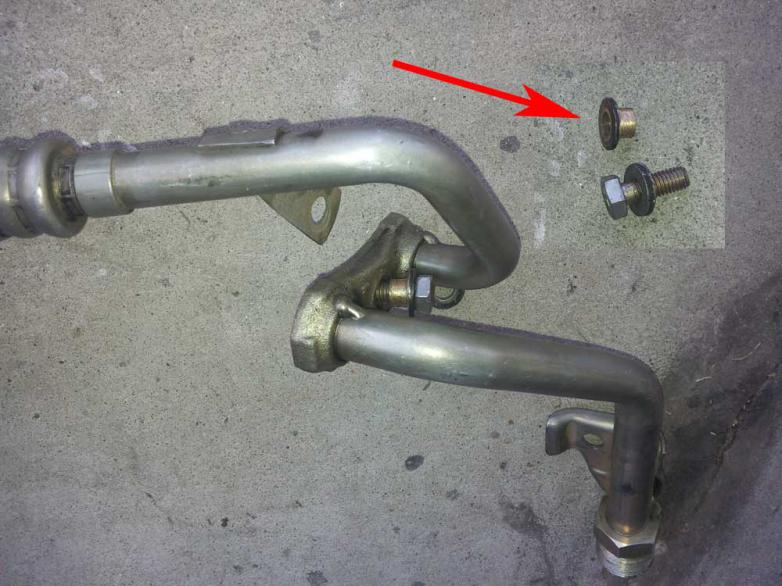 I have a ways to go with this project. I still need to rip apart the dash so I can clean out the evaporator. I'm dreading this task and just dragging my feet on it. I'm putting in new hoses and a new parallel condenser that larger than my existing one. I'm looking forward to when this done. .
__________________
1983 123.133 California - GreaseCar Veg System
Last edited by DeliveryValve; 05-09-2013 at 10:32 PM.
|
|
#7
04-30-2013, 09:54 AM
|
||||
|
||||
|
Quote:
__________________
 All Diesel Fleet 1985 R107 300SLD TURBODIESEL 2005 E320 CDI (daily) LOTS of parts for sale! EGR block kit http://www.peachparts.com/shopforum/diesel-discussion/355250-sale-egr-delete-block-off-plate-kit.html 1985 CA emissions 617 owners- You Need This! Sanden style A/C Compressor Mounting Kit for your 616/ 617 For Sale + Install Inst. Sanden Instalation Guide (post 11): http://www.peachparts.com/shopforum/diesel-discussion/367883-sanden-retrofit-installation-guide.html
|
|
#8
04-30-2013, 10:22 AM
|
||||
|
||||
|
I recently purchased a GH head and compressor. These are enroute and I hope to have pics by the middle of next week. My pics though will be with the engine IN the car.
Thanks, DeliveryValve, for your assistance.
__________________
daw_two Germantown, TN Links: Sold last car --- 05/2012 1984 300D Light Ivory, Red interior No longer selling Cluster Needles Paint No longer selling New Old Stock (NOS) parts Past: 3/2008 1986 300SDL "Coda" 04/2010 1965 190D(c) "Ben" & many more
|
|
#9
04-30-2013, 11:43 AM
|
||||
|
||||
|
Quote:
The way the MB fittings are made its all but impossible to reuse the barb to attach a new hose. The ferrule appears to be welded on. 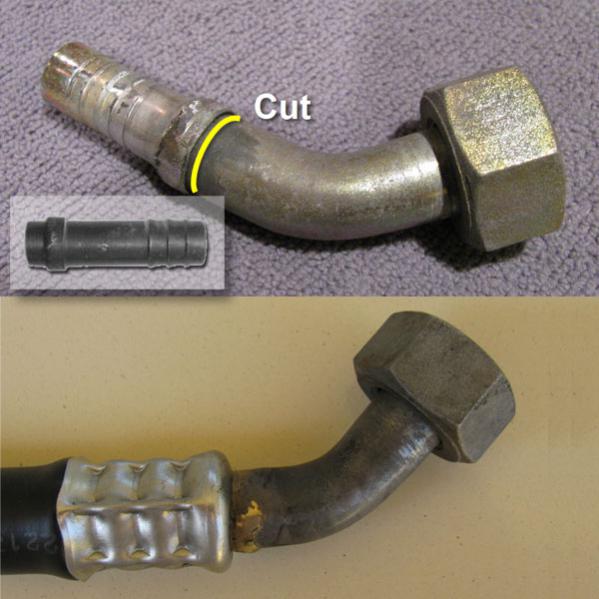 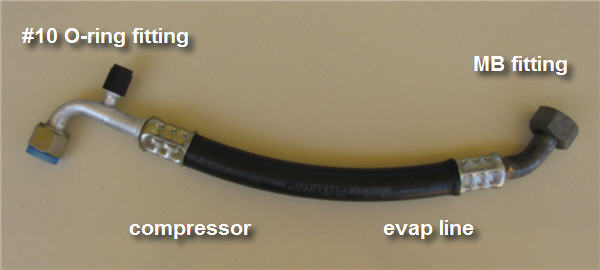
__________________
Current Stable
|
|
#10
04-30-2013, 04:54 PM
|
||||
|
||||
|
Quote:
Quote:
Quote:
I planned to replace the hose regardless because the existing hose is pretty much original. So since I'm doing that, I'll just have them add a couple of inches in length. BTW - I have an extra GH rear plate with a slightly buggard thread (but still holds fine) on the center bolt hole that I can sell for cheap. I can also shape/bend another stock manifold fitted to Rollguy's Gen 1 Sanden bracket and have the a/c shop replace the additional hose since I'm doing mine. If interested, PM me. .
__________________
1983 123.133 California - GreaseCar Veg System
Last edited by DeliveryValve; 04-30-2013 at 08:29 PM.
|
|
#11
04-30-2013, 05:26 PM
|
||||
|
||||
|
Quote:
__________________
All Diesel Fleet 1985 R107 300SLD TURBODIESEL 2005 E320 CDI (daily) LOTS of parts for sale! EGR block kit http://www.peachparts.com/shopforum/diesel-discussion/355250-sale-egr-delete-block-off-plate-kit.html 1985 CA emissions 617 owners- You Need This! Sanden style A/C Compressor Mounting Kit for your 616/ 617 For Sale + Install Inst. Sanden Instalation Guide (post 11): http://www.peachparts.com/shopforum/diesel-discussion/367883-sanden-retrofit-installation-guide.html
|
|
#12
08-31-2012, 07:06 PM
|
||||
|
||||
|
Quote:
__________________
All Diesel Fleet 1985 R107 300SLD TURBODIESEL 2005 E320 CDI (daily) LOTS of parts for sale! EGR block kit http://www.peachparts.com/shopforum/diesel-discussion/355250-sale-egr-delete-block-off-plate-kit.html 1985 CA emissions 617 owners- You Need This! Sanden style A/C Compressor Mounting Kit for your 616/ 617 For Sale + Install Inst. Sanden Instalation Guide (post 11): http://www.peachparts.com/shopforum/diesel-discussion/367883-sanden-retrofit-installation-guide.html
|
|
#13
09-03-2012, 02:18 AM
|
||||
|
||||
|
I had some time today to mock up the compressor on a spare motor.
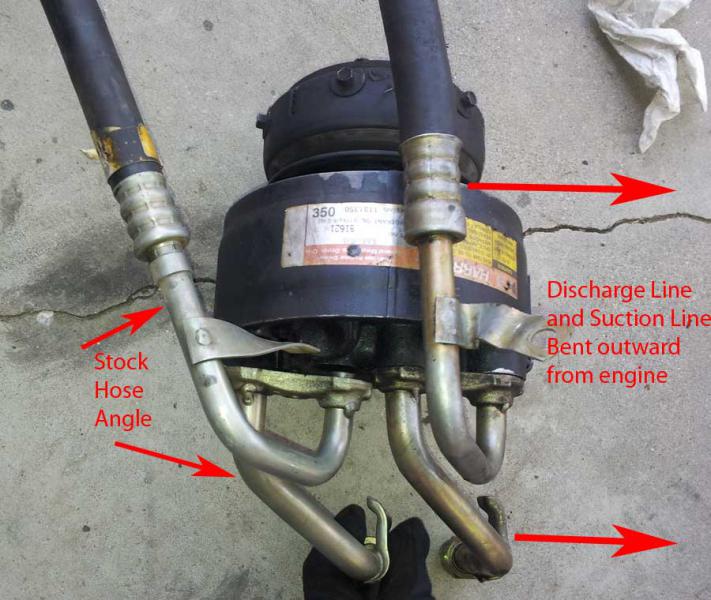
Alignment looks good, except for the belt sizing for my specific compressor. Rich, what is the belt size that we have here? I am going to need a shorter diameter belt.  The compressor I'm using is a Sanden 7h15 and according to the Sanden catalog for my particular model, it has a 125mm pulley. Once installed and up and running, I have no doubt this belt will stretch. To tighten it up more, the tensioner pulley will eventually hit the vacuum pump.  On another note, check out how small this Sanden 7h15 is compared to this original Harrison R4.   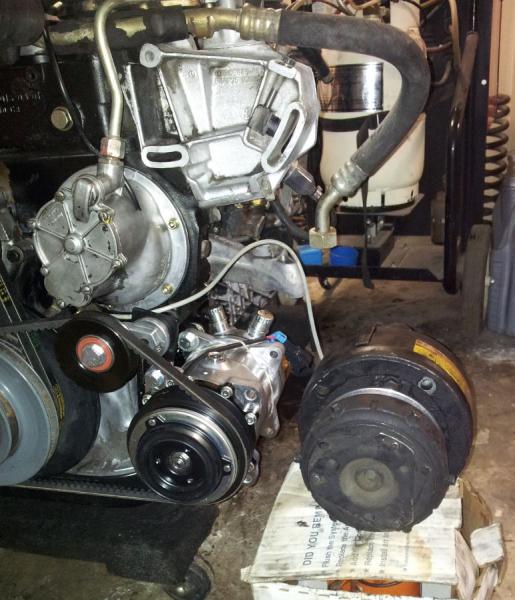 .
__________________
1983 123.133 California - GreaseCar Veg System
|
|
#14
09-03-2012, 02:44 AM
|
|||
|
|||
|
That is a nice tidy compact unit compared to the monster it replaced.
Too bad this wasn`t installed from the factory. Charlie
__________________
there were three HP ratings on the OM616... 1) Not much power 2) Even less power 3) Not nearly enough power!! 240D w/auto Anyone that thinks a 240D is slow drives too fast. 80 240D Naturally Exasperated, 4-Spd 388k DD 150mph spedo 3:58 Diff We are advised to NOT judge ALL Muslims by the actions of a few lunatics, but we are encouraged to judge ALL gun owners by the actions of a few lunatics. Funny how that works
|
|
#15
09-03-2012, 10:28 AM
|
||||
|
||||
|
Quote:
__________________
All Diesel Fleet 1985 R107 300SLD TURBODIESEL 2005 E320 CDI (daily) LOTS of parts for sale! EGR block kit http://www.peachparts.com/shopforum/diesel-discussion/355250-sale-egr-delete-block-off-plate-kit.html 1985 CA emissions 617 owners- You Need This! Sanden style A/C Compressor Mounting Kit for your 616/ 617 For Sale + Install Inst. Sanden Instalation Guide (post 11): http://www.peachparts.com/shopforum/diesel-discussion/367883-sanden-retrofit-installation-guide.html
|
|
| Bookmarks |
|
|


 Hybrid Mode


