

|
|
|
|
|
|
|||||||
 |
|
|
LinkBack | Thread Tools | Display Modes |
|
#1
 03-09-2014, 03:16 PM
|
||||
|
||||
|
W201 annular axle re-boot – much easier than W123 homokinetic axles!
G'day Folks,
{Sorry for the childish title but I'm in one of my moods} What a difference ten years makes – 1981 W123 vs 1992 W201; if only I'd had bought one of the last W123s, I wouldn't have had the worst job on a W123 ever to contend with => trying to re-boot those bloody homo(kinetic) axles. Annular axle re-boot is in comparison a piece of piss. So here's a few pictures of a W201 annular axle being re-booted with the “original” thick style boots. I reckon these axles are so easy to do it is worthwhile considering these items as service items – every five years in a wet climate – whip 'em off the car; paint 'em up and give 'em a bit of grease! Go on you know you want to – easy weekend job if you get your ducks lined up. It is especially worthwhile considering these items as service items (rather than wait until they break items) when you see what vstech found => w201-w210 rear axles NEED SERVICING!!! It turns out that many axle shafts are left unpainted inside the axle boot (well there's some sort of electroplated coating but it isn't up to the job). If water gets in there – rust – rust eats – twist – dink... This process is covered by the FSM – chapter 35-660. There's a lot of that chapter regurgitated here but I've added in some extra comments though that might make this all worthwhile. In my defence – the W201 FSM is not as well written as the W123 FSM and the pictures are crap. You can remove the axles from your trusty W201 by loosening the bolts that hold the axle onto the differential. 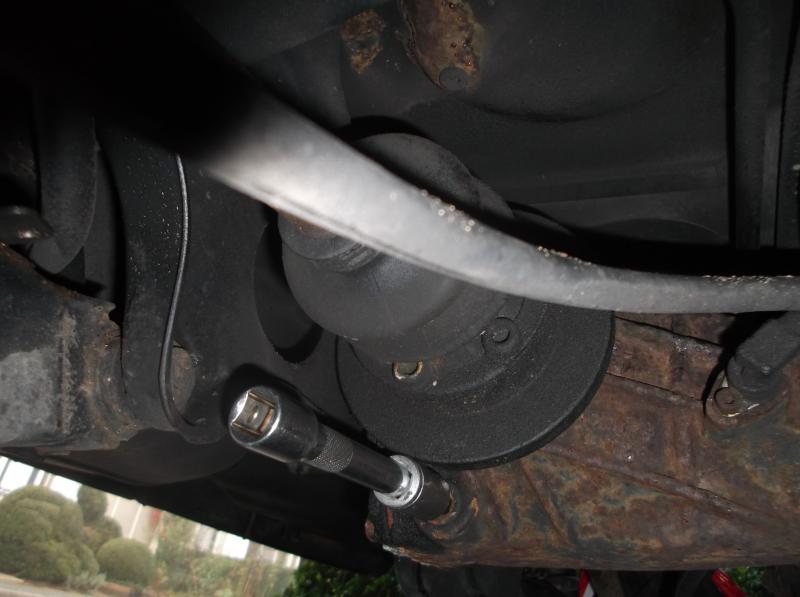 Ignore the socket extension fitted to the differential drain plug in the picture above – concentrate on the bolts you can see next to the axle boot. Please note because I got carried away the pictures below show axle removal with the sub frame removed from the car. Someone once told me I don't have to strip every bloody part of the car just to do the axle boots; but where's the fun in that? I mean where I live a Mercedes just isn't a Mercedes if it still has wheels on it... ...if like me you've also been a bit too keen and you've already yanked the differential off of the sub frame and pulled the C clips from the axle flanges =>  Then you'll have to whack the axle flanges in a vice to remove those bolts  The differential end of the axle looks like this 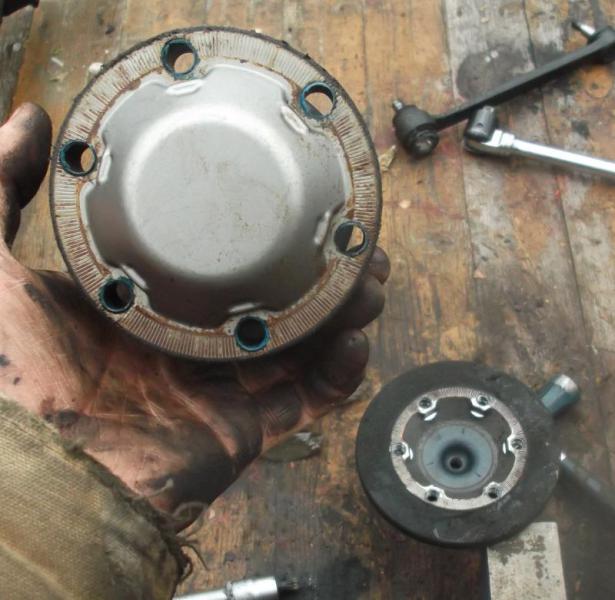 However, with the axles still on the car you need to remove the nut at the wheel   With care you can use a simple three legged puller to push the axle through the hub  In summary the method is => bolts at differential – nut at wheel hub – wiggle – compress – pull out. You might have to raise or lower the back end of the car to get the good angle on the dangle. Cutting the clips carefully as shown makes the least mess    You can then just pull the boots away to see if you have some nasty rust in there – hopefully not   If you decide to do this check with the axle still on the car (this could be done this way in principle) then you're going to need to fit different clamps from the original style shown in the pictures above. Here's a link to a video showing a metal zip-tie-like effort. LINK Installing a Clamp on a CV Boot - YouTube Fitting the original (much tougher) style is shown below in a bit.
__________________
1992 W201 190E 1.8 171,000 km - Daily driver 1981 W123 300D ~ 100,000 miles / 160,000 km - project car stripped to the bone 1965 Land Rover Series 2a Station Wagon CIS recovery therapy! 1961 Volvo PV544 Bare metal rat rod-ish thing I'm here to chat about cars and to help others - I'm not here "to always be right" like an internet warrior  Don't leave that there - I'll take it to bits! Last edited by Stretch; 03-09-2014 at 03:49 PM. Reason: Made a change 
|
|
#2
03-09-2014, 03:16 PM
|
||||
|
||||
|
On with the dismantling.
A small tap with a small hammer and a screw driver releases the end cap at the differential end of the axle.  Clean it up to see the circlip that holds the ball bearing assembly on the end of the axle shaft. The FSM calls this a synchromesh joint I'm not sure if that's a dodgy translation or not. I'm not so good at naming these parts.  Before you remove the circlip you are meant to mark the three parts of the bearing assembly.  The FSM says you are meant to press the axle shaft through this bearing / synchromesh assembly with two shell clamps that split and fit around the shaft. On both of my axles I used a three legged puller to push the axle shaft through the bearing / synchro assembly. Neither of these assemblies were that tight a fit on the shafts.  This is what you get once you pull the boots off. 
__________________
1992 W201 190E 1.8 171,000 km - Daily driver 1981 W123 300D ~ 100,000 miles / 160,000 km - project car stripped to the bone 1965 Land Rover Series 2a Station Wagon CIS recovery therapy! 1961 Volvo PV544 Bare metal rat rod-ish thing I'm here to chat about cars and to help others - I'm not here "to always be right" like an internet warrior Don't leave that there - I'll take it to bits! Last edited by Stretch; 03-09-2014 at 03:23 PM. Reason: Added pictures
|
|
#3
03-09-2014, 03:17 PM
|
||||
|
||||
|
On one of my axles I found evidence of water ingress on the differential side. Very strange wheel side was dry.
 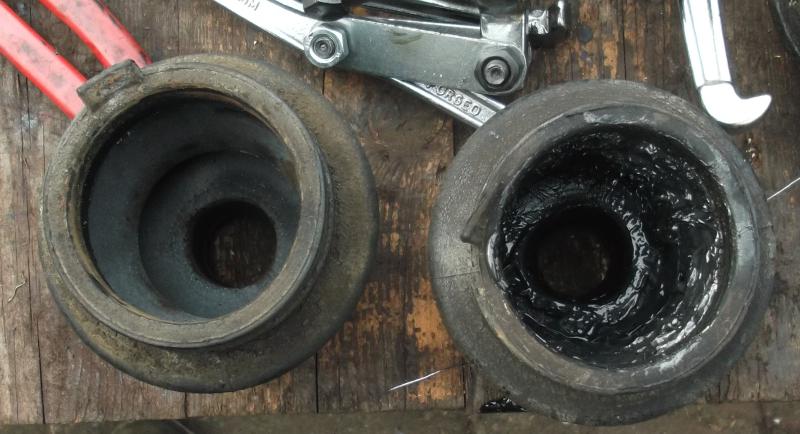 The boot on the right hand side of the picture above was the one that seemed to have gotten wet. The grease felt very different in the dry and wet ends. I reckon the water has mixed with the grease and has been flung on the inside of the boot during use because the viscosity or stick-ability changed.   
__________________
1992 W201 190E 1.8 171,000 km - Daily driver 1981 W123 300D ~ 100,000 miles / 160,000 km - project car stripped to the bone 1965 Land Rover Series 2a Station Wagon CIS recovery therapy! 1961 Volvo PV544 Bare metal rat rod-ish thing I'm here to chat about cars and to help others - I'm not here "to always be right" like an internet warrior Don't leave that there - I'll take it to bits! Last edited by Stretch; 03-09-2014 at 03:26 PM. Reason: Added pictures
|
|
#4
03-09-2014, 03:17 PM
|
||||
|
||||
|
If you are going to be taking your time with this project it is probably worthwhile wrapping up the ball bearings in their race to make sure they don't get lost or damaged. Old disposable gloves can get a second life doing this sort of thing.
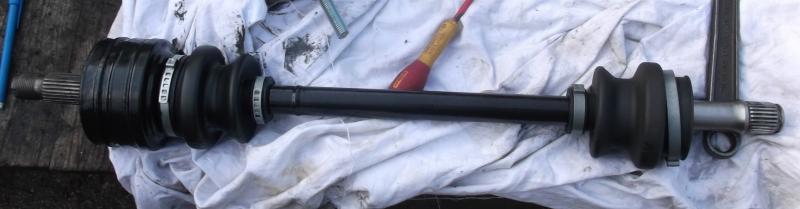
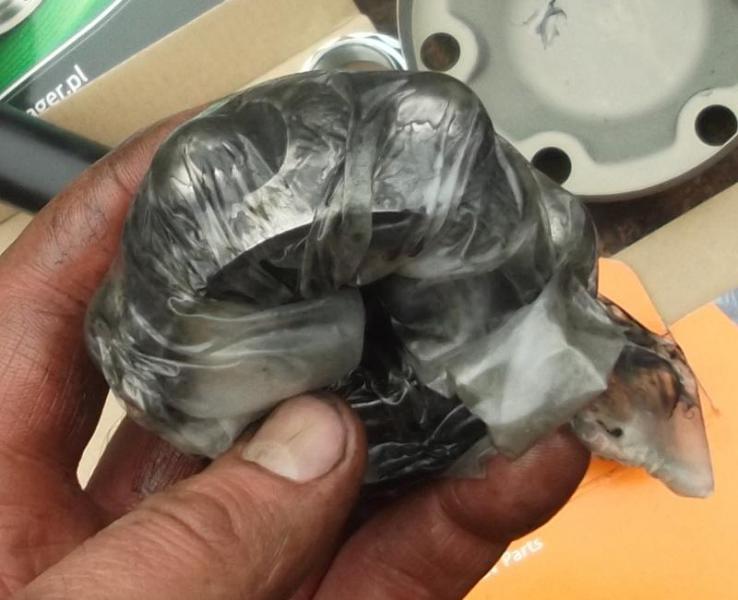 To clean off the surface rust and gunk I used an angle grinder and wire brush attachment. Stuff some bog roll into the can joint that goes into the wheel hub this can not be taken apart {for this service}.  Bit of paint 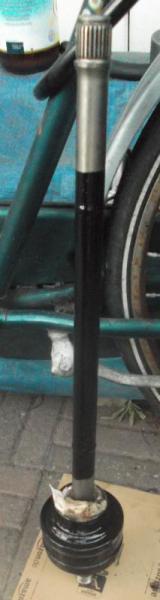 New paint and new boots.  The GKN replacement boots came with a new cover and some bolts for attaching the axle to the differential; whilst the Kager ones just had the boots and the clips. Note these GKN bolts do not come with any thread lock on them. There's been trouble about that... ...don't you forget to fit them with thread lock. 
__________________
1992 W201 190E 1.8 171,000 km - Daily driver 1981 W123 300D ~ 100,000 miles / 160,000 km - project car stripped to the bone 1965 Land Rover Series 2a Station Wagon CIS recovery therapy! 1961 Volvo PV544 Bare metal rat rod-ish thing I'm here to chat about cars and to help others - I'm not here "to always be right" like an internet warrior Don't leave that there - I'll take it to bits! Last edited by Stretch; 03-09-2014 at 03:29 PM. Reason: Added pictures
|
|
#5
03-09-2014, 03:17 PM
|
||||
|
||||
|
Here's a view inside the can side that you can not easily dismantle. The only way to deal with this is to dig out the old grease as best you can and fit in some new.
If anyone discovers new cans for these ends please let me know about them. The W123 cans are too big - and are of a different shape. 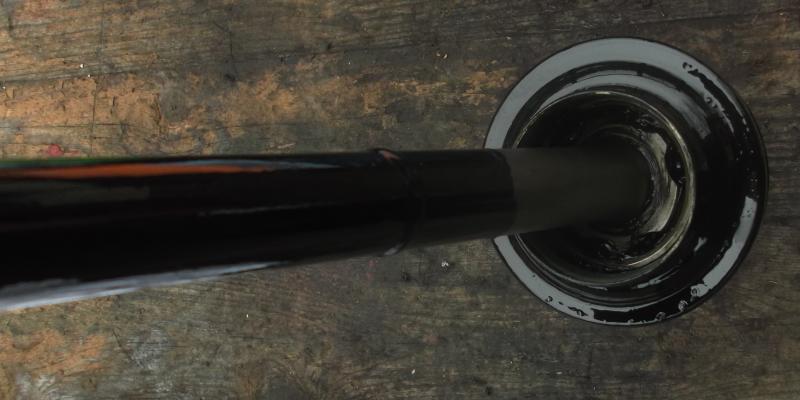 I've decided to ignore the free grease that comes in the boot kits and use some good quality stuff instead.  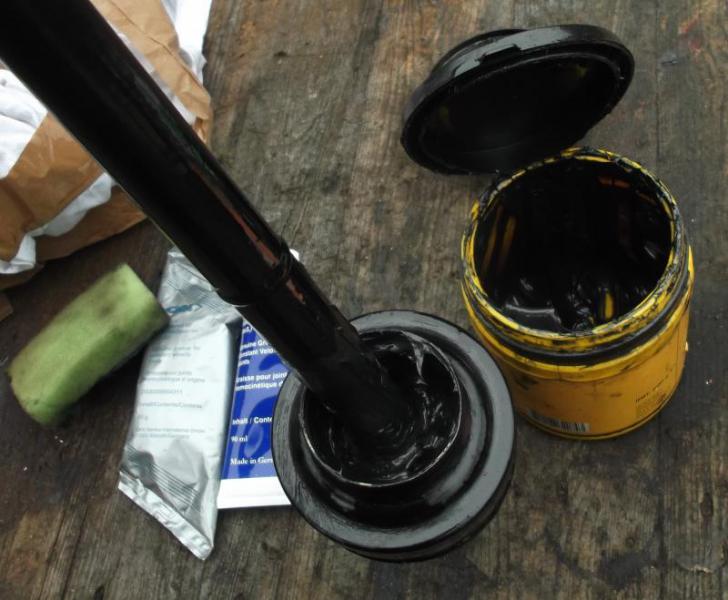 If you are going to use the original clamps you will find that you need to put the clips on the smaller end of the boots before you fit them to the axle shaft. You can't get the clips to hook into the slots on the clamp with the boot fitted on the axle shaft.  The point of restriction is the abutting land at the end of the splined section of the axle shaft 
__________________
1992 W201 190E 1.8 171,000 km - Daily driver 1981 W123 300D ~ 100,000 miles / 160,000 km - project car stripped to the bone 1965 Land Rover Series 2a Station Wagon CIS recovery therapy! 1961 Volvo PV544 Bare metal rat rod-ish thing I'm here to chat about cars and to help others - I'm not here "to always be right" like an internet warrior Don't leave that there - I'll take it to bits! Last edited by Stretch; 03-09-2014 at 03:32 PM. Reason: Added pictures
|
|
#6
03-09-2014, 03:18 PM
|
||||
|
||||
|
The FSM says to use their elongated conical condom-like special tool to fit the boots onto the axle shafts. I've been there before with boot guns and KY jelly and W123 axles – broken fingers and busted boots and frustration can rule your world...
...not worth trying to do that during my life span again... …plan B => build a simple wooden press. EDIT - please note this wooden press is a "make your life easier" suggestion. It isn't 100% necessary. See comment here => W201 annular axle re-boot – much easier than W123 homokinetic axles! 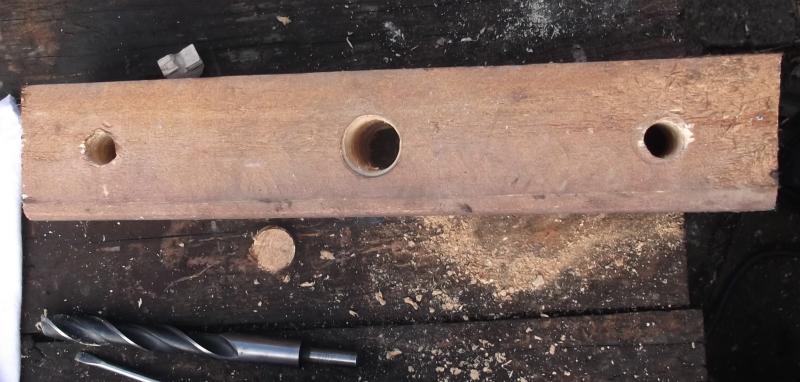  Clips fitted to the boots. Big washer used to spread the load.   All because the lady loves Milk Tray  Finger nails and dignity intact. Take that you rubber bastards!
__________________
1992 W201 190E 1.8 171,000 km - Daily driver 1981 W123 300D ~ 100,000 miles / 160,000 km - project car stripped to the bone 1965 Land Rover Series 2a Station Wagon CIS recovery therapy! 1961 Volvo PV544 Bare metal rat rod-ish thing I'm here to chat about cars and to help others - I'm not here "to always be right" like an internet warrior Don't leave that there - I'll take it to bits! Last edited by Stretch; 03-11-2014 at 04:27 AM. Reason: Added pictures
|
|
#7
03-09-2014, 03:18 PM
|
||||
|
||||
|
Now that the boot on the wheel end has been pushed into place, the boot for the differential end needs to go on with the clip for the axle fitted to the boot. Don't forget to put the boot on the right way round.
 This time the washer used for spreading the load is placed inside the boot 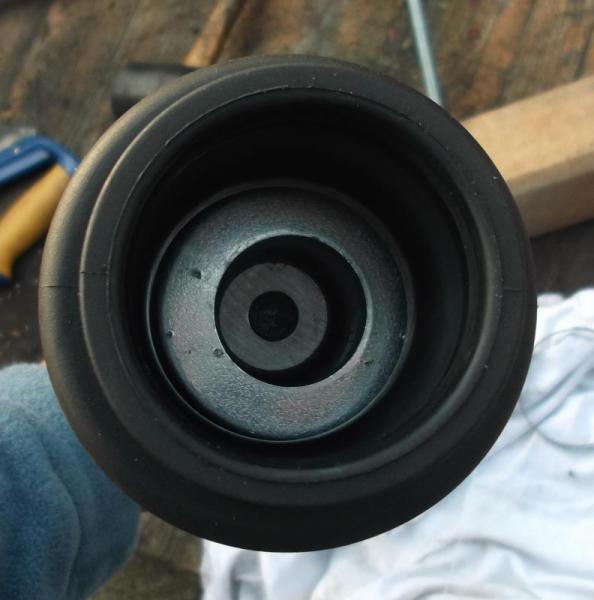 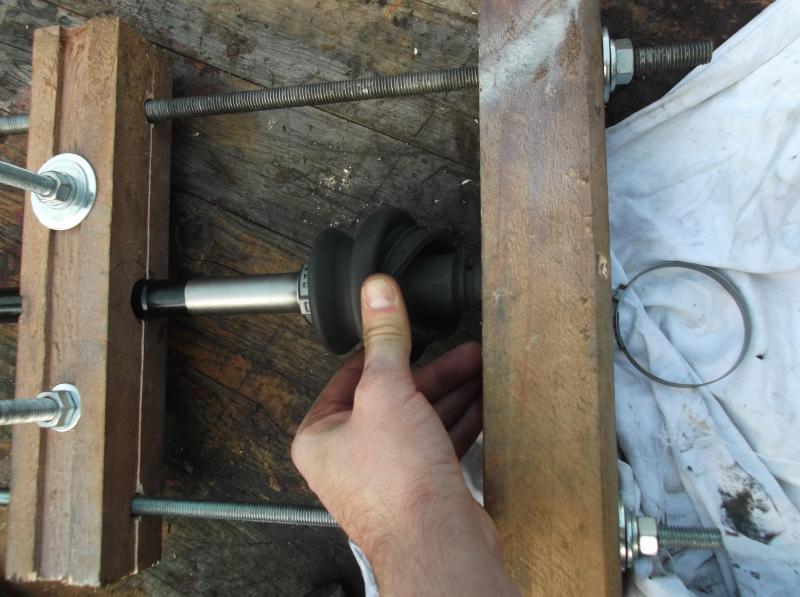  Don't forget to remove that washer 
__________________
1992 W201 190E 1.8 171,000 km - Daily driver 1981 W123 300D ~ 100,000 miles / 160,000 km - project car stripped to the bone 1965 Land Rover Series 2a Station Wagon CIS recovery therapy! 1961 Volvo PV544 Bare metal rat rod-ish thing I'm here to chat about cars and to help others - I'm not here "to always be right" like an internet warrior Don't leave that there - I'll take it to bits! Last edited by Stretch; 03-09-2014 at 03:37 PM. Reason: Added pictures
|
|
#8
03-09-2014, 03:18 PM
|
||||
|
||||
|
Boots on
 Irritatingly I found that the GKN boots came with clamps that are too big for the axle can openings.  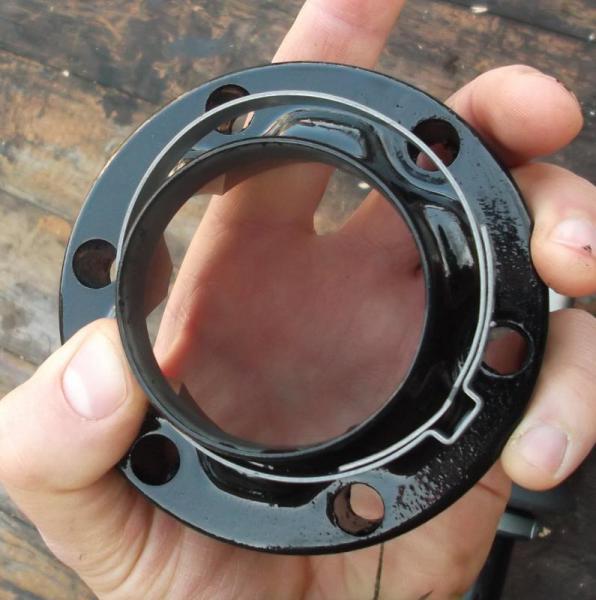 Looks like I'll be off down the dealer sometime this week. If like me you forgot to read the FSM (as usual) and didn't mark the positions of the three sections of the bearing assembly / synchro you will probably need to figure out how these things go back together. There's a right way and a wrong way.  
__________________
1992 W201 190E 1.8 171,000 km - Daily driver 1981 W123 300D ~ 100,000 miles / 160,000 km - project car stripped to the bone 1965 Land Rover Series 2a Station Wagon CIS recovery therapy! 1961 Volvo PV544 Bare metal rat rod-ish thing I'm here to chat about cars and to help others - I'm not here "to always be right" like an internet warrior Don't leave that there - I'll take it to bits! Last edited by Stretch; 03-10-2014 at 05:27 PM. Reason: Added pictures GKN boots with over sized clamps
|
|
#9
03-09-2014, 03:19 PM
|
||||
|
||||
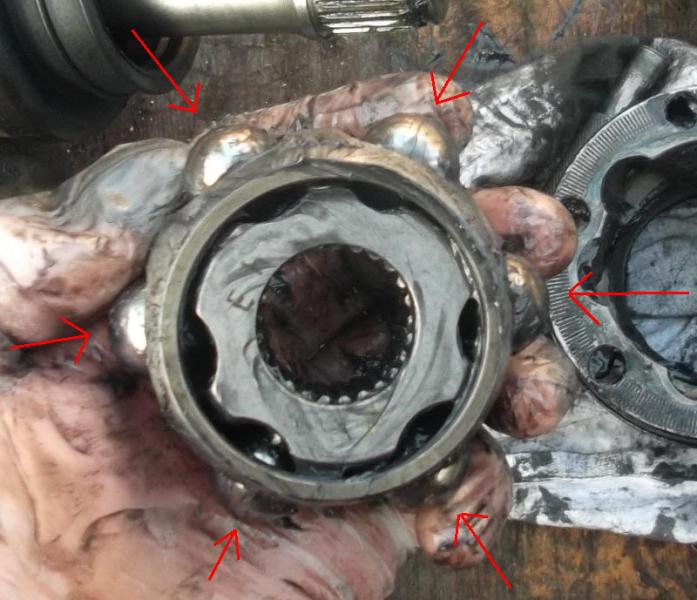
 If you assemble the inner spider so that the wide parts match with the wide parts of the outer spider =>  Then you will find that the joint is rigid – it is locked into one position. It will be so stiff that you might think it has been friction welded into place. Trying to knock out the inner spider part does not work. The secret to dis-assembly is to push out the centre ring cage – push it through the joint and then twist the inner spider round and pop out the ball bearings. Correct assembly is when the thin parts are aligned with the thick parts  An alternative way of considering the assembly is that where there are a pair of converging tracks in the outer spider part of the assembly, they need to mesh with a diverging pair of tracks on the inner spider. Look at the pictures above to see what I mean (in previous post). To assemble the bearing assembly / synchro coat the (middle) bearing cage with grease and slide in the inner spider.  
__________________
1992 W201 190E 1.8 171,000 km - Daily driver 1981 W123 300D ~ 100,000 miles / 160,000 km - project car stripped to the bone 1965 Land Rover Series 2a Station Wagon CIS recovery therapy! 1961 Volvo PV544 Bare metal rat rod-ish thing I'm here to chat about cars and to help others - I'm not here "to always be right" like an internet warrior Don't leave that there - I'll take it to bits! Last edited by Stretch; 03-09-2014 at 05:20 PM. Reason: Added pictures and made a correction
|
|
#10
03-09-2014, 03:19 PM
|
||||
|
||||
|
Simply push the ball bearings into inner spider through the holes in the cage.
 Fit this in the outer spider. This might seem like a bit of a “Haynes” instruction but it is really just a simple case of slotting two opposing balls into two correct tracks to get this =>  Tap the assembly onto the axle shaft 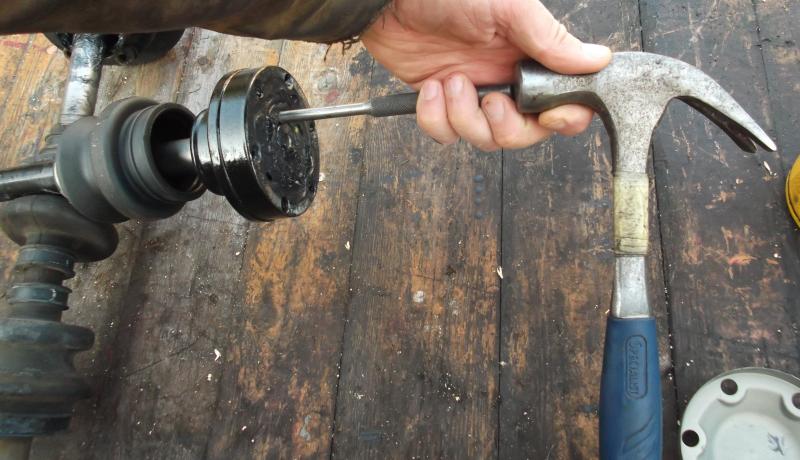 Fit circlip  Clean the outer surface of the axle can with degreaser so that you can apply some sort of sealant for the axle end cap. The FSM specifies a gucci Loctite. I'm using twenty year old Blue Hylomar found in my cellar – this isn't a recommendation but will probably keep water out. RTV would probably do too.  Using two bolts {that fit the axle to the differential} as a guide for the hole positions on the cap, fit the cap 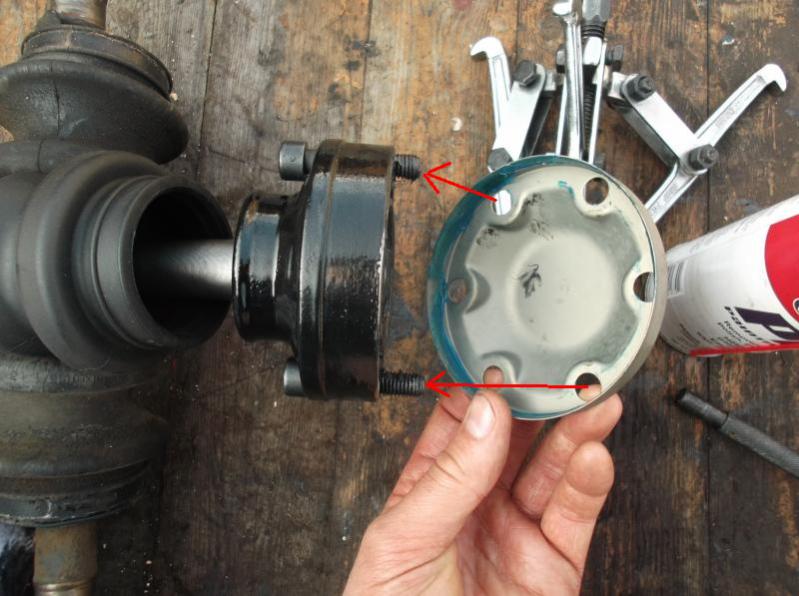
__________________
1992 W201 190E 1.8 171,000 km - Daily driver 1981 W123 300D ~ 100,000 miles / 160,000 km - project car stripped to the bone 1965 Land Rover Series 2a Station Wagon CIS recovery therapy! 1961 Volvo PV544 Bare metal rat rod-ish thing I'm here to chat about cars and to help others - I'm not here "to always be right" like an internet warrior Don't leave that there - I'll take it to bits! Last edited by Stretch; 03-09-2014 at 03:46 PM. Reason: Added pictures
|
|
#11
03-09-2014, 03:19 PM
|
||||
|
||||
|
I used bolts, washers and nuts to persuade the cap to fit on the end of the axle. G-clamps might also work, as could a hammer and a punch, though the chances of damage during assembly increase with these methods.
 Because the boot clamps for the large ends were too big I need to get some new ones. It is possible to fiddle with the original style boot clamps for the large end of the boot but not with the small ones because of the physical restriction of the axle shaft.  Before the clamps on the axle shaft are crimped into position it is best to fully extend the axle pull the axle can away from the shaft.  Commonly found (nail removing) pincer pliers can be used to form the crimp on these original clamps. The proper pliers for this job are similar although not so sharp so be careful if you are using these cutter style pliers. Obviously you need to deform not slice.  When you come to fit the axles to the differential don't forget the thread locker for the bolts and don't forget to stake / peen the nut at the wheel hub.
__________________
1992 W201 190E 1.8 171,000 km - Daily driver 1981 W123 300D ~ 100,000 miles / 160,000 km - project car stripped to the bone 1965 Land Rover Series 2a Station Wagon CIS recovery therapy! 1961 Volvo PV544 Bare metal rat rod-ish thing I'm here to chat about cars and to help others - I'm not here "to always be right" like an internet warrior Don't leave that there - I'll take it to bits! Last edited by Stretch; 03-09-2014 at 03:49 PM. Reason: Added pictures
|
|
#12
03-10-2014, 05:30 PM
|
||||
|
||||
|
Good clamp size for the larger boot opening is 68mm. The GKN boots came with 74mm diameter clamps - too big for the job.
__________________
1992 W201 190E 1.8 171,000 km - Daily driver 1981 W123 300D ~ 100,000 miles / 160,000 km - project car stripped to the bone 1965 Land Rover Series 2a Station Wagon CIS recovery therapy! 1961 Volvo PV544 Bare metal rat rod-ish thing I'm here to chat about cars and to help others - I'm not here "to always be right" like an internet warrior Don't leave that there - I'll take it to bits!
|
|
#13
03-10-2014, 06:02 PM
|
||||
|
||||
|
As usual excellent pictorial and nice explanations.
This must be a record to have 12 consecutive posts in one thread. (Could of had more, but I messed you up buddy!) .
__________________
1983 123.133 California - GreaseCar Veg System 
Last edited by DeliveryValve; 03-10-2014 at 11:51 PM.
|
|
#14
03-10-2014, 06:06 PM
|
||||
|
||||
|
Quote:
.
__________________
1983 123.133 California - GreaseCar Veg System
|
|
#15
03-10-2014, 07:28 PM
|
||||
|
||||
|
For the end cap I recommend loctite anaerobic sealant with activator on the cap.
__________________
John HAUL AWAY, OR CRUSHED CARS!!! HELP ME keep the cars out of the crusher! A/C Thread "as I ride with my a/c on... I have fond memories of sweaty oily saturdays and spewing R12 into the air. THANKS for all you do! My drivers: 1987 190D 2.5Turbo 1987 560SL convertible 1987 190D 2.5-5SPEED!!!  1987 300TD 2005 Dodge Sprinter 2500 158"WB 1994GMC 2500 6.5Turbo truck... I had to put the ladder somewhere!
|
|
| Bookmarks |
|
|


 Linear Mode


